| Now that you've created these multiple audio tracks, it's time to blend them into a synergistic audio experience by adjusting their relative volume. Studio offers two tools, the Volume tool discussed here, and the adjustment handles on the Timeline discussed in the next section. Both tools are designed to complement each other, so you can use the adjustment handles on the Timeline to modify any adjustments you made using the Volume tool, and vice versa. There are up to four sets of volume controls, one each for the Original and Overlay Audio tracks, the Sound Effect track, and the Music track. Here's how they operate: Mute: Mutes the entire track. Global Volume: Adjusts the volume of the entire track. Volume Adjust: Adjusts the volume at the current edit location. This tool is best used in real time with the audio playing, so you can listen to the volume and adjust as necessary. Volume Meter: Reflects track volume at that location. Fade-in and Fade-out: Perform their namesake tasks at the current edit location. Balance: Adjusts the audio balance between the left and right speakers, and the position of each track front to back as perceived by the listener (this is also called a fade).
To open the Volume tool - Do one of the following:
- Click the Audio Toolbox icon in the Movie window (Figure 11.1), and then click the Speaker icon on the left of the Audio Toolbox panel.
- In the Studio menu, choose Toolbox > Change Volume.
The Volume tool opens above the Movie window (Figure 11.24).
Figure 11.24. Studio's cool Volume mixer. Each of the four tracks has a complete set of controls. 
To mute a track 1. | Follow Step 1 of the previous task.
| 2. | Click the Mute button for the respective track.
Studio places a red line over the Mute button and adjusts track volume to zero, placing a red line at the bottom of the track (Figure 11.25).
Figure 11.25. A muted track. Note the line at the bottom of the Audio track it will be more easily visible when you try this on your projects. 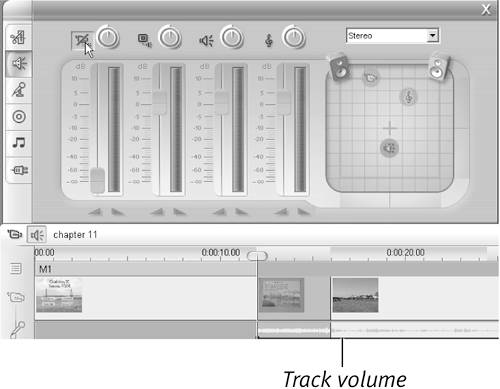
|
To adjust track global volume 1. | Follow Step 1 in "To open the Volume tool."
| 2. | Adjust the Global Volume tool to the desired level by turning it clockwise (to increase volume) or counterclockwise (to decrease volume) (Figure 11.26).
Figure 11.26. This control adjusts volume for the entire audio clip. 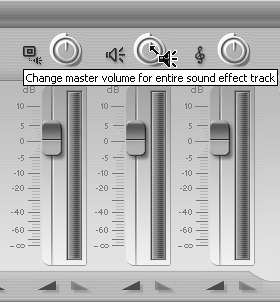
Studio adjusts the volume of the entire track and places a blue line at the adjusted level (Figure 11.27).
Figure 11.27. The adjusted audio track. Note the uniform level of the volume line, especially compared with Figure 11.29, where I create adjustment handles to edit track regions, rather than the entire track. 
|
To adjust track volume 1. | Follow Step 1 in "To open the Volume tool."
| 2. | Position the Timeline scrubber at the target location.
| 3. | Move the volume adjustment downward or upward (Figure 11.28).
Figure 11.28. This control adjusts volume at that location, as opposed to uniformly over the entire clip. 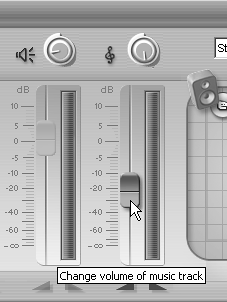
Studio creates an adjustment handle and adjusts the clip volume on the track at the target location (Figure 11.29).
Figure 11.29. Here I'm adjusting the Music track upwards during a break in narration. 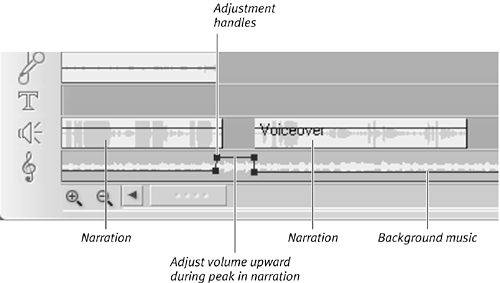
Once Studio creates the adjustment handle, you can move it around manually. As you'll see in the next section, you can also create adjustment handles directly on the Timeline.
|
To fade in audio 1. | Follow Step 1 in "To open the Volume tool."
| 2. | Position the Timeline scrubber where the fade-in should start that is, the point where volume should be zero before it starts to increase (Figure 11.30).
Figure 11.30. To fade in audio, first place the Timeline scrubber where you want the fade-in to start that is, where audio volume is set to zero. Normally, this is the start of the audio file. 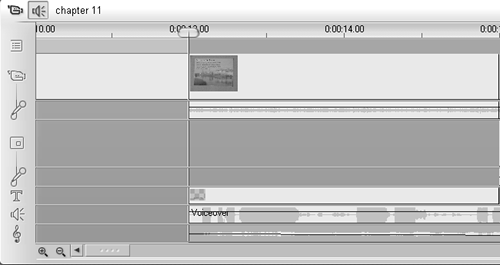
Normally, this is the absolute start of a scene or audio clip.
| 3. | Click the Fade-in icon for the target audio track (Figure 11.31).
Figure 11.31. Click this button to produce the fade-in. 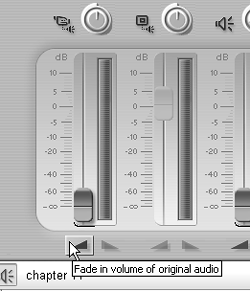
Studio fades in the audio using the default fade-in/fade-out duration (Figure 11.32). To adjust this default setting, see "Setting Default Durations" in Chapter 2.
Figure 11.32. Fade-in accomplished. Again, note the small blue dot, which is the adjustment handle you can manually move. 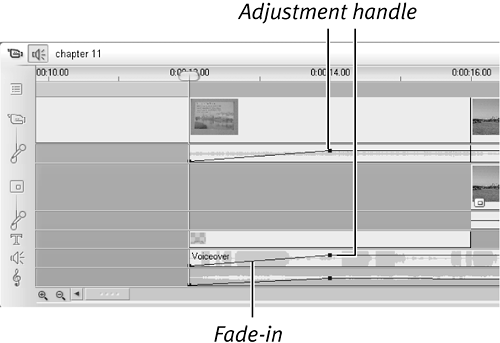
|
 Tips Tips
If your track has multiple files and you want each to fade in, you have to apply the effect separately to each audio file. For example, if you have multiple CD-Audio or narration tracks and want each to fade in, you must apply the fade-in to each file manually. When you apply transitions between clips, Studio automatically creates a cross-fade between the two original audio tracks, unless you apply the fade transition (in which case Studio fades the first track out and fades the second one in). Note that you can customize this cross-fade manually see "Adjusting Volume, Balance, and Fade on the Timeline," later in this chapter. If the track's Fade-in control is not active, click the target track with your pointer to make it the active track. Studio will turn the Fade-in and Fade-out controls black and make them active.
To fade out audio 1. | Follow Step 1 in "To open the Volume tool."
| 2. | Position the Timeline scrubber where the fade-out should end that is, the point where volume should be set to zero (Figure 11.33).
Figure 11.33. To fade out, place the Timeline scrubber at the point you want volume to be set to zero normally, the end of the clip. 
Normally, this is the absolute end of a scene or audio clip.
| 3. | Click the Fade-out icon for the target audio track (Figure 11.34).
Figure 11.34. Click this button to fade out. 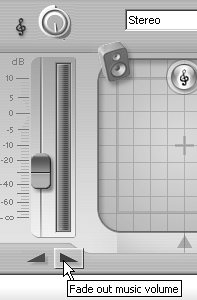
Studio fades out the audio (Figure 11.35) using the default fade-in/fade-out duration. To adjust this default setting, see "Setting Default Durations," in Chapter 2.
Figure 11.35. Fade-out accomplished. 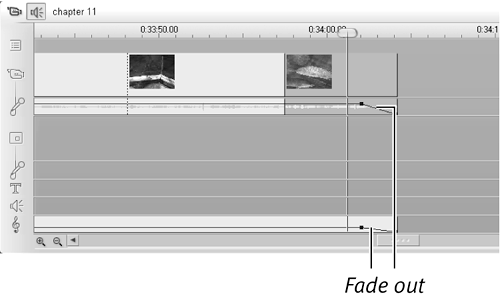
|
Tip If your track has multiple files and you want each to fade out, you have to apply the effect separately to each audio file. For example, if you have multiple CD-Audio or narration tracks and want each to fade out, you must apply the fade-out to each file manually.
About the Balance Control The Balance control adjusts two characteristics of an audio clip: the clip's position with reference to the left and right speakers (called the balance, or pan) and its position front to back (or the fade) as perceived by the listener. These controls are useful under several circumstances, including the following: If you recorded the left and right audio tracks of an event separately (balance). To change the perceived location of a sound, such as a train or car, from one direction to another to create the impression that the train or car was moving from left to right (balance). To make a clip sound more faint toward the end (fade). To place background music clearly behind the Audio or Sound Effect track (fade). To place a voice narration track more clearly in front of the audio from the video clip.
It's important to note, however, that Studio doesn't provide track-wide balance or fade control in the same way it does with the other volume adjustments. For example, if you're not at the first frame of an audio file when you adjust the balance or fade using the Balance control, Studio creates an adjustment handle and adjusts the balance or fade value from that position forward, which is often not the desired effect. But if you position the Timeline scrubber at the absolute start of an audio clip and then adjust the Balance control, Studio adjusts the balance or fade values for the entire clip. So if you use balance and fade controls extensively, you may find it easier to make these adjustments on the Timeline rather than using the Balance control (see "Adjusting Volume, Balance, and Fade on the Timeline" later in this chapter for more information). The easiest way to set the Timeline scrubber to the absolute start of an audio clip is to position it a few frames before the start of an audio clip, and then press the right arrow key, which is the shortcut that directs Studio to select the next clip. Note that all three tracks start at the same exact position in the Balance control, front and center. Each track is represented by the same icon that represents the track in the Timeline (Figure 11.36). To select the track to adjust, either click the desired icon in the Balance control or click the target track in the Timeline. Figure 11.36. A close up of the Balance control. Note the icons for the four tracks. 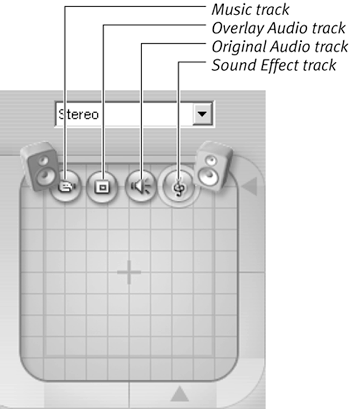
Note also that the balance control has three modes, Stereo, Surround, and Dialog. Here's how each operates. Stereo is shown in Figure 11.37, and is the simplest. This assumes that you have only two speakers, left and right, and are limited to pan adjustments between the left and right speakers. Figure 11.37. Balance control in Stereo mode, with only two speakers. 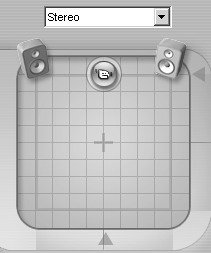
Dialog mode (Figure 11.38) is optimized for dialogue. In this mode the center channel takes priority over the front left and right channels, ensuring that dialogue is clearly audible in the center at all times. Figure 11.38. Balance control in Dialog mode, which uses five speakers, including one directly in front of the listener, to focus the audio. 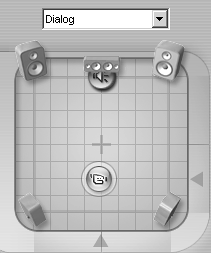
When a stereo clip is panned to dead center, the left and right channels are combined and sent to the center speaker. The right channel is also sent to the right rear speaker at half the level as is sent to the center speaker and the left channel is sent to the left rear speaker at half the level as is sent to the center channel. As the clip is panned to the front, the audio level sent to the rear speakers is decreased. As it is panned to the rear, the audio level sent to the center speaker is decreased. As the clip is panned to the left or right of center, audio is sent to the front right and front left speakers as appropriate. A mono clip is panned in the same manner: with a mono clip panned dead center sent to the center, right rear, and left rear speakers Surround mode (Figure 11.39) is optimized for sound effects. This mode does not use the center channel, and allows panning anywhere between the left front, right front, left rear, and right rear channels. In this mode, when a clip is panned to dead center, the audio will be heard equally from each of the four speakers. As it is panned to one speaker, the volume for that speaker will increase while the volume of the other speakers decreases. Figure 11.39. Balance control in Surround mode, which uses four speakers. 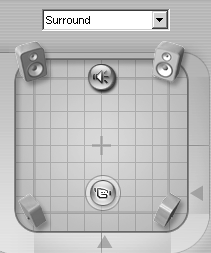
|
To adjust balance using the Balance control 1. | Follow Step 1 in "To open the Volume tool."
| 2. | Position the Timeline scrubber where the balance adjustment should begin: at the start of the audio clip for clip-wide adjustments, or at any other position to adjust the value from that position forward (Figure 11.40). (See the sidebar "About the Balance Control" for more information.)
Figure 11.40. To adjust balance, place the Timeline scrubber at the point to adjust. 
| 3. | Do one of the following to select the track to adjust:
- Click the target track on the Timeline.
- Click the Target icon in the Balance control (Figure 11.36).
To access the icon in the Balance control directly, you may have to move one of the other icons out of the way, which obviously changes its balance value. So, remember to move it back to the desired value after you've adjusted your target track (just another reason why it's easier to adjust these values on the Timeline).
| 4. | Do one of the following to adjust track balance:
- Click the icon and move it to the left or right (Figure 11.41).
Figure 11.41. Click the icon for the target track and move it to the left or right, or use the green triangle beneath. 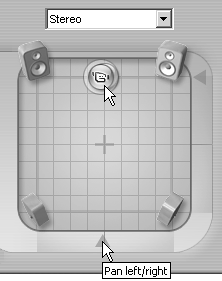
- Click the green triangle beneath the Balance control and move it to the left or right.
Studio adjusts the track's balance.
|
To adjust fade using the Balance control 1. | Follow Step 1 in "To open the Volume tool."
| 2. | Position the Timeline scrubber where the fade adjustment should begin: at the start of the audio clip for clip-wide adjustments or at any other position to adjust the value from that position forward (Figure 11.40). (See the sidebar "About the Balance Control" for more information.)
| 3. | Click the drop-down box at the top of the Balance control and choose Dialog (Figure 11.38) or Surround (Figure 11.39).
| 4. | Do one of the following to select the track to adjust:
- Click the target track on the Timeline.
- Click the Target icon in the Balance control (Figure 11.40).
Note that to access the icon in the Balance control directly, you may have to move one of the other icons out of the way, which obviously changes its balance value. So, remember to move it back to the desired value after you've adjusted your target track (just another reason why it's easier to adjust these values on the Timeline).
| 5. | Do one of the following to adjust track fade position:
- Click the icon and move it in front of the other icons or behind them (Figure 11.42).
Figure 11.42. To fade a track, either grab it directly or use the brown triangle. 
- Click the brown triangle to the right of the Balance control and move it to the front or back.
Studio adjusts the track's fade position.
|
To perform real-time, multitrack audio mixing and balance adjustments One of Studio's best features is the ability to adjust volume, balance, and fade for all three tracks in real time, which is the fastest and easiest way to produce the desired values. 1. | Follow Step 1 in "To open the Volume tool."
| 2. | Position the Timeline scrubber where you'd like to start adjusting the volume, fade, and balance (Figure 11.43).
Figure 11.43. Now for some fun: real-time, multitrack mixing. Position the Timeline scrubber at the starting point. 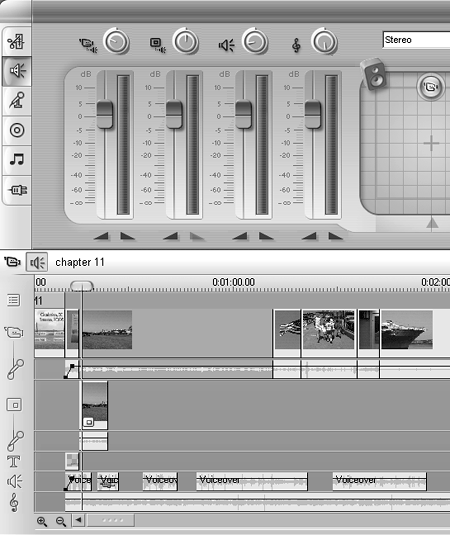
| 3. | In the Preview window, press Play.
| 4. | As you listen to the audio, adjust the volume, balance, and fade position for each track using the appropriate controls in the Volume tool.
Studio creates adjustment handles and adjusts the three parameters in real time (Figure 11.44). Don't feel like you need to make this perfect; you'll learn how to fine-tune these settings manually in the next section.
Figure 11.44. The adjusted volumes. 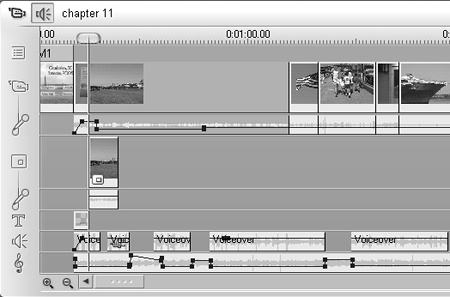
|
|