68 Managing Images in Premiere Pro
#68 Managing Images in Premiere ProPremiere Pro does an excellent job managing images, but unless you know what the program is doing behind the scenes, sometimes it can be confusing. For example, Figure 68a is a 3072x2048 resolution picture of my daughter Whatley, but it looks like it's about 640x480 resolution with the full image displayed in Premiere Pro's Program Monitor (in this 16:9 project). Figure 68a. Premiere Pro automatically scales imported images to the project frame size, which can be confusing.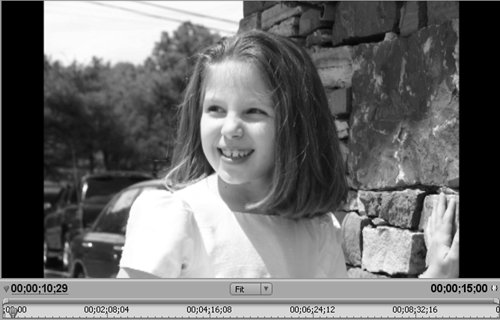
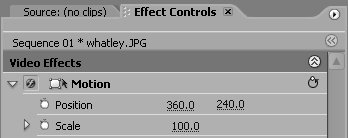
A quick check of the Motion controls reveals that the image is at 100% scale (Figure 68b)! Where did the rest of the image go? Well, when Premiere Pro imports an image, it automatically scales it to the current video frame sizein this case, 720x480. This works well if you're quickly creating a simple slide show, but can be confusing if you're planning extensive panning and zooming in the image. Figure 68b. Based on the parameters we have set in the Motion controls, it looks like this image is displayed at full resolution. Where did the rest of the pixels go? To reverse this default, right-click the image and click Scale to Frame Size to de-select it, which displays the image at 100% resolution (Figure 68c). Figure 68c. After deselecting Scale to Frame Size, you see that it's actually a much larger imagetoo big, as you would expect, to be fully displayed in the Program Monitor in a 16:9 DV project.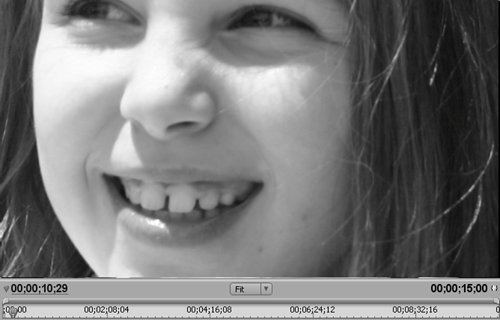 There are a few other points to consider. First, Premiere Pro sets image duration when you drag an image to the timeline. You can change this in the General Preferences dialog (Edit > Preferences), but this is prospective only, and won't affect images already on the timeline. Once on the timeline, of course, you can click the edge of an image and drag it to any length. In addition, while Premiere Pro doesn't have a formal storyboard feature, you can use the Project panel to arrange your images, and even send them to the timeline with frame overlap and a transition inserted. See #10 for details. Finally, you can apply effects and transitions to images on the timeline, just as you do with video. |
EAN: 2147483647
Pages: 148
- Chapter IV How Consumers Think About Interactive Aspects of Web Advertising
- Chapter V Consumer Complaint Behavior in the Online Environment
- Chapter VI Web Site Quality and Usability in E-Commerce
- Chapter IX Extrinsic Plus Intrinsic Human Factors Influencing the Web Usage
- Chapter XI User Satisfaction with Web Portals: An Empirical Study
- Key #1: Delight Your Customers with Speed and Quality
- Key #4: Base Decisions on Data and Facts
- Beyond the Basics: The Five Laws of Lean Six Sigma
- Making Improvements That Last: An Illustrated Guide to DMAIC and the Lean Six Sigma Toolkit
- The Experience of Making Improvements: What Its Like to Work on Lean Six Sigma Projects