Flylib.com

Books Software


98 Creating and Using Playlists


#98 Creating and Using Playlists

Playlists link or group elements of disc content that do not appear sequentially in a DVD's navigational structure (e.g., Chapters 1, 2, 3, or scenes and their assigned End Actions) so that they play sequentially. Once created, a playlist looks like any other piece of content; you play it by linking it to a button, and assign it an End Action so Encore DVD knows what to do when it's finished playing.

Create a Play All Button

Here's a common usage scenario for playlists. You've produced a wedding DVD with separate scenes accessible via chapter points with End Actions that return the viewer to the originating menu after playing each scene. But you also want one button that lets the viewer "Play All." The easiest way to accomplish this is with a playlist that links all chapters together.


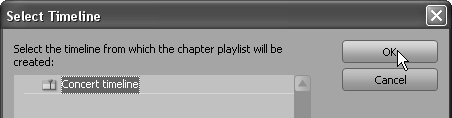
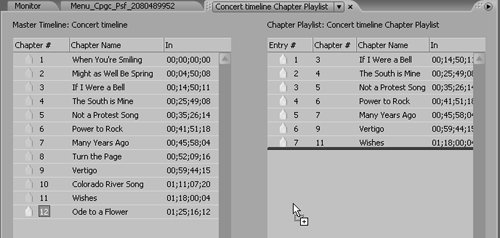
Here's how to create such a Chapter Playlist.

1.

In the Project panel, right-click and choose New > Chapter Playlist from the pop-up menu that appears. Encore DVD will open all timelines in a Select Timeline dialog ( Figure 98a ).

Figure 98a. Choose which timeline to use as the basis for the Chapter Playlist.


2.

Select the timeline and click OK. Encore creates a new Chapter Playlist and opens a dialog box displaying all chapter points from the Master Timeline ( Figure 98b ).

Figure 98b. Click and drag the desired chapters from the Master Timeline to the Chapter Playlist in any order.


3.

Drag the desired chapter points from the Master Timeline to the Chapter Playlist. You can insert the chapter points in any order, and reorder them in the Chapter Playlist column via drag and drop.

Customize a Concert Experience

Another playlist scenario would be a concert DVD in which the band played original music in songs 1, 3, 5, 7, and 9, and covers of songs written by other artists for the rest. If you want to let the viewer click one button and play only the original material, you would create a playlist that links these songs together.


4.

As with all DVD content, specify an End Action in the Chapter Playlist Properties panel, and link the Playlist to a button on a menu (or make it the First Play) so viewers can play it.

5.

Close the Chapter Playlist dialog box to save your new playlist.


#99 Manually Arranging Button Routing

Button routing controls where viewers go when using the arrow controls on their remote control. Normally, Encore DVD manages button routing automatically, but if you've added or arranged buttons manually, routings may need a bit of tweaking. Here's how.

Consistency? Ease of Access?

With menus like the one shown in Figure 99, I typically choose consistency over ease of access, and cycle the viewer through all buttons in numerical order rather than by position. This means that the down and right arrow keys always send the viewer to the same button, as do the up and left arrow keys. I'm not advocating this approach as much as encouraging you to choose a navigational paradigm and stick to it.


1.

In the Menu Properties panel, deselect the Automatically Route Buttons checkbox. This allows you to manually route the buttons.

2.

Below the Menu window, click the Show Button Routing icon ( Figure 99 ). Encore DVD will reveal the button routing in the Menu window.

Figure 99. Click and drag the link to the target button.


Note

In the cross over each button, the center number is the number of that button, while the other numbers are the buttons currently assigned to that arrow key. For example, for button 13 in the lower-right corner of Figure 99, clicking the up arrow key would move the viewer to button 12, the right and left arrow keys to button 9, and the down arrow key to button 1 (not shown) .

3.

To change the target for any button, click the arrow key and drag it to your button of choice. For example, in Figure 99, the right arrow key for button 9 is being reassigned from button 13 to button 10.

4.

When finished, click the Show Button Routing icon to return to normal viewing mode.