4 Customizing Your Workspace
#4 Customizing Your WorkspaceFigure 4a shows the Premiere Pro interface in all its glory. You may already know what many of the windows are and what they do, but I want to make sure you know their official names (for example, it's the Program Monitor, not the preview window) before I started tossing them around. Figure 4a. Here's Premiere Pro; please note the official names for all the windows (er... panels and monitors), since I'll be using these names throughout the book.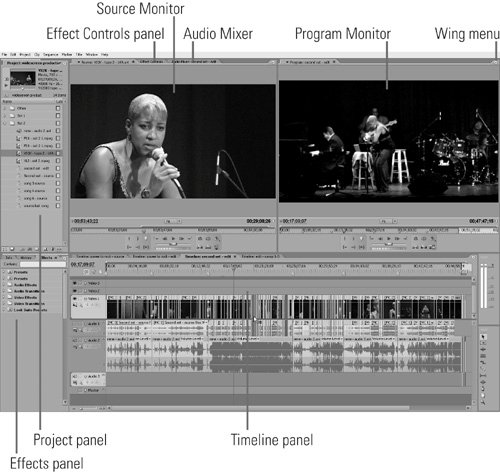 Adobe gives you lots of flexibility in using the various Production Studio applications by allowing you to drag and resize most panels in each program's workspace to your heart's desire. You can also choose between several "workspaces" designed to facilitate a particular editing or production activity. The most obvious way to alter your workspace is by increasing the size of the preview window. It's easy enough to do, but in most cases you'll want to resize the window briefly then return it to its normal size. There are three more options that will save you time by eliminating workspace clutter and highlighting frequently used features. First is the ability to close panels that you don't typically use. For example, when editing, I want my Premiere Pro Timeline panel as wide as possible. In Premiere Pro's default workspace, however, a three-tabbed panel sits to the left of the Timeline, taking up space I'd rather allocate to the Timeline.
Two items you will rarely use in editing are the Info and History tabs. To close them permanently, do the following:
You'll spend much more time in the third panel, "Effects." To make it more prominent, do the following:
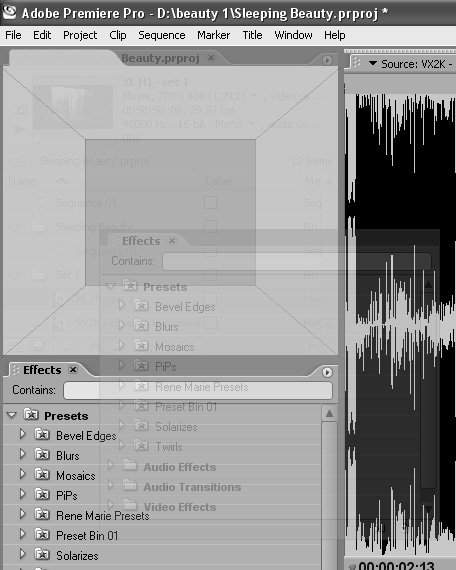
When you do this, Premiere Pro divides the Project panel into five drop zones (see Figure 4b). To reposition the panel, do one of the following:
Now you've got the Effects panel right where you want it. Once you've achieved your desired workspace, save it by choosing Window > Workspace > Save Workspace (Figure 4d). Figure 4d. Now that I've got my workspace all prettied up, here's how I save it.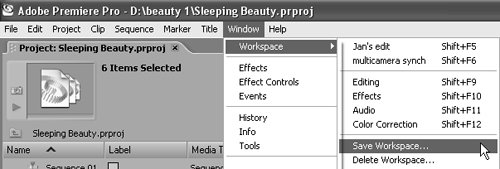 As you can see in Figure 4d, I've already saved two workspaces, "Jan's edit" and "multicamera synch." |
EAN: 2147483647
Pages: 148