Packet Capture Drivers
|
| < Day Day Up > |
|
When a computer is placed on a network, the network card is responsible for receiving and transmitting data to other hosts. Network applications use methods, like sockets, to establish and maintain connections, while the underlying operating system handles the low level details and provides protocol stacks for communications. Some programs, however, need direct access to handle the raw network data, without interference from protocol stacks. A packet capture driver provides exactly this; it has the ability capture raw network packets. Better than that, a packet capture driver can capture all data on a shared network architecture, regardless of the intended recipient. This is what allows a program like Ethereal to passively monitor network traffic.
Two very famous and widely used packet capture drivers are libpcap, and its Windows counterpart, WinPcap. Libpcap is a free, open source packet capture library originally developed at the Lawrence Berkeley National Laboratory in California. It is now maintained by a variety of authors at www.tcpdump.org. Not only does libpcap allow data to be captured, it also provides a mechanism for filtering the data based on user specifications before passing it to the application. WinPcap is maintained by a group of developers at http://winpcap.polito.it. It uses some of the code of libpcap as well as some newly added code. There are many other programs that use the libpcap and WinPcap libraries including, TCPDump, WinDump, Snort, Ettercap, Dsniff, Nmap, tcpflow, and TCPstat. Programs that use libpcap tend to be network monitors, protocol analyzers, traffic loggers, network intrusion detection systems, and various other security tools.
| Note | TCPDump is another protocol analyzer, like Ethereal, that can be used to monitor network traffic. It is a command line application that runs on UNIX-based systems. The Windows version is called Windump. |
| Security Alert | CERT Advisory CA-2002-30 reports that several distributions of TCPDump and libpcap have an altered source code that contains malicious trojan code. Although this advisory was dated November 2002, there are still many altered copies floating around. The advisory can be found at www.cert.org/advisories/CA-2002-30.html. Please verify that you are downloading your distributions from trusted sources, and verifying the MD5 hashes. |
Compression Utilities
As you are downloading software packages from the Internet, you will encounter numerous compression utilities. Many people are already familiar with the zip compression format that is used on both Windows and UNIX systems. In this chapter we discuss the tar format that is used for archiving files. The tar format does not provide compression, it merely packages files together into one single file. This single tar file will still take up the same amount of space, plus a little more, as the sum of all of the individual files. Tar files are typically compressed with other utilities such as gzip or bzip2.
Gzip is used to reduce the size of files, thus making it a great tool for compressing large packet captures. Gzip files are recognized by the .gz extension. Ethereal can automatically uncompress and read Gzip compressed files, even if they don’t have the .gz extension. We have included both UNIX and Windows version of Gzip on the accompanying CD-ROM in the /syngress/gzip directory. Files can be compressed by typing the command gzip filename. Files can be uncompressed by using the commands gzip –d filename or gunzip filename.
Bzip2 is a newer file compression utility and is capable of greater compression ratios than gzip. Bzip2 files are recognized by the .bz2 extension. Files can be compressed by typing the command bzip2 filename. Files can be uncompressed by using the commands bzip2 –d filename or bunzip2 filename. At this time Ethereal cannot read bzip2 compressed files.
Installing libpcap
We are going to cover three methods of installing libpcap: the Red Hat Package Manager (RPM), the Sun Solaris packages, and building from source. Once you install libpcap (or WinPcap) you won’t have to do anything else with it unless you are a developer. Ethereal will use the libpcap libraries to passively capture network data. Let’s get started installing libpcap!
Installing libpcap Using the RPMs
Installing software from the RPM can be a very tricky process. Luckily the libpcap installation poses no problems. See the “Notes from the Underground” sidebar in this chapter for more details on RPMs. For now, this is how we install libpcap from the RPM. We have also included the libpcap RPM on the accompanying CD-ROM. Remember, there might be newer versions that have been released since the writing of this book, you can download the latest libpcap RPM from www.rpmfind.net. Make sure that you are getting the proper RPM for your system, Red Hat Linux 9.0 in our case. Before you begin, you will need to have root privileges to install an RPM. Make sure you are logged in as root, or switch to root by typing su root, press Enter, and type the appropriate root password.
-
Open a terminal window by right-clicking the desktop and choosing New Terminal.
-
Install the libpcap RPM by typing rpm -ivh /mnt/cdrom/pcap/libpcap-0.7.2-7.1.i386.rpm and press Enter.
-
Verify the installation by typing rpm –qa | grep libpcap and press Enter. If you see libpcap-0.7.2-7.1 listed, it is installed!
The following output shows how to install the libpcap RPM and then verify that it is installed:
[root@localhost root]# rpm -ivh /mnt/cdrom/pcap/libpcap-0.7.2-7.1.i386.rpm Preparing... ########################################### [100%] 1:libpcap ########################################### [100%] [root@localhost root]# rpm -qa | grep libpcap libpcap-0.7.2-7.1
Not too bad! Now that you have libpcap installed feel free to move on to the “Installing Ethereal on UNIX” section where you can continue with the RPM process or compile Ethereal from the source code.
| Note | If your system does not have automount enabled, mount the accompanying CD-ROM by entering the command mount /dev/cdrom /mnt/cdrom and pressing Enter. The CD-ROM can be unmounted by typing eject cdrom and pressing Enter. Some versions of UNIX use different names for the location of the CD-ROM, instead of the standard /mnt. Please check the documentation that came with your OS if the mount command is not working. |
A Word about RPMs
The Red Hat Package Manager (RPM) is a powerful package management system capable of installing, uninstalling, verifying, querying, and updating Linux software packages. Finding RPMs is relatively easy, and www.rpmfind.net has a well-designed search and download system. However, since RPMs tend to be contributed by various individuals, they are often times a version or two behind the current source code release. They are created on systems with varying file structures and environments, which can lead to difficulties if your system does not match those parameters. Installing an RPM can sometimes be easier than compiling from source – provided there are no dependency problems.
The RPM system, while an excellent package management tool, is fraught with problems regarding dependencies. It understands and reports which specific files the package requires that you install, but is not yet capable of acquiring and installing the packages necessary to fulfill its requirements. If you are not familiar with the term, dependencies are packages and/or libraries required by other packages. The RedHat Linux OS is built on dependencies, which you can visualize as an upside-down tree structure. At the top of the tree are your basic user-installed programs, such as Ethereal. Ethereal depends on libpcap to operate, and libpcap requires other libraries to function. This tree structure is nice, but it adds to the dependency problem. For example, you may want to install a new software package and receive an error stating that another library on the system needs to be updated first. OK, so you download that library and attempt to update it. But, now, that library has dependencies too that need to be updated! This can be a never ending and stressful adventure.
There are several ways to get information about RPMs:
-
rpm –q (query) can be used to find out the version of a package installed, for example rpm –q ethereal-base.
-
rpm –qa (query all) can be used to show a very long list of all of the packages on the system. To make this list shorter you can pipe the query into a grep to find what you are looking for: rpm –qa | grep ethereal.
-
rpm –ql (query list) shows all of the files that were installed on the system with a particular package, for example rpm –ql ethereal-base-0.10.0a-1.RH9.
-
rpm –qf (query file) can be used to find out which RPM a particular file belongs to, for example rpm –qf /usr/sbin/ethereal.
There are three choices when using the RPM utility to install software:
-
rpm –i (install) installs a new RPM file, and leaves any previous installed versions alone.
-
rpm –u (update) installs new software and removes any existing older versions.
-
rpm –f (freshen) installs new software, but only if a previous version already exists. This is typically used for installing patches.
There is one way to uninstall an RPM from your system:
-
rpm –e (erase) will remove an RPM from the system, for example rpm –e ethereal-base-0.10.0a-1.RH9.
Sometimes you can be successful by installing a package with the –nodeps option (notice there are two hyphens there). This causes the package to install regardless of the dependencies it calls for. This may, or may not work, depending on whether the package you are installing really does need all of the dependencies to function. One final note, the –force option (once again two hyphens) might not be the best choice when you are tired, stressed, and angry at your computer. We used this to try and replace an old package with a new one no matter what, at all costs, and ended up crashing X windows, and when all was said and done, We had to reinstall the system. Not fun!
Installing libpcap from the Sun packages
Installing software from the Solaris packages is much like using the RPM method, and is sometimes much easier. We have included the libpcap Solaris package on the accompanying CD-ROM. Remember, there might be newer versions that have been released since the writing of this book, and you can download the latest versions from www.sunfreeware.com. Make sure that you are getting the proper package for your system, Solaris 9.0 for Sparc systems in our case. We will now step through the process of installing the libpcap package. Before you begin, you will need to have root privileges to install the packages. Make sure you are logged in as root, or switch to root by typing su root, press Enter, and type the appropriate root password.
-
Open a terminal window by right clicking the desktop and choosing Tools | Terminal.
-
Install the libpcap package by typing pkgadd -d /cdrom/syngress/pcap/libpcap-0.7.2-sol9-sparc-local and press Enter. Confirm the installation of the SMClpcap package by pressing Enter. If this is the first time you have installed a package, you may see a message requesting the creation of the /usr/local directory. To create the directory, type y and press Enter.
-
You should see a message stating that the installation completed successfully and you are done!
Now that you have libpcap installed feel free to move on to the “Installing Ethereal on UNIX” section where you can continue with the Solaris package process or compile Ethereal from the source code.
The following output shows the process of installing the libpcap package:
# pkgadd -d /cdrom/syngress/pcap/libpcap-0.7.2-sol9-sparc-local The following packages are available: 1 SMClpcap libpcap (sparc) 0.7.2 Select package(s) you wish to process (or 'all' to process all packages). (default: all) [?,??,q]: <enter> Processing package instance <SMClpcap> from </cdrom/syngress/pcap/libpcap-0.7.2-sol9-sparc-local> libpcap (sparc) 0.7.2 The Tcpdump Group The selected base directory </usr/local> must exist before installation is attempted. Do you want this directory created now [y,n,?,q] y Using </usr/local> as the package base directory. ## Processing package information. ## Processing system information. ## Verifying disk space requirements. ## Checking for conflicts with packages already installed. ## Checking for setuid/setgid programs. Installing libpcap as <SMClpcap> ## Installing part 1 of 1. /usr/local/doc/libpcap/CHANGES /usr/local/doc/libpcap/CREDITS /usr/local/doc/libpcap/CVS/Entries /usr/local/doc/libpcap/CVS/Entries.Log /usr/local/doc/libpcap/CVS/Repository /usr/local/doc/libpcap/CVS/Root /usr/local/doc/libpcap/CVS/Tag /usr/local/doc/libpcap/FILES /usr/local/doc/libpcap/INSTALL.txt /usr/local/doc/libpcap/LICENSE /usr/local/doc/libpcap/README /usr/local/doc/libpcap/SUNOS4/CVS/Entries /usr/local/doc/libpcap/SUNOS4/CVS/Repository /usr/local/doc/libpcap/SUNOS4/CVS/Root /usr/local/doc/libpcap/SUNOS4/CVS/Tag /usr/local/doc/libpcap/SUNOS4/nit_if.o.sparc /usr/local/doc/libpcap/SUNOS4/nit_if.o.sun3 /usr/local/doc/libpcap/SUNOS4/nit_if.o.sun4c.4.0.3c
/usr/local/doc/libpcap/TODO /usr/local/doc/libpcap/VERSION /usr/local/include/net/bpf.h /usr/local/include/pcap-namedb.h /usr/local/include/pcap.h /usr/local/lib/libpcap.a /usr/local/man/man3/pcap.3 [ verifying class <none> ] Installation of <SMClpcap> was successful.
Installing libpcap from the source files
Installing libpcap from the source tarball is a relatively simple process. A tarball is a single file that can contain many other files, like a zip file. The tar format by itself does not provide compression like the zip format does, so it is customary to compress the tar file with either gzip or bzip2. See the sidebar for more information on using the gzip and bzip2 compression utilities. We will be extracting the contents of the tar file as well as compiling the source code. We will follow the common configure | make | make install format for building the package into the system. We have included the libpcap source tarball on the accompanying CD-ROM. It is standard practice NOT to build software as root, but to change to root to do the make install step. We will now step through the process of installing libpcap from the source files.
-
Open a terminal window by right clicking the desktop and choosing New Terminal.
-
Change to the /tmp directory by typing cd /tmp and pressing Enter.
-
Extract the tarball by typing tar –xvf /mnt/cdrom/pcap/libpcap-0.7.2.tarand pressing Enter. This will create a new directory in /tmp called libpcap-0.7.2. You will see the extracted output displayed on the screen.
Note Let’s take a moment to define the typical variables used for the tar command: -z, -x, -v, and -f options.
The -z option specifies that the file must be processed through the gzip filter. You can tell if an archive was created with gzip by the .gz extension. The –z options is only available in the GNU version of tar. If you are not using the GNU version, you will have to unzip the tar file with a command such as gunzip or gzip –dc filename.tar.gz | tar xvf -.
The -x option indicates that you want the contents of the archive to be extracted. By default, this action will extract the contents into the current working directory unless otherwise specified.
The -v option stands for verbose, which means that tar will display all files it processes on the screen. This is a personal preference and is not critical to the extraction operation.
The -f option specifies the file that tar will process. For example, this could be libpcap-0.7.2.tar.gz. Sometimes it might be necessary to specify a full path if the file you want to work with is located in another directory. -
Change directories by typing cd libpcap-0.7.2 and pressing Enter.
-
Run the configure script by typing ./configure and pressing Enter. The configure script will analyze your system to make sure that dependencies, environment variables, and other parameters are acceptable. You will see a question-and-answer type of analysis displayed on the screen.
-
When the configure process is complete, and the command prompt is displayed, make sure that there are no errors. If everything appears trouble-free, run the make utility simply by typing make and pressing Enter. This utility will compile the actual source code. You will see the output of the compilation on the screen.
-
The last step of the process is to distribute the executables and other files to their proper locations in the systems directories. We are going to switch to the root user to perform this step. If the make utility completes without errors, type su root and press Enter. Enter the password for root and press Enter. Next, type make install and press Enter. Once again you will see the output of this process on the screen.
-
After the make install process completes, the command prompt will be displayed once again. If everything looks error free, you are done! You can type exit to log out as the root user and return to your normal user shell.
Now that you have libpcap installed feel free to move on to the “Installing Ethereal on UNIX” section where you can continue with compiling Ethereal from the source code or choose one of the other processes.
The following output shows the whole process of installing the libpcap source code:
[testuser@localhost testuser]$ cd /tmp [testuser@localhost tmp]$ tar -xvf /mnt/cdrom/pcap/libpcap-0.7.2.tar [output reomoved] [testuser@localhost tmp]$ cd libpcap-0.7.2 [testuser@localhost libpcap-0.7.2]$ ./configure [output removed] [testuser@localhost libpcap-0.7.2]$ make [output removed] [testuser@localhost libpcap-0.7.2]$ su root Password: <password> [root@localhost libpcap-0.7.2]# make install [root@localhost libpcap-0.7.2]# exit
If at anytime during the installation process you receive errors, you will need to investigate the problem and resolve it before continuing. Most of the time dependency issues, software versions, or environment settings cause compiling errors. Compiling software from the source files offers the benefit of providing highly customized and optimized software for your system.
| Note | Some UNIX distributions (such as Red Hat 9.0) have software like libpcap, Ethereal, and others preinstalled. It is worth the time and effort to install the latest versions of these packages. You will benefit from the increased stability, features, bug fixes, and speed of updated software. |
Installing WinPcap
The latest WinPcap installation executable can be downloaded from http://winpcap.polito.it. It will install on Windows 95, 98, ME, NT, 2000, and XP. This site also contains a developers’ pack download and source code download, but we won’t be covering those here. We have also included the WinPcap installation executable on the accompanying CD-ROM. To install WinPcap, you need to have the right to install new drivers to your system, and will need to be logged in as Administrator or have administrator rights. Now we will step through the process of installing the WinPcap 3.0 auto-installer on a Windows 2000 system.
-
Browse to the /pcap folder on the CD-ROM.
-
Begin the installation process by double-clicking on the installer, WinPcap_3_0.exe. The first screen that appears is show in Figure 3.1. This is a general welcome screen that informs you of what you are about to do, recommends that you exit other Windows programs, and warns you about the copyright law.
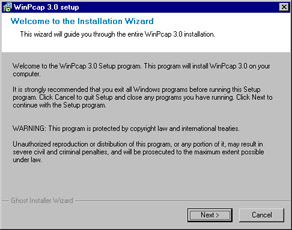
Figure 3.1: The WinPcap Installation Wizard -
Click Next to continue.
Note If you do not have WinPcap installed you will be able to open saved capture files, but you will not be able to capture live network traffic.
-
The next screen in Figure 3.2 displays information on the WinPcap license. You must click the box “Yes, I agree with all the terms of this license agreement” and click Next to accept the license and continue.
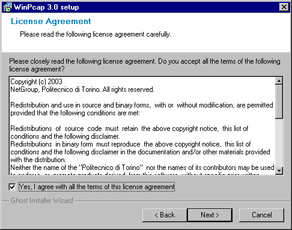
Figure 3.2: The WinPcap License Agreement -
Figure 3.3 shows the Setup Status window. It lets you know which files are being copied and displays a progress bar. You might not see this window during the installation because it completes so quickly.
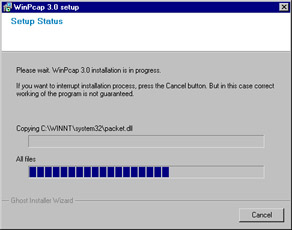
Figure 3.3: WinPcap Setup Status -
The next screen (Figure 3.4) warns you to reboot the system if an old version of WinPcap was already present. It is always good practice to uninstall an old version of WinPcap before installing a new version. Click Next to continue.
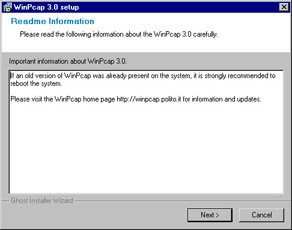
Figure 3.4: WinPcap Readme InformationWarning If you have an older version of WinPcap and would like to install a new one, you must uninstall the old version and reboot. This will ensure that the new version of WinPcap installs properly. At the time of this writing, version 3.0 is recommended, as it supports multiprocessor machines and Windows XP.
-
Finally installation is complete, as seen in Figure 3.5. Click OK to exit the setup.
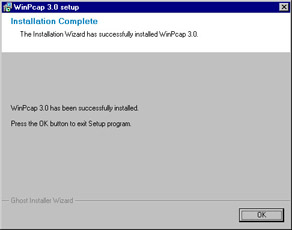
Figure 3.5: WinPcap Installation CompleteNote To make sure that WinPcap is installed on your system, you can check Start | Settings | Control Panel | Add/Remove Programs. You should see WinPcap listed under the currently installed programs list.
WinPcap installs by default in C:\Program Files\WinPcap. This directory will contain daemon_mgm.exe, npf_mgm.exe, rpcapd.exe, install.log, and Uninstall.exe. Unless you are developing applications to use the WinPcap driver, you won’t need to use the first three. If you need to uninstall WinPcap, please use the provided uninstall executable located in this directory. The setup copies the following to the C:\WINNT\system32 directory: packet.dll, wpcap.dll, and pthreadVC.dll. It also copies npf.sys to the C:\WINNT\system32\drivers directory and makes some registry changes for the uninstall program and the packet drivers. See how easy that was! Now let’s move on to the Ethereal installation.
|
| < Day Day Up > |
|
EAN: 2147483647
Pages: 105