Adding a Header and Footer
Microsoft Office Specialist Before you print your presentation, you can add a header and footer that will appear on every slide, handout, or notes page. Headers and footers contain useful information about the presentation, such as the author or company name , the date and time, and the slide number. Because you can add more than one header and footer to a presentation, you can have different headers and footers for slides and for notes and handouts.
Header and footer information is stored on the presentation s master slides. You can quickly add a header and footer to slides, audience handouts, outlines, and speaker notes with the Header and Footer command on the View menu.
In this exercise, you will add a header and footer to a presentation.
BE SURE TO start PowerPoint before beginning this exercise.
USE the HeaderFooter presentation in the practice file folder for this topic. This practice file is located in the My Documents\Microsoft Press\PowerPoint 2003 SBS\PrintingPresent\AddingHeader folder and can also be accessed by clicking Start/All Programs/Microsoft Press/PowerPoint 2003 Step by Step .
OPEN the HeaderFooter presentation.
-
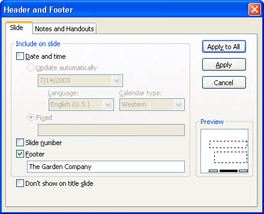
On the View menu, click Header and Footer .
The Header and Footer dialog box appears, displaying the Slide tab.
-
Clear the Date and time check box to eliminate the date and time from the slides.
-
Select the Footer check box, and in the box below it, type The Garden Company .
In the Preview box, a black rectangle highlights the placement of the footer on the slides.
-
Select the Don t show on title slide check box so that the footer won t appear on the title slide.
-
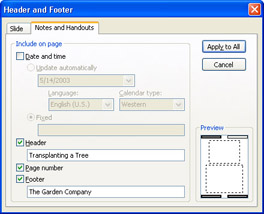
Click the Notes and Handouts tab.
The header and footer settings for the notes and handout pages appear. All four check boxes are selected.
Tip The settings for notes and handouts will also be applied if you print an outline of your presentation.
-
Clear the Date and time check box so that the date and time won t appear on each printout.
-
Click the Header text box, and type Transplanting a Tree .
-
Click the Footer text box, and type The Garden Company .
PowerPoint will include the header, footer, and page number on each notes or handout page that you print.
-
Click Apply to All .
PowerPoint applies the header and footer information to the slides, notes pages, and handouts pages.
-
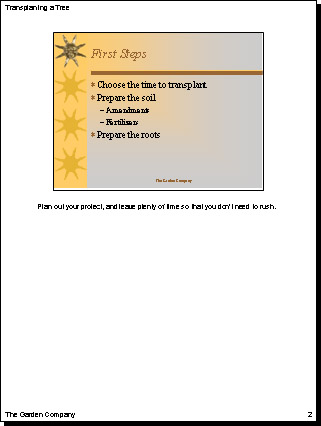
Move to Slide 2 to see the footer in place on the slide, and then on the View menu, click Notes Page to see the header and footer in place on the notes page.
-
In the lower-left corner of the screen, click the Normal View button.
You return to Normal view.
-
On the Standard toolbar, click the Save button to save the presentation.
CLOSE the HeaderFooter file.
EAN: N/A
Pages: 145