Working with Multiple Pages
When a document is more than one page long, you will usually want to add page numbers for clarity. If a document is more than a couple of pages long, you might want to insert headers or footers to carry such information as the document s title and author in addition to the page numbers , and you might want to add reader aids such as a table of contents or an index. The document you have been creating in this chapter is barely two pages, so for demonstration purposes, you ll create false page breaks so that you can experiment with the elements you might need to add to a longer document.
Information about: Tables of contents, page 156 Indexes, page 159
Microsoft Office Specialist: Control pagination
Inserting a Page Break
When you work on a longer document, Word automatically inserts page breaks as you fill up the pages. Because Word has no way of assessing the actual content of the document, these page breaks can occur in awkward places. You can control the location of automatic page breaks, and you can insert page breaks manually. Follow these steps to work with both types of page breaks:
-
Click to the left of the Where are the bags made? heading.
-
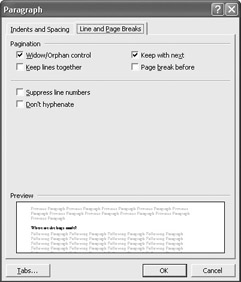
On the Format menu, click Paragraph , and then click the Line and Page Breaks tab .
Word displays the options shown in this graphic:
-
In the Pagination area, select the Page break before check box, and click OK.
Word moves the heading and its paragraph to the second page of the document.
-
Press Ctrl+End to move to the end of the document, and then press Ctrl+Enter .
Alternatively, you can click Break on the Insert menu and accept the default Page Break option by clicking OK. Word inserts a page break, thereby adding a new page to the flyer, which as you can see in the status bar now has three pages.
Adding a Header or Footer
Microsoft Office Specialist: Create and modify a header and footer
It is customary to add a header or footer to documents that are longer than one page. Headers are printed in the top margin of the page, and footers are printed in the bottom margin. With Word, you have many header and footer options. For example, you can create identical headers and footers for every page, a different header and footer for the first page and the following pages, different headers and footers for left (even) pages and right (odd) pages, or different headers and footers for each section of a document.
Your flyer is currently three pages long, so we ll show you how to add a header to all the pages of the flyer except the first. Follow these steps:
-
Press Ctrl+Home to move to the top of the flyer.
-
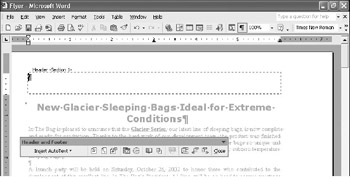
On the View menu, click Header and Footer .
Word dims the text of the document, outlines the space in which the header will appear with a dotted box, and displays the floating Header and Footer toolbar, as shown in the graphic on the next page.

Keeping lines together You can keep lines or paragraphs together on the same page by using the Keep lines together or Keep with next options in the Paragraph dialog box. Select the lines or click the paragraph, click Paragraph on the Format menu, and on the Line and Page Breaks tab, select the appropriate check box, and click OK.
Sometimes longer documents can produce orphans (the first line of a paragraph printed by itself at the bottom of a page) or widows (the last line of a paragraph printed by itself at the top of a page). By default, Word controls orphans and widows to prevent this from happening. You can turn this feature off or on by deselecting or selecting the Widow/Orphan control check box on the Line and Page Breaks tab of the Paragraph dialog box.
-
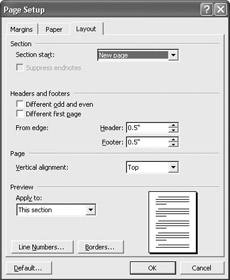
On the Header and Footer toolbar, click the Page Setup button.
Word displays the Layout tab of the Page Setup dialog box:
More about page numbers If you simply want to print the page number on each page of your document, you don t have to create a header or footer. You can have Word perform this chore for you. On the Insert menu, click Page Numbers, and in the Page Numbers dialog box, specify whether the numbers should appear at the top or bottom of the page, how they should be aligned, and if a number should appear on the first page. When you click OK, Word inserts page numbers in the document s header or footer. Whether you add page numbers this way or by clicking the Insert Page Number button on the Header and Footer toolbar, you can format them by clicking the Format button in the Page Numbers dialog box or clicking the Format Page Number button on the Header and Footer toolbar. You can select from six numbering schemes: Arabic numerals (1, 2, 3), Arabic numerals with dashes (- 1 -, - 2 -, - 3 -), lowercase or upper- case letters (a, b, c or A, B, C), and lowercase or uppercase Roman numerals (i, ii, iii or I, II, III). You can also specify whether to include chapter numbers, and you can select a starting number.
-
In the Headers and footers area, select the Different first page check box, and click OK .
Word changes the header designation to read First Page Header - Section 1 .
-
Leave the first page header blank, and click the Show Next button on the Header and Footer toolbar to move to the next page, which begins Section 2.
-
Click the Same as Previous button to toggle it off.
When this button is turned on, Word repeats the previous header for the current section, but you want this header to be different from the first one.
-
Type In The Bag , press the Tab key twice to move to the right margin, and type Page and a space.
-
On the Header and Footer toolbar, click the Insert Page Number button.
For a multi-page document, you can type a space, followed by of and another space, and then click the Insert Number of Pages button on the Header and Footer toolbar. The result is something like 1 of 12. You can also enter the current date and time by clicking the Insert Date and Insert Time buttons .
-
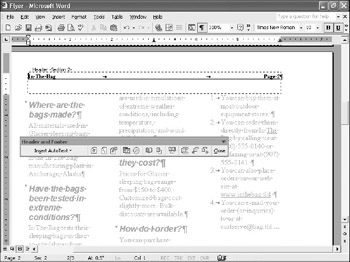
Select the entire header, click the Bold and Underline buttons, change the font size to 10 , and press Home.
The header now looks as shown in the graphic on the following page.
Adding footnotes Footnotes are used to document sources and to give tangential tidbits of information when their inclusion in the main text would distract from the discussion. To add a footnote, click an insertion point to the right of the word where you want the footnote reference mark to be placed. On the Insert menu, click Reference and then Footnote to display the Footnote and Endnote dialog box. By default, Word numbers footnotes sequentially and places them at the bottom of the page. (Click the Endnotes option to have references appear at the end of the document.) To change the placement of footnotes or endnotes, the number format, or the numbering options, make the appropriate adjustments in the Footnote and Endnote dialog box. When you click Insert, Word inserts a superscripted footnote symbol at the location of the insertion point and moves to the bottom of the page or the end of the document, where you can type the footnote/endnote text. (In Normal view, the footnote/endnote appears in a separate pane. You can display this window by clicking Footnotes on the View menu.) When you finish typing the text, click anywhere outside the footnote if you are in Print Layout view, or click the Close button to close the Footnotes pane if you are in Normal view. To edit your footnotes, click Footnotes on the View menu.
-
Click the Show Next button.
Word displays the blank last page, which starts a new section. Because the Same as Previous button is toggled on, Word applies the header from the second section to this section as well.
-
On the Header and Footer toolbar, click the Close button to return to Print Layout view.
EAN: N/A
Pages: 74