Setting Up Newsletters
The first thing you need to do is create the newsletter that you will be working with in this chapter. In this topic, we show you how to set up the newsletter and adjust the basic page layout.
Creating a Newsletter by Using a Design Set
The easiest way to take the grunt work out of setting up a newsletter is to use one of Publisher s built-in design sets as a starting point. Follow these steps:
1. If necessary, start Publisher . If Publisher is already running, close any open publications , and make sure the New Publication task pane is displayed.
2. In the task pane s By Publication Type list, click Newsletters , and then in the Newsletters pane in the work area, click the Waves Newsletter thumbnail.
3. When the Newsletter Options task pane opens, make sure 2 is selected in the One- or two-sided printing area to designate a double-sided layout for the publication.
4. Click Include in the Customer address area to include a placeholder for a customer address.
5. Click the Color Schemes link at the top of the task pane, and notice that Tropics is already selected in the Color Schemes task pane s Apply a color scheme list.
| Information about | Color schemes, page 26 |
To help you maintain a consistent color scheme, Publisher has applied the color scheme you selected for previous publications. You can change the color scheme in this task pane if you want; however, for the purposes of this exercise, leave the color scheme set at Tropics.
Adjusting the Page Layout
Publisher has established a basic page layout for the newsletter, but you need to change it. You want to format the newsletter so that its text appears in two columns , and then you want to add a sign-up form. Follow these steps:
1. In the Newsletter Options task pane, click the Page Content link to display the Page Content task pane.
2. In the Columns area, click the down arrow to the right of the 2 option, and then click Apply to All Pages .
Publisher applies a 2-column format to the entire newsletter.
3. Click the 2 button in the page navigation controls.
The second and third pages of the newsletter are now displayed in the publication window. The Page Content task pane has changed to show options available for the newsletter s inside page content, as shown in this graphic:
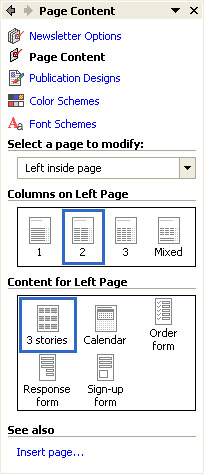
4. Click the down arrow to the right of the Select a page to modify box, and click Right inside page .
5. In the Content for Right Page area, click the Sign-up form option to change the layout of the right page.
6. Click the task pane s Close button to allow more room for the newsletter.
The two inside pages now look as shown in this graphic:
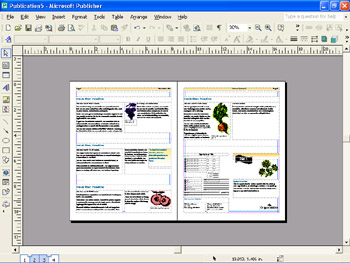
In the publishing world, two facing pages are called a spread . When you design longer publications, you will want to look at spreads to see how the pages balance.
7. Save the file in the My Documents folder as Newsletter .
Remember to save frequently from now on.
EAN: N/A
Pages: 76