Working with Shapes
Working with Shapes
So far you have used only a few of the buttons on the Objects toolbar. In this topic, you ll learn how to use some of the toolbar s other tools in order to draw shapes. You can add a shape to any publication and then adjust its appearance and location until it looks just the way you want it. You can use ovals, rectangles, lines, and arrows to create custom shapes, but be sure to check the Design Gallery before doing this, because the shape you need might already be available.
Drawing a Shape
You want to create a starburst shape to draw attention to the new Adventure Works fossil dig tours . Try this:
1. Press F9 to zoom the brochure to actual size , and then scroll the fossil graphic in the left panel into view.
2. Click the AutoShapes button on the Objects toolbar to display a menu of shape categories.
3. On the menu, click Stars and Banners to display a palette of star and banner shape options.
4. Click the Explosion 1 shape (the first shape in the first row), and move the pointer over the publication.
5. Position the cross-hair pointer so that the pointer guides sit at the .5-inch mark on the horizontal ruler and the 1.5-inch mark on the vertical ruler.
6. Drag down and to the right until the shape is about 1 inch by 1 inch.
Working with a Group of Shapes
All the elements of a publication ”text frames , graphics, shapes, and so on ”are objects . When you want to be able to move, resize, or rotate two or more objects simultaneously , you group them together. For example, suppose you want to add a text frame in the middle of the starburst and then group the shape and the text frame together so that you can rotate them both. Follow the steps on the next page.
| |
If you hold down the Shift key while you are using the Line, Oval, or Rectangle button, you can draw straight horizontal or vertical lines, circles, or squares. To create arrows, first draw a line with the Line button and then add an arrowhead by selecting the line, clicking the Arrow Style button on the Formatting toolbar, and then clicking the arrow style you want on the drop-down palette. (You can add a left arrowhead, a right arrowhead, or both.) To fine-tune the arrow, click the Line/Border Style button, and then click More Lines to adjust the thickness , color , and arrow type on the Colors and Lines tab of the Format AutoShape dialog box. To remove an arrowhead, select the line, click the Arrow Style button, and click the line with no arrowhead at the top of the Arrow Styles palette.
| |
1. Click the Text Box button on the Objects toolbar, and drag the cross-hair pointer to create a text frame in the middle of the starburst.
2. With the insertion point in the new text frame, type New! . Then change the font to Eras Bold ITC , and size the text to fit within the frame.
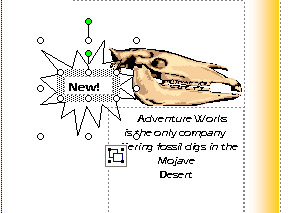
3. Select the starburst frame by clicking one of the shape s lines, and then add the text frame to the selection by holding down the Shift key and clicking inside the frame.
The selected objects look like this:
| |
In addition to rotating objects, you can flip them all the way over horizontally or vertically. Select the object, click the down arrow to the right of the Free Rotate button on the Standard toolbar, and then click Flip Horizontal or Flip Vertical on the dropdown menu. To quickly rotate an object 90 degrees to the right or left, you can click Rotate Right or Rotate Left on the same dropdown menu. (The Free Rotate button changes to whatever Free Rotate command you last clicked, so if you want to repeat that command, you can just click the button.)
| |
4. Click the Group Objects button attached to the selection to group the two frames.
The objects are now surrounded by one frame, and it is no longer possible to move or resize the shape without moving or resizing the text, and vice versa.
5. Because the shape is a little too close to the fossil graphic, drag the grouped object slightly down and to the left.
Both the shape and the text move as a group to their new position. Now you decide to reposition the text within the shape. To move just the text, you must ungroup the objects.
6. Click the Ungroup Objects button, and then click outside the starburst to remove the selection.
7. Click the text frame to select it, and then click Nudge and then Left on the Arrange menu to adjust the position of the text frame.
8. Press the Shift key, click the starburst to add it to the selection, and then click the Group Objects button to group the frames again.
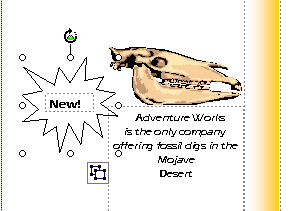
9. Point to the green rotate handle just above the upper-middle handle on the grouped object s frame.
The mouse pointer changes to a rotate icon, as shown in this graphic:
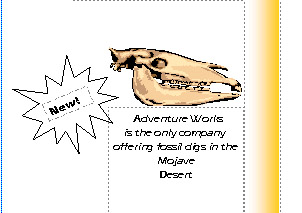
10. Drag the rotate handle to the left until the shadow image tilts to about a 45-degree angle from the original graphic s placement, and click away from the group to deselect it.
The results look similar to those shown in this graphic:
Changing a Shape s Color
You know how to recolor a graphic. You can recolor a shape in the same way. Here we ll show you how to recolor the shapes that are part of the logo by using the Format AutoShape dialog box, and then you ll quickly color the starburst using the Fill Color button. Follow these steps:
1. Scroll the logo on the third panel into view, and then click the bottom curved line of the logo once to select it.
When the line is selected, gray handles appear within the object s frame.
2. Double-click the bottom curved line.
The Colors and Lines tab of the Format AutoShape dialog box appears, as shown in this graphic:

3. In the Fill area, click the down arrow to the right of the Color box, and then click the slate-blue color box ( Accent 1 , or the second box in the colors row).
4. In the Line area, click the Color box s down arrow, click the slate-blue color box ( Accent 1 ), and click OK .
You need to change both the fill and line colors for the curved lines to be colored uniformly.
5. Repeat the previous steps to change the top curved line s colors.
6. Select the Adventure Works text, click the down arrow to the right of the Font Color button on the Formatting toolbar, and click the slate-blue color box ( Accent 1 ).
7. Repeat step 6 to recolor the Jeep Tours text.
The logo is shown in this graphic:

8. Scroll to the starburst object on the first panel, and click it to select it.
9. Click the down arrow to the right of the Fill Color button on the Formatting toolbar, and then click the red color box ( Accent 3 , or the fourth box in the colors row).
10. Click outside the object to deselect it.
Hiding and Displaying On-Screen Guides
When you want to view the results of your work as it will appear when printed, you can hide the on-screen guides. Let s do that now so that you can get a clearer picture of what the completed brochure looks like:
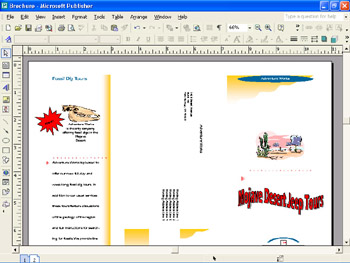
1. Change the zoom percentage to 66% to display more of the brochure.
2. Click Boundaries and Guides on the View menu to remove the command s check mark and turn it off.
Your brochure looks like the one shown in this graphic:
3. Click Boundaries and Guides on the View menu to turn the command back on and redisplay the on-screen guides for your next project.
4. If you want, click the Print button to see the results of your work on paper.
5. To get a better overview of the brochure s layout, place the two printed pages back to back, and fold the brochure into three panels.
6. Save and close the Brochure file.
EAN: N/A
Pages: 76