Using the RDP
| < Day Day Up > |
| The usage scenario in this section uses server blades as an example to
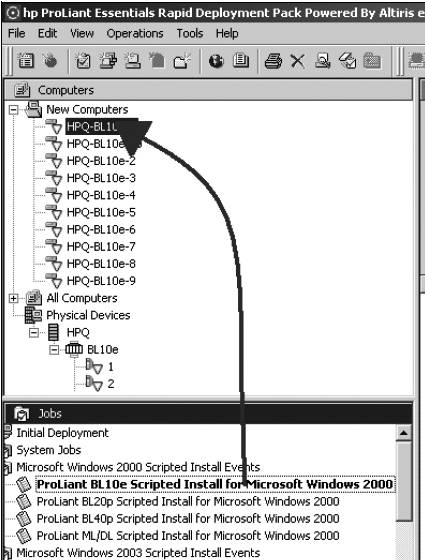
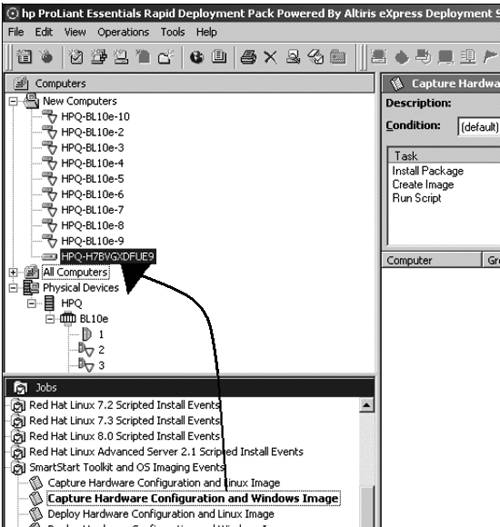
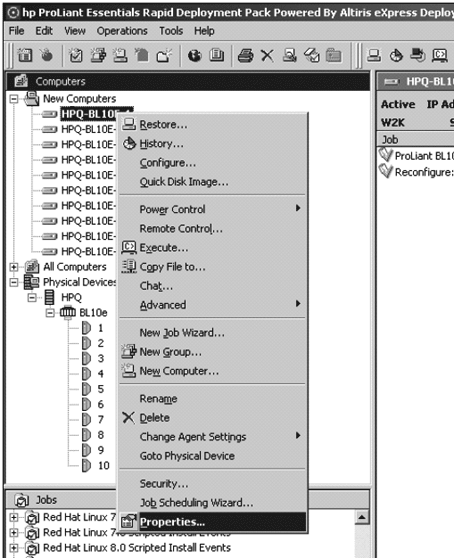
Although this scenario uses server blades, the process can be duplicated for other supported ProLiant servers. When performing an image capture and deployment, the hardware configuration of the target servers must be identical to the hardware configuration of the reference server. This scenario presumes that all necessary installation and pre-deployment steps provided in the HP ProLiant Essentials ”RDP ”Windows Edition Installation Guide have been performed. note If you plan to change the default rack and enclosure names, setting these names before the first server in an enclosure connects to the Deployment Server. After the server blades are powered on for the first time and the rack and enclosure names are recorded in the Deployment Server database, the server blades must be rebooted for new rack and enclosure names to be discovered . For more information, refer to "Configuring ProLiant BL Server Enclosures" in the HP ProLiant Essentials RDP ”Windows Edition Installation Guide. Connect an enclosure of server blades to the network and power on the enclosure. The server blades connect to the network. The Deployment Server detects all server blades that come online and displays them in the Computers pane of the Deployment Server Console under New Computers or Physical Devices by utilizing PXE. Server blades are indicated in the Deployment Server Console by rack name-enclosure name-bay number. For example, in the following figure, the rack name of the first server is HPQ, and the enclosure name is BL10e. Each server blade is denoted by an icon, which specifies that the server blade is waiting for instructions as shown in Figure 9.22. Figure 9.22. Blade enclosure and bay naming.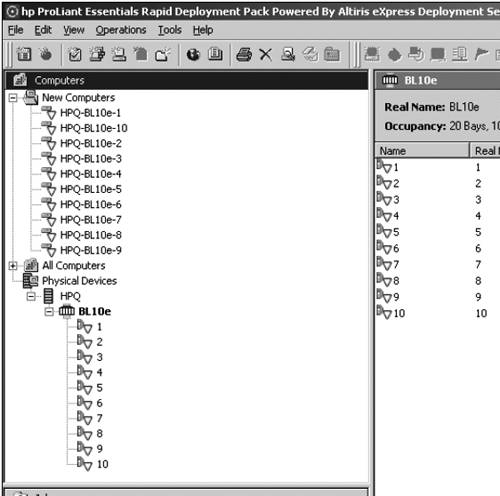 Scripted Installation Deployment for ProLiant BL ServersYou can deploy all the server blades in an enclosure by means of a scripted install job. However, it's faster to run the scripted install on the first server blade, which becomes the reference server, and then capture and deploy the reference server image to all the other server blades in the enclosure simultaneously. From the Deployment Server Console, to deploy a single server blade:
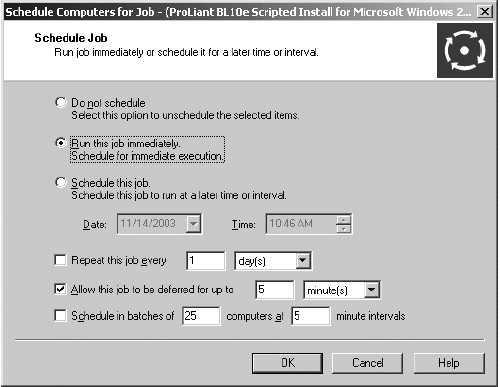
The Details pane displays the tasks that are occurring during the installation. When the server deployment is complete, the server icon and server name change. note For Windows installs , the server name is a randomly generated name specified by the unattend.txt file. For Linux installs, the server name is the default hostname, localhost for Red Hat or (none) for UnitedLinux. Figure 9.24. Scheduling an event. note The job status might change to Complete before the installation is actually complete, because the installation status is not communicated to the Deployment Server during the OS portion of the scripted install job. The installation is complete when the Deployment Agent on the target server automatically connects to the Deployment Server and displays the blue server icon. Image Capture for ProLiant BL ServersAfter a scripted install and any postconfiguration of the reference server are complete, you can perform the image capture and deploy that image to multiple similar servers. From the Deployment Server Console, capture a server blade image by following these steps:
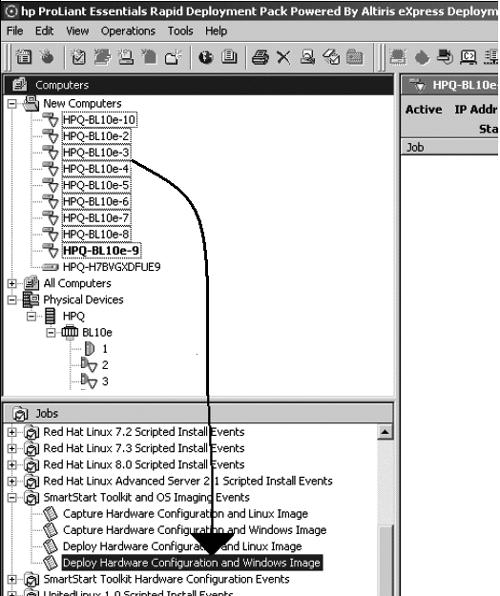
note The jobs provided with the RDP create and deploy images using a predefined image name. If you use the provided jobs without modification, each time you capture a new image it overwrites the previous image. To capture images for different server configurations, you must copy and rename the job, and then modify the file name variables within the job so that the files are saved with a unique name. The server reboots and performs the specified tasks. When the image capture is complete, the server icon changes to indicate a server is connected to the Deployment Server. Image Deployment for ProLiant BL ServersFrom the Deployment Server Console, deploy a set of server blades using imaging:
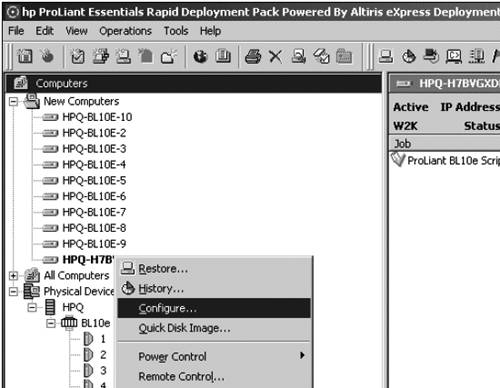
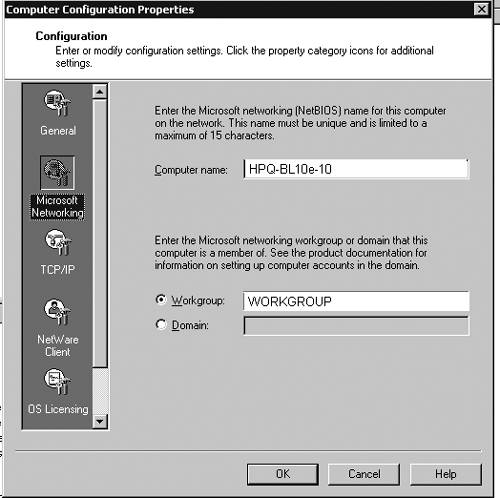
The image of the reference server previously captured is deployed to all the selected server blades simultaneously. When the server deployment is complete, the server icons change to indicate a server is connected to the Deployment Server. Configuration of Deployed ServersWhen deploying an image, the target server is automatically reconfigured to use the computer name and IP address information specified in the Deployment Server database. This Deployment Server feature can also be used to reconfigure existing servers or servers deployed using scripted install. In the previous example, the reference server blade was installed using a scripted install job. This server was named HPQ-H7BVGXDFUE9, as specified in the Windows unattend.txt file. To change the name of the reference server to match those deployed using imaging:
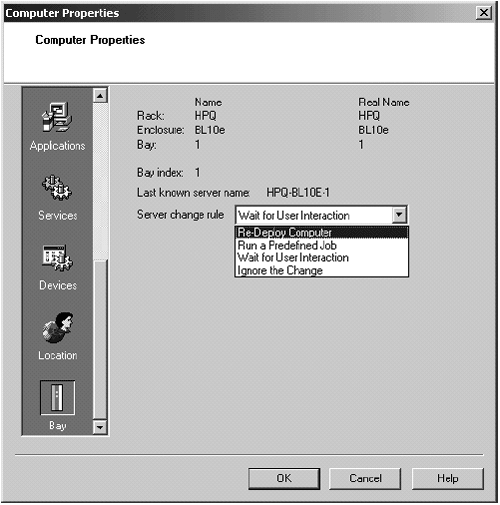
The server configuration changes, and the change is reflected in the Deployment Server Console (see Figure 9.29). Figure 9.29. Server name configuration changes.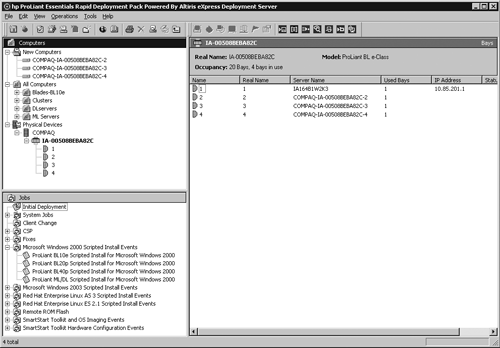 Rip-and-Replace for ProLiant BL ServersFrom the Deployment Server Console, set a deployment rule on one of the deployed server blades:
When this server blade is replaced, the deployment history is replayed on the new server. The tasks and jobs in the server history are run starting from the most recent image or scripted installation job, which for this example would be the image deployment. |
| < Day Day Up > |
EAN: N/A
Pages: 214