Chapter 9: Citrix ICA Client Software
|
| < Free Open Study > |
|
The Citrix Independent Computer Architecture Client software allows multiple platforms access to the MetaFrame XP server. This software also permits clients to access local resources mapped to the server. During this chapter, you will learn deployment methods of the Citrix Client Software, different requirements and features of the Citrix clients, and preconfiguration of Citrix clients.
Certification Objective 9.01: Installing the Citrix ICA Client Software
The ICA client software has three different deployment methods, but careful consideration is needed when choosing a deployment method, as each has its strengths and weaknesses. The three deployment methods are
-
Client installation disks
-
Network share-based
-
Web-based
Care needs to also be given to what client is needed, as well as the application delivery method. These deployment methods, except for the Web-based install, are only for the DOS, Windows 9x/ME/NT and Windows 3.11 clients.
| Exam Watch | Remember, Mac, Unix, and Windows CE clients require manual installation the first time they're installed. |
Client Installation Disks
Installation diskettes-probably the easiest of all deployment methods-are created from the Independent Computing Architecture (ICA) Client Creator in the Citrix toolbar. This is also the most tedious and time-consuming method of distributing the ICA client. The client installation disk method of deployment is mostly for smaller companies that do not want to set up a network share point, or remote locations that need to be sent disks when installing over a wide area network (WAN) line is too costly or too slow to be practical. Obviously this method requires touching every machine you want the client on, so distributing clients this way is pretty labor intensive. This method is recommended if you want to put the client on only a few machines, or, as mentioned earlier, you need to send the disks to a remote location. This is the way to distribute the ICA DOS client, as the files on the ICA Client CD are broken into individual disks. Although all these files can be copied to a share point and installed, it really is preferable to install the DOS client manually.
Network Share Point
Deploying from a network share point is usually the best method to get the clients the appropriate files. To deploy using a share point, create a directory on a shared network drive or volume. Into this directory, copy the ICA client installation files. (Note: This method again only works for the Windows 9x/ME/NT and Windows 3.11 clients.) The client files will be in the directory X:\icaweb\language, where X is your CD drive. Copy the files over to the share point, and point your users to this point. The users then double-click on the file to install the client.
Understanding how to deploy a Citrix client using a network share point is key to successfully deploying Citrix. The following steps will take you through setting up your share properly.
-
Log in to a file server with administrative permissions.
-
Create a directory on a drive on the server (e.g., D:\clients).
-
Copy the files from X:\icaweb\language over to this directory. X: is your CD drive, so for an English install, it would be E:\icaweb\en.
-
Share this directory and give users permissions to it.
-
Have your users (or IT staff) go to this directory. There they will find the appropriate client. Double-click the client to install.
That's the procedure. Not only is it easy, but it is a massive time-saver compared to doing a manual install. Remember, though, this is only for Windows clients. All other clients have to be installed by hand.
-Kevin Wing, MCSE, CCEA, CCNA
Web-Based Install
Web-based install is the best deployment method if you're using NFuse in your enterprise. When the client connects to an NFuse enabled Web page, the server will check its system for the appropriate client. If the client does not exist on the system, it will analyze their platform and present the client for install. To enable this, copy the contents of the icaweb directory on the ICA Client CD to a directory named Citrix in the NFuse server's root directory. For example, c:\wwwroot\citrix. You must copy the entire directory structure of icaweb to the server for this to work. An NFuse-enabled Web page uses the following code to check for an ICA client:
// if (noClientDetect == -1) { // ### Open ICA Client Install popup web page at 380x440px. // var icaPopUpWindow = window.open("icaclient.asp?initCheck=true","icaPopUp","toolbar=no,location=no, directories=no,status=no,menubar=no,resizable=no,width=380,height=440"); // icaPopUpWindow.focus(); // } Even if you have not implemented NFuse in your organization, you can still do a Web-based installation. Set up a directory on a file server to hold the client images, copy the icaweb directory over to it, and create a Web page that links to the setup file of the client. The client will not be automatically detected or installed as in the NFuse installation, but it does allow Web links to the installation point.
Now that we've discussed the deployment methods, let's look at some scenarios of when you would use these different methods.
| You need to deploy the client to hundreds of users on your LAN. | Use network share-based installation |
| You have DOS clients that need to access MetaFrame. | Use client installation disks |
| You run NFuse. | Use web-based install |
| You have remote users. | Use client installation disks |
| You want easy access to a share point. | Use web-based install |
| You need to automatically install Macintosh clients. | Use web-based install |
Exercise 9-1: Create Client Installation Disks
This exercise will take you through the steps required to create the Citrix ICA client diskettes.
-
Click on the ICA Client Creator and the Make Installation Disk Set dialog box will appear.
-
Choose the appropriate client. (Note: Only the client for DOS, Windows 9x/ME/NT, and Windows 3.11 clients can be created from the ICA Client Creator, as shown in Figure 9-1).
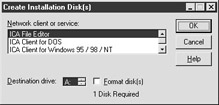
Figure 9-1: The Citrix Installation Disk creator -
Select the floppy drive you want the client to be copied to (it should be autoselected to A:), and check the Format Disks box if you want the floppies to be formatted before writing.
-
Click OK and follow the instructions on the screen. This method requires three floppies.
Using Server Auto-Location and Server Groups
When a Citrix client is not configured with a specified server, it will attempt to auto-locate the nearest Citrix server. This is handled by sending broadcasts out through the network, depending on the protocol the client is configured with. For example, with TCP/IP, a broadcast is made to UDP port 1604. This broadcast is read by the Citrix master browser, which returns the server location to the client. The client then connects to the server through TCP port 1494. By using broadcasts, this obviously increases the load on the network. This can be eliminated by configuring the client with a server. Click Add in the address list, as shown in Figure 9-2, type the server address, click OK, and the server will be listed. When refreshing an application set, the client will contact that server to get the list of applications available to the user.

Figure 9-2: The client server configuration screen
Server groups can also be defined so as to contain several servers to contact, in case the main server cannot be reached. The server groups built into the client are Primary, Backup 1, and Backup 2. These can be renamed if needed. Each one of these groups can hold up to five server addresses. The groups are then queried in order to try to create a Citrix session. A packet is sent to all the servers in the Primary list, then through each of the servers in the Backup groups. If at any time one of the servers responds, all subsequent attempts are aborted, and the client creates the normal ICA connection.
Another piece of the configuration at this point is firewall information. The Citrix client can connect to Citrix servers located behind a firewall as long as the server has an alternate address configured for the firewall. Simply check the box to activate the alternate address setting, which is displayed in Figure 9-3. The address for a SOCKS proxy can also be entered here.
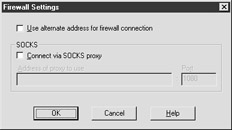
Figure 9-3: The firewall configuration screen
| Exam Watch | Expect a question dealing with alternate addresses for firewalls. Remember, simply configuring the address on the server is not enough; the client must be configured for this as well. |
Windows 9x and Windows ME
There are two different clients for Windows 9x and ME. One is the graphical Program Neighborhood client; the other is the Web-based client. Where these clients should be used depends upon the needs of the organization. If Citrix is mainly used for published applications on a LAN and there are few or no Web connections, then the Program Neighborhood client would be the correct client to install. If most of the connections come from a Web page and the client needs to embed inside that page, then the Web client would make more sense. Both have many of the same features and requirements.
Program Neighborhood Client
The Citrix Win32 Program Neighborhood client allows graphical access to applications published on a Citrix server. Users can browse the Program Neighborhood (as shown in Figure 9-4) to access application sets that have been configured on the Citrix server. They can then launch the application from the Program Neighborhood window. This client can also be used with NFuse to run applications configured to launch a separate window. Application icons can be pushed to the client desktop or the Start menu, allowing the user to run the application without opening the client program.
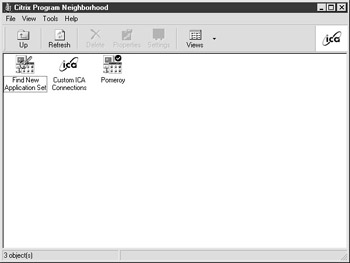
Figure 9-4: The Win32 ICA Program Neighborhood client
The Win32 Program Neighborhood has also the following features.
TAPI Support
The Win32 client works with TAPI (Telephony Application Programming Interface) compliant modems to allow dial-up access to Citrix servers. The standard Windows modem support is integrated into the client. If a non-TAPI modem is installed, the client can still load and configure the modem for Citrix access. This allows direct dial-up access to a Citrix server. It does not use the Remote Access Service (RAS) inside Windows and does not allow dial-up connections to a RAS server. It only permits connections to a Citrix server that has modems configured for direct dial-up access.
Seamless Windows
The Win32 client supports the seamless integration of local and remote application windows. Full mouse and keyboard, including clipboard integration and wheel-mouse support is incorporated in the client. The user can switch between local and remote applications using standard keyboard shortcuts, cut and paste items between local and remote windows, and tile and cascade local and remote application windows. Cutting and pasting between local and remote sessions is handled as if the remote sessions are local to the desktop. Users can also drag and drop information from either window.
If clipboard mapping needs to be disabled, the client connection properties need to be configured. Click the Client Connection button on the MetaFrame toolbar. Select the connection, and go to its properties. Click the Settings button. Check the box marked Disable Client Clipboard Mapping. This will disable the feature.
Client Device Mapping
The Win32 client supports client device mapping during a Citrix session. This allows local drives, printers, and COM ports to be accessed while running remote applications. Client drive mapping also allows remote drives to be mapped to local drives on a user's computer. For example, a home directory on a server can be mapped to the user's C: drive. The drive can then be accessed by all standard file tools. Printer mapping allows clients to use their local printers in remote applications, just like they would with local applications. COM port mapping permits almost any peripheral that connects through the COM port to be accessed in a Citrix application session. (Note: These features are not available when connecting to MetaFrame Unix servers.)
Client drive, printer, and COM port mapping can all be disabled from the server. Click the Client Connection button on the MetaFrame Toolbar. Select the appropriate connection and go to its properties. Click the client settings button. Choose the check box next to the feature that is to be disabled. Printer and drive mappings are automatic, by default. To disable this automatic mapping, uncheck the Inherit User Config box, then uncheck the box marked Connect Client Drives At Logon For Drive Mappings, or Connect Client Printers For Printer Mappings.
Printer mappings can also be forced to the default printer on the client by checking the box labeled Default To Main Client Printer. To prevent every printer on every client from being auto-created on the server, check the box named Connect Only The Client's Main Printer. The default printer on the client will be the only printer auto-created on the server.
COM ports must be manually mapped to the server. When connected to a Citrix session, open up a command prompt. From the prompt, type net use comx: \\clientname\comz:, where x is the COM port on the server, and z is the COM port on the client that needed to be mapped.
Client drives are mapped to accessible drive letters. Table 9-1 provides the drive mappings.
| Client Drive Letter | Accessed in a Citrix Session as |
|---|---|
| A | A |
| B | B |
| C | V |
| D | U |
The letters on the Citrix server can be remapped to not interfere with the local client drives. The user then sees their local drives by the local drive letters (C stays C). The server drives can be mapped to any drive letter to prevent conflicts with mapped network drives. The letters follow the pattern of C: drive on server mapped to letter, all subsequent drives are the next letter. For example, if C: is mapped to M:, drive D: on the server is mapped to N:, and so on. This mapping is set during the initial installation of MetaFrame and cannot be changed after setup.
Sound Support
Win32 client sound support allows users with a compatible sound card to play sound files on the server and hear them through their local computer sound system. The sound files can be compressed to meet bandwidth requirements for the network. Sound support can be managed on the client side from the settings of the application set. Select the application set, and click Settings. Click the Default Options tab, and enable sound. Choose a sound quality option. There are three: high, medium, and low. Sound quality options depend on bandwidth. High quality sound requires 1.3Mbps to play clearly. This will eat up bandwidth and processor time, so only use this option if clear sound is an absolute necessity. Medium quality sound uses 64Kbps, which is fine for most local area network connections, while Low quality uses 16Kbps, providing sound support for most modem connections. Client audio mapping can be disabled in the Client Connection Properties, just like drive and printer mapping. The quality of sound can also be controlled from the server. Click on the ICA Settings tab of the connection properties. There is a drop-down list specifying the audio quality.
| On The Job | Client sound support is more important than one might think. Although sound is usually fairly trivial in most applications, for some users it is vital. Enabling sound support for users helps with political issues surrounding a Citrix roll-out, especially if the user's local desktop is being totally replaced with a Citrix session. The impact on the network can be minimized by compressing the audio to its lowest level. This allows the user to still get sound, but doesn't beat up the network too much. |
Client Auto-Update
Client auto-update allows users to connect to the Citrix server and download the latest Citrix client. This frees the administrator from having to touch every machine when a new client becomes available. Clients are stored in the central Client Update Database. New clients can be added to the database using the Client Distribution Wizard on the MetaFrame Toolbar. Click the wizard and provide the path to the new client. The client will then be added to the database, allowing users to auto-update on their next connection. When a Citrix client connects to the server, its version is compared to the version on the server. If a newer client is available, the server informs the users and allows them to download the latest client. Should they choose to download it, they simply wait for it to upgrade before beginning their session, or they can have it download in the background and then update after their session is over. Client auto-update can be disabled from Tools | ICA Settings. Uncheck the box labeled Allow Automatic Client Updates.
Disk Caching and Compression
Disk caching and compression allows the Win32 client to work well over low speed links, whether they are asynchronous or WAN links. To manage the amount of caching and files stored on the local machine, select the Application set; then click Tools | ICA Settings. Select the Bitmap Cache tab. From here, the amount of drive space given over to caching can be modified (the default is one percent), the cache directory can be chosen, and the minimum size bitmap to be cached can be configured. To disable bitmap caching, right-click the Application set, choose Properties, and select the Options tab. Uncheck the box marked Use Disk Cache For Bitmaps.
TCP/IP+HTTP Server Location
This feature allows ICA clients to find Citrix servers without using UDP (User Datagram Protocol) broadcasts. Some networks restrict UDP packets, and most routers are configured to filter out broadcasts. The client transmits XML (eXtensible Markup Language) information in HTTP (Hypertext Transfer Protocol) packets to port 80 (by default) on the server. This functionality can be used with or without NFuse.
| Exam Watch | Although it may look like questions on TCP/IP+HTTP server location properly belong on an NFuse exam, this is a new feature of the clients, and will be tested. |
Per-User Time Zones
Clients logging into a MetaFrame XP server in a different time zone can have their Citrix session reflect local time zones. This is a new feature with MetaFrame XP.
Encryption
The Win32 ICA Web client includes encryption levels of 40-, 56-, or 128-bit. Published applications and Citrix sessions can require a specific encryption level from the client. If encryption is not set, the client will not be able to connect. The encryption requirement can be set on either the application, or applied to an entire connection. The choices of Basic, 40-, 56-, 128-bit (Logon Only), or 128-bit are available. To configure the connection, click the Connection Properties button on the ICA toolbar. Click the desired connection, and select Properties. Click the Advanced button. Select the desired encryption level. To require the encryption, click the button for Minimum Requirement. To configure at the published application level, select the application; then choose Properties. On the Application tab, select the encryption level and click the button marked Minimum Requirement. This can also be configured when the program is initially published.
| Exam Watch | Now that encryption does not require a separate add-on to the Citrix server to function, more IT departments are requiring it on their clients. Expect it to be tested. |
| On The Job | Encryption in Citrix once required the Secure ICA add-on pack, which was separately licensed and installed. It is now part of the MetaFrame XP package. All clients, version 6 and later, now support encryption. Although encryption may not necessarily be required in every organization, the performance hit associated with 128-bit encryption is minor. Most users will not be able to tell the difference between the encrypted and unencrypted sessions. It may be a good idea to go ahead and require at least some level of encryption on all connections. |
Pass-Through Authentication
Pass-through authentication allows local usernames and passwords to be automatically forwarded to servers to allow users to log in to their applications. This reduces the number of logon windows a user will face. The main drawback of this feature is that automatic client update will not work. To enable pass-through authentication, right-click the Application Set, and select Properties. Under the tab marked Logon Information, enter the username, password, and domain for the Application Set. If the password is to be saved, check the box labeled Save Password.
| On The Job | While pass-through authentication does reduce the amount of logon screens the client sees, losing the ability to auto-update the client is a significant drawback. Although you may hear users complain about all the logon screens they see, that may be preferable than hand-installing every new client update. |
Installing the Win32 Program Neighborhood Client
Installing the Program Neighborhood client depends upon the deployment method used. If being deployed from the client disks created on the server:
-
Insert Disk 1. Double-click 'My Computer,' then the floppy drive. Double-click setup.exe.
-
The setup program will then search the computer for any previously installed versions of the client software. If one is found, a screen will ask if the client is to be upgraded, or to be installed in a separate instance. If no previous client is found, it will skip to the Choose Destination Location screen.
-
The default path is C:\Program Files\Citrix\ICA Client. This can be customized to any location.
-
The Select Program Folder dialog box will appear. The default group is Citrix ICA client. It will be created if it doesn't exist.
-
The next screen asks for the ICA client name. Each ICA client needs a unique name to identify itself to the server. If names are repeated, the mapping of devices will not work properly.
-
The files will be copied to the hard drive. The installation program will prompt for the next disk when needed.
Installation from a network share point is the same process, except that all the files needed are in the same directory.
The Win32 Web Client
The Win32 ICA Web client allows connections to applications through an NFuse server using a Web browser. The ICA session is embedded in the web browser window. The Win32 Web client replaces the Active-X controls and Netscape Plug-In clients. The size of the installation executable is much smaller than the full Program Neighborhood client, allowing for faster installation and downloads. While the Win32 Web client supports most of the same features as the Program Neighborhood client; it does not support TAPI or any modem connections. The Web client can also be configured for silent installation and deployment.
System Requirements
System requirements for the Win32 ICA Program Neighborhood client are as follows:
-
386 or above
-
Window 9x, 2000, ME or NT 3.5 and later
-
8MB of RAM for Windows 9x; 16 MB of RAM for NT 3.5 or later/2000
-
Approximately 6.5MB of hard drive space (more may be required for caching)
-
VGA or SVGA video card with monitor
-
For dial-up connections, either an internal or external modem
-
For network connections, a network interface card configured for the appropriate network transport. Transports supported are TCP/IP, IPX, SPX, and NetBIOS
System requirements for the Win32 ICA Web client are the same, except that Internet Explorer 4 or later, or Netscape Navigator 4 is required.
| Exam Watch | Expect a question dealing with standalone kiosks or terminals. |
Now that you know more about the Win32 clients, let's look at why you would choose one client over another, depending on the situation.
| If your setup consists of all users on a local network | Use program Neighborhood client |
| If your setup consists of an Application Server Provider | Use Web client |
| If your setup consists of a LAN with many subnets | Use program Neighborhood client |
| If your setup consists of Standalone kiosk or terminal | Use Web client |
DOS
The ICA DOS client allows access to Citrix server and published applications from DOS. This client comes in two flavors, 16-bit and 32-bit. The DOS client supports many of the same features as the other clients, with the obvious lack of Windows graphical features. Most of the graphical elements of published applications will show up on the DOS client.
System Requirements
The system requirements for the ICA DOS client are:
-
286 or later (16-bit client); 386 or later (32-bit)
-
2MB of RAM or greater
-
XMS memory (16-bit client)
-
Microsoft mouse or 100 percent compatible
-
Sound Blaster 16 or compatible for sound support (optional)
-
VGA or SVGA video card and monitor
-
DOS 4.0 or later
-
Internal/External modem for dial-up connections
-
Network interface card with appropriate drivers for the network transport
To install the ICA DOS client, run the install.exe from Disk one of the client diskettes, or from the Client CD. The MetaFrame XP client CD only contains the DOS 32 client. The DOS 32 client is recommended for connections to an XP server.
Windows 3.1x
The ICA Win16 client allows 16-bit Windows PCs to connect to a Citrix server and published applications. The Win16 client allows up to three concurrent ICA sessions. It has the same features as the Win32 clients, and the same system requirements.
Mac
The ICA Macintosh client enables Macintosh computers to run Windows-based programs on their desktops. The local Macintosh drives, printers, and communication ports can also be mapped to the server to allow user access during a Citrix session.
System Requirements
The system requirements for the ICA Macintosh client are
-
68030/40 or PowerPC processor
-
System 7.1 or later
-
8MB of RAM
-
3MB of disk space
-
16 color or better display
-
Open Transport TCP/IP version 1.1.1 or later
-
Internal/external modem for dial-up connections
-
Network interface card with the appropriate network drivers
The ICA Macintosh client, since it is a Mac program, is a bit different than the DOS and Windows clients. The Macintosh client, although it supports published applications, does not support the Program Neighborhood. Citrix connections are configured through the ICA Client Editor. A server address is entered and can be configured to either launch the server desktop or a specific published application. Multiple connections can be configured to give the 'feel' of Program Neighborhood, allowing the Mac clients to have multiple connections on their desktop. Every time a new application is added to the server, a new connection will have to be created on the Mac client. The Mac will not automatically poll the server for new applications, as with the Program Neighborhood clients. The Macintosh client does support Windows keyboard mappings, allowing Mac users to still enter Windows key combinations using their keyboard. Macintosh clients also have to be installed manually the first time, but can be auto-updated from the server after initial installation.
Unix
The ICA Unix clients come in two different versions. Version 6 of the client, which supports all the latest features of the ICA client, runs on Linux, AIX, and Sun Solaris (SPARC). Version 3 of the client supports SGI IRIX, Tru-64 Unix, SunOS, Solaris(X86), SCO, and HP-UX. Most of the features available to the version 6 clients are also available on version 3. The features not replicated are
-
COM port mapping
-
Audio mapping
-
Encryption
-
SpeedScreen
-
Increased color support
-
Seamless Windows
The Unix client supports the features of the clients for other platforms, but, as with the Mac client, it lacks two key features. It does not support Program Neighborhood (though it does support running an application automatically at start), and it does not have a way to install other than manually. Once installed, it can take advantage of the client auto-update feature.
Linux
The ICA Linux client allows connections to Citrix servers from Red Hat, SuSE, Caldera, and Slackware Linux platforms. It supports all of the features of version 6 of the ICA client for Unix. When a new workstation is to be set up with the Citrix client, it must be installed manually the first time. To install the Linux client, insert the Client CD into the CD-ROM drive on the PC. Mount the CD onto the system. Switch to the icainst/language/icaunix directory. Run the setup script by typing ./setupwfc. A menu of options will appear on the screen, choose 1 to install the ICA client. The installation program will prompt for the program directory (default is /usr/lib/ICAClient). The license agreement screen will come up; type Y to accept the license. The installation will proceed. When finished, the menu will reappear. To exit the menu, type 3. To start the ICA Unix client, at a prompt type /usr/lib/ICAClient/wfcmgr.
Deploying Multiple ICA Clients with Identical Configurations
When deploying ICA clients, sometimes it is advantageous to be able to preconfigure them before making them available. This way, multiple clients can be deployed with the same configuration, server lists, and firewall settings without the IT staff having to touch the individual client machines. There are four files inside the client distribution package. They are appsrv.src, module.src, pn.src, and wfclient.src. These files can be extracted from the package using any compression utility and changed to meet the needs of the organization. They can then be recompressed and distributed. All the settings that can be configured through running the ICA client can be preconfigured inside these four files. Table 9-2 gives an idea of when you should preconfigure a client setup.
| Client setup | Preconfigure or Not |
|---|---|
| A few local clients | Configure at the desktop |
| MAC/Unix clients | Configure at the desktop |
| Multiple Win32 clients on a network | Preconfigure |
| Multiple Windows client needing firewall settings | Preconfigure |
| Multiple Windows clients connecting to one server | Configure at the desktop |
|
| < Free Open Study > |
|
EAN: 2147483647
Pages: 169