Section 16.1. Components
16.1. ComponentsA component is the fundamental user interface object in Java. Everything you see on the display in a Java application is a component. This includes things like windows, panels, buttons, checkboxes, scrollbars, lists, menus, and text fields. To be used, a component usually must be placed in a container. Container objects group components, arrange them for display using a layout manager, and associate them with a particular display device. All Swing components are derived from the abstract javax.swing.JComponent class, as you saw in Figure 16-1. For example, the JButton class is a subclass of AbstractButton, which is itself a subclass of the JComponent class. JComponent is the root of the Swing component hierarchy, but it descends from the AWT Container class. At this bottom level, Swing is based on AWT, so our conversation occasionally delves into the AWT package. Container's superclass is Component, the root of all AWT components, and Component's superclass is, finally, Object. Because JComponent inherits from Container, it has the capabilities of both a component and a container. AWT and Swing, then, have parallel hierarchies. The root of AWT's hierarchy is Component, while Swing's components are based on JComponent. You'll find similar classes in both hierarchies, such as Button and JButton, List, and JList. But Swing is much more than a replacement for AWTit contains sophisticated components as well as a real implementation of the Model-View-Controller (MVC) paradigm, which we'll discuss later. For the sake of simplicity, we can split the functionality of the JComponent class into two categories: appearance and behavior. The JComponent class contains methods and variables that control an object's general appearance. This includes basic attributes, such as its visibility, its current size and location, and certain common graphical defaults, such as font and color, used by different subclasses in different ways. The JComponent class also contains graphics and event-handling methods which are overridden by subclasses to produce all of the different kinds of widgets that we will see. When a component is first displayed, it's associated with a particular display device. The JComponent class encapsulates access to its display area on that device. It includes tools for rendering graphics, for working with off-screen resources, and for receiving user input. When we talk about a component's behavior, we mean the way it responds to user-driven events. When the user performs an action (such as pressing the mouse button) within a component's display area, a Swing thread delivers an event object that describes what happened. The event is delivered to objects that have registered themselves as listeners for that type of event from that component. For example, when the user clicks on a button, the button generates an ActionEvent object. To receive those events, an object registers with the button as an ActionListener. Events are delivered by invoking designated event-handler methods within the receiving object (the "listener"). A listener object receives specific types of events through methods of its listener interfaces (for example, through the actionPerformed( ) method of the ActionListener interface) for the types of events in which it is interested. Specific types of events cover different categories of component user interaction. For example, MouseEvents describe activities of the mouse within a component's area, KeyEvents describe key presses, and higher-level events (such as ActionEvents) indicate that a user interface component has done its job. We will describe events thoroughly in this chapter because they are so fundamental to the way in which user interfaces function in Java. But they aren't limited to building user interfaces; they are an important interobject communications mechanism, which may be used by completely nongraphical parts of an application, as well. They are particularly important in the context of JavaBeans, which uses events as a generalized change-notification mechanism. Swing's event architecture is very flexible. Instead of requiring every component to listen for and handle events for its own bit of the user interface, an application may register arbitrary event "handler" objects to receive the events for one or more components and "glue" those events to the correct application logic. A container might, for example, process some of the events relating to its child components. In the graphical realm, the primary responsibility of a container is to lay out the components it contains visually, within its borders. A component informs its container when it does something that might affect other components in the container, such as changing its size or visibility. The container then tells its layout manager that it is time to rearrange the child components. As we mentioned, Swing components are all fundamentally derived from Container. This doesn't mean that all Swing components can meaningfully contain arbitrary GUI elements within themselves. It does mean that the container-component relationship is built in at a low level. Containers can manage and arrange JComponent objects without knowing what they are or what they are doing. Components can be swapped and replaced with new versions easily and combined into composite user interface objects that can be treated as individual components themselves. This lends itself well to building larger, reusable user interface items. 16.1.1. Peers and Look-and-FeelSwing components are sometimes referred to as peerless, or lightweight. These terms refer to the relationship that AWT has (and Swing does not have, respectively) with the native toolkits for rendering components on each platform. To get native components on the screen, AWT utilizes a set of peer objects that bridge the gap from pure Java to the host operating system. At some level, of course, all our components have to talk to objects that contain native methods to interact with the host operating environment; the difference is at what level this occurs. AWT uses a set of peer interfaces. The peer interface makes it possible for a pure Java-language graphic component to use a corresponding real componentthe peer objectin the native environment. With AWT, you don't generally deal directly with peer interfaces or the objects behind them; peer handling is encapsulated within the Component class. AWT relies heavily on peers. For example, if you create a window and add eight buttons to it, AWT creates nine peers for youone for the window and one for each of the buttons. As an application programmer, you don't have to worry about the peers, but they are always lurking under the surface, doing the real work of interacting with the operating system's windowing toolkit. In Swing, by contrast, most components are peerless, or lightweight. This means that Swing components don't have any direct interaction with the underlying windowing system. They draw themselves in their parent container and respond to user events in pure Java, with no native code involved. In Swing, only the top-level (lowest API level) windows interact with the windowing system. These Swing containers descend from AWT counterparts, and, thus, still have peers. In Swing, if you create a window and add eight buttons to it, only one peer is createdfor the window. Because it has fewer interactions with the underlying windowing system than AWT, Swing is less vulnerable to the peculiarities of any particular platform. With lightweight components, it is easy to change their appearance. Since each component draws itself instead of relying on a peer, it can decide at runtime how to render itself. Accordingly, Swing supports different look-and-feel schemes, which can be changed at runtime. (A look-and-feel is the collected appearance of components in an application.) Look-and-feels based on Windows, Macintosh, and Motif are available (though licensing issues may encumber their use on various platforms), as well as several entirely original Java creations, including one called Metal. Java 5.0 added a default Java look-and-feel called Ocean, which has a slightly "flatter" and more modern look. Another new development in Java 5.0 is the addition of the Synth look-and-feel. Synth makes Java applications "skinnable" at a high level using an XML descriptor file and images as resources. 16.1.2. The MVC FrameworkBefore continuing our discussion of GUI concepts, we want to make a brief aside and talk about the MVC framework. MVC is a method of building reusable components that logically separates the structure, presentation, and behavior of a component into separate pieces. MVC is primarily concerned with building user interface components, but the basic ideas can be applied to many design issues; its principles can be seen throughout Java. The fundamental idea behind MVC is the separation of the data model for an item from its presentation. For example, we can draw different representations of the data in a spreadsheet (e.g., bar graphs, pie charts). The data is the model; the particular representation is the view. A single model can have many views that present the data differently. A user interface component's controller defines and governs its behavior. Typically, this includes changes to the model, which, in turn, cause the view(s) to change. For a checkbox component, the data model could be a single Boolean variable, indicating whether it's checked or not. The behavior for handling mouse-click events would alter the model, and the view would examine that data when it draws the on-screen representation. The way in which Swing objects communicate, by passing events from sources to listeners, is part of this MVC concept of separation. Event listeners are "observers" (controllers) and event sources are "observables" (models).[*] When an observable changes or performs a function, it notifies all its observers of the activity.
Swing components explicitly support MVC. Each component is actually composed of two pieces. One piece, called the UI-delegate, is responsible for the "view" and "controller" roles. It takes care of drawing the component and responding to user events. The second piece is the data model itself. This separation makes it possible for multiple Swing components to share a single data model. For example, a read-only text box and a drop-down list box could use the same list of strings as a data model. 16.1.3. PaintingIn an event-driven environment such as Swing, components can be asked to draw themselves at any time. In a more procedural programming environment, you might expect a component to be involved in drawing only when first created or when it changes its appearance. In Java, however, components act in a way that is closely tied to the underlying behavior of the display environment. For example, when you obscure a component with another window and then re-expose it, a Swing thread may ask the component to redraw itself. Swing asks a component to draw itself by calling its paint( ) method. paint( ) may be called at any time, but in practice, it's called when the object is first made visible, whenever it changes its appearance, or whenever some tragedy in the display system messes up its area. Because paint( ) can't generally make any assumptions about why it was called, it must redraw the component's entire display. The system may limit the drawing if only part of the component needs to be redrawn, but you don't have to worry about this. Swing is fairly smart and will do everything it can to avoid asking components to redraw themselves (including using "backing store" where applicable). A component never calls its paint( ) method directly. Instead, if a component requires redrawing, it requests a call to paint( ) by invoking repaint( ). The repaint( ) method asks Swing to schedule the component for repainting. At some point after that, a call to paint( ) occurs. Swing is allowed to manage these requests in whatever way is most efficient. If there are too many requests to handle, or if there are multiple requests for the same component, the thread can collapse a number of repaint requests into a single call to paint( ). This means that you don't normally know exactly when paint( ) is called in response to a repaint( ); all you can expect is that it happens at least once, after you request it. Calling repaint( ) is normally an implicit request to be updated as soon as possible. Another form of repaint( ) allows you to specify a time period within which you would like an update, giving the system more flexibility in scheduling the request. The system tries to repaint the component within the time you specify, but if you happen to make more than one repaint request within that time period, the system may simply condense them to carry out a single update within the time you specified. An application performing simple animation could use this method to govern its refresh rate (by specifying a period that is the inverse of the desired frame rate). As we've mentioned, Swing components can act as containers, holding other components. Because every Swing component does its own drawing, Swing components are responsible for telling any contained components to draw themselves. Fortunately, this is all taken care of for you by a component's default paint( ) method. If you override this method, however, you have to make sure to call the superclass's implementation like this: public void paint(Graphics g) { super.paint(g); ... } There's a cleaner way around this problem. All Swing components have a method called paintComponent( ). While paint( ) is responsible for drawing the component as well as its contained components, paintComponent( )'s sole responsibility is drawing the component itself. If you override paintComponent( ) instead of paint( ), you won't have to worry about drawing contained components. Both paint( ) and paintComponent( ) receive a single argument: a Graphics object. The Graphics object represents the component's graphics context. It corresponds to the area of the screen on which the component can draw and provides the methods for performing primitive drawing and image manipulation. (We'll look at the Graphics class in detail in Chapter 18.) 16.1.4. Enabling and Disabling ComponentsStandard Swing components can be turned on and off by calling the setEnabled( ) method. When a component such as a JButton or JTextField is disabled, it becomes "ghosted" or "greyed-out" and doesn't respond to user input. For example, let's see how to create a component that can be used only once. This requires getting ahead of the story; we won't explain some aspects of this example until later. Earlier, we said that a JButton generates an ActionEvent when it is pressed. This event is delivered to the listeners' actionPerformed( ) method. The following code disables whatever component generated the event: public boolean void actionPerformed(ActionEvent e ) { ((JComponent)e.getSource( )).setEnabled(false); } This code calls getSource( ) to find out which component generated the event. We cast the result to JComponent because we don't necessarily know what kind of component we're dealing with; it might not be a button, because other kinds of components can generate action events. Once we know which component generated the event, we disable it. You can also disable an entire container. Disabling a JPanel, for instance, disables all the components it contains. 16.1.5. Focus, PleaseIn order to receive keyboard events, a component has to have keyboard focus. The component with the focus is the currently selected component on the screen and is usually highlighted visually. It receives all keyboard event information until the focus changes to a new component. Typically, a component receives focus when the user clicks on it with the mouse or navigates to it using the keyboard. A component can ask for focus with the JComponent's requestFocus( ) method. You can configure whether a given component is eligible to receive focus with the setFocusable( ) method. By default most components, including things such as buttons and checkboxes, are "focusable." To make an entire window and its components nonfocusable, use the Window setFocusableWindowState( ) method. The control of focus is often at the heart of the user's experience with an application. Especially with text-entry fields and forms, users are accustomed to a smooth transfer of focus with the use of keyboard navigation cues (e.g., Tab and Shift-Tab for forward and backward field navigation). The management of focus in a large GUI with many components could be complex. Fortunately, in Java 1.4 and later, Swing handles almost all this behavior for you, so, in general, you don't have to implement code to specify how focus is transferred. Java 1.4 introduced an entirely new focus subsystem. The flexible KeyboardFocusManager API provides the expected common behavior by default and allows customization via FocusTraversalPolicy objects. We'll discuss focus-related events later in this chapter and focus navigation more in Chapter 18. 16.1.6. Other Component MethodsThe JComponent class is very large; it has to provide the base-level functionality for all the various kinds of Java GUI objects. It inherits a lot of functionality from its parent Container and Component classes. We don't have room to document every method of the JComponent class here, but we'll flesh out our discussion by covering some of the more important ones:
JComponent myComponent = ...; Cursor crossHairs = Cursor.getPredefinedCursor( Cursor.CROSSHAIR_CURSOR ); myComponent.setCursor( crossHairs ); 16.1.6.1 ContainersA container is a kind of component that holds and manages other components. Three of the most useful general container types are JFrame, JPanel, and JApplet. A JFrame is a top-level window on your display. JFrame is derived from java.awt.Window, which is pretty much the same but lacks a border (JWindow is the swing version of Window). A JPanel is a generic container element that groups components inside JFrames and other JPanels. The JApplet class is a kind of container that provides the foundation for applets that run inside web browsers. Like other containers, a JApplet can hold other user-interface components. You can also use the JComponent class directly, like a JPanel, to hold components inside another container. With the exception of JFrame, JWindow, JApplet, and JDialog (another window-like container), which are derived from AWT components, all the components and containers in Swing are lightweight. A container maintains the list of "child" components it manages and has methods for dealing with those components. Note that this child relationship refers to a visual hierarchy, not a subclass/superclass hierarchy. By themselves, most components aren't very useful until they are added to a container and displayed. The add( ) method of the Container class adds a component to the container. Thereafter, this component can be displayed in the container's display area and positioned by its layout manager. You can remove a component from a container with the remove( ) method. 16.1.7. Layout ManagersA layout manager is an object that controls the placement and sizing of components within the display area of a container. A layout manager is like a window manager in a display system; it controls where the components go and how big they are. Every container has a default layout manager, but you can install a new one by calling the container's setLayout( ) method. Swing comes with a few layout managers that implement common layout schemes. The default layout manager for a JPanel is a FlowLayout, which tries to place objects at their preferred size from left to right and top to bottom in the container. The default for a JFrame is a BorderLayout, which places objects at specific locations within the window, such as NORTH, SOUTH, and CENTER. Another layout manager, GridLayout, arranges components in a rectangular grid. The most general (and difficult to use) layout manager is GridBagLayout, which lets you do the kinds of things you can do with HTML tables. (We'll get into the details of all these layout managers in Chapter 19.) When you add a component to a container using a simple layout manager, you'll often use the version of add( ) that takes a single Component as an argument. However, if you're using a layout manager that uses "constraints," such as BorderLayout or GridBagLayout, you must specify additional information about where to put the new component. For that you can use the version that takes a constraint object. Here's how to place a component at the top edge of a container that uses a BorderLayout manager: myContainer.add(myComponent, BorderLayout.NORTH); In this case, the constraint object is the static member variable NORTH. GridBagLayout uses a much more complex constraint object to specify positioning. 16.1.8. InsetsInsets specify a container's margins; the space specified by the container's insets won't be used by a layout manager. Insets are described by an Insets object, which has four public int fields: top, bottom, left, and right. You normally don't need to worry about the insets; the container sets them automatically, taking into account extras like the menu bar that may appear at the top of a frame. To find the insets, call the component's getInsets( ) method, which returns an Insets object. 16.1.9. Z-Ordering (Stacking Components)With the standard layout managers, components are not allowed to overlap. However, if you use custom-built layout managers or absolute positioning, components within a container may overlap. If they do, the order in which components were added to a container matters. When components overlap, they are "stacked" in the order in which they were added: the first component added to the container is on top, and the last is on the bottom. To give you more control over stacking, two additional forms of the add( ) method take an additional integer argument that lets you specify the component's exact position in the container's stacking order. Again, you don't normally need to think about this, but it's nice to know for completeness sake that it's there. 16.1.10. The revalidate( ) and doLayout( ) MethodsA layout manager arranges the components in a container only when asked to. Several things can mess up a container after it's initially laid out:
Any of these actions cause the container to be marked invalid. This means that it needs to have its child components readjusted by its layout manager. In most cases, Swing readjusts the layout automatically. All components, not just containers, maintain a notion of when they are valid or invalid. If the size, location, or internal layout of a Swing component changes, its revalidate( ) method is automatically called. Internally, the revalidate( ) method first calls the method invalidate( ) to mark the component and all its enclosing containers as invalid. It then validates the tree. Validation descends the hierarchy, starting at the nearest validation root container, recursively validating each child. Validating a child Container means invoking its doLayout( ) method, which asks the layout manager to do its job and then notes that the Container has been reorganized by setting its state to valid again. A validation root is a container that can accommodate children of any size such as JScrollPane (and, hence, can accommodate any possible changes in its child hierarchy without upsetting its own parents). There are a few cases in which you may need to tell Swing to fix things manually. One example is when you change the preferred size of a component (as opposed to its actual onscreen size). To clean up the layout, call the revalidate( ) method. For example, if you have a small JPanelsay a keypad holding some buttonsand you change the preferred size of the JPanel by calling its setPreferredSize( ) method, you should also call revalidate( ) on the panel or its immediate container. The layout manager of the panel then rearranges its buttons to fit inside its new area. 16.1.11. Managing ComponentsThere are a few additional tools of the Container class we should mention:
16.1.12. Listening for ComponentsYou can use the ContainerListener interface to automate setting up a container's new components. A container that implements this interface can receive an event whenever it gains or loses a component. This facility makes it easy for a container to micromanage its components. 16.1.13. Windows and FramesWindows and frames are the top-level containers for Java components. A JWindow is simply a plain, graphical screen that displays in your windowing system. Windows have no frills; they are mainly suitable for making "splash" screens and pop-up windows. JFrame, on the other hand, is a subclass of JWindow that has a border and can hold a menu bar. You can drag a frame around on the screen and resize it, using the ordinary controls for your windowing environment. Figure 16-2 shows a JFrame on the left and a JWindow on the right. All other Swing components and containers must be held, at some level, inside a JWindow or JFrame. Applets are a kind of Container. Even applets must be housed in a frame or window, though normally you don't see an applet's parent frame because it is part of (or simply is) the browser or appletviewer displaying the applet. Figure 16-2. A frame and a window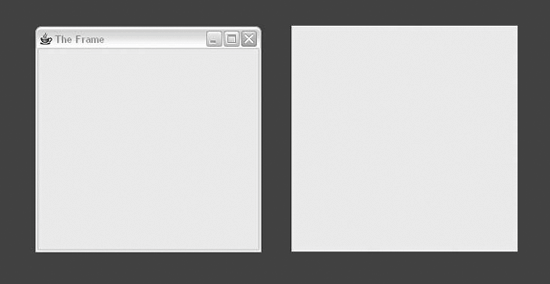 JFrames and JWindows are the only components that can be displayed without being added or attached to another Container. After creating a JFrame or JWindow, you can call the setVisible( ) method to display it. The following short application creates a JFrame and a JWindow and displays them side by side, just as in Figure 16-2. //file: TopLevelWindows.java import javax.swing.*; public class TopLevelWindows { public static void main(String[] args) { JFrame frame = new JFrame("The Frame"); frame.setSize(300, 300); frame.setLocation(100, 100); JWindow window = new JWindow( ); window.setSize(300, 300); window.setLocation(500, 100); frame.setVisible(true); window.setVisible(true); } } The JFrame constructor can take a String argument that supplies a title, displayed in the JFrame's titlebar. (Or you can create the JFrame with no title and call setTitle( ) to supply the title later.) The JFrame's size and location on your desktop is determined by the calls to setSize( ) and setLocation( ). After creating the JFrame, we create a JWindow in almost exactly the same way. The JWindow doesn't have a titlebar, so there are no arguments to the JWindow constructor. Once the JFrame and JWindow are set up, we call setVisible(true) to get them on the screen. The setVisible( ) method returns immediately, without blocking. Fortunately, our application does not exit, even though we've reached the end of the main( ) method, because the windows are still visible. You can close the JFrame by clicking on the close button in the titlebar. JFrame's default behavior is to hide itself when you click on the box by calling setVisible(false). You can alter this behavior by calling the setDefaultCloseOperation( ) method or by adding an event listener, which we'll cover later. Since we haven't arranged any other means here, you will have to hit Ctrl-C or whatever keystroke kills a process on your machine to stop execution of the TopLevelWindows application. 16.1.14. Other Methods for Controlling FramesThe setLocation( ) method of the Component class can be used on a JFrame or JWindow to set its position on the screen. The x and y coordinates are relative to the screen's origin (the top-left corner). You can use the toFront( ) and toBack( ) methods to place a JFrame or JWindow in front of, or behind, other windows. By default, a user is allowed to resize a JFrame, but you can prevent resizing by calling setResizable(false) before showing the JFrame. On most systems, frames can be "iconified"that is, they can be shrunk down and represented by a little icon image. You can get and set a frame's icon image by calling getIconImage( ) and setIconImage( ). As you can with all components, you can set the cursor by calling the setCursor( ) method. 16.1.15. Content PanesWindows and frames have a little more structure than simple containers. Specifically, to support some of the fancier GUI features that require overlaying graphics (such as popups and menus), windows and frames actually consist of a number of separate overlapping container "panes" (as in glass) with names such as the root pane, layered pane, and glass pane. The primary pane of interest is usually the content pane. The content pane is just a Container that covers the visible area of the JFrame or Jwindow; it is the container to which we actually want to add child components. With simple containers, you can add child components with the add( ) method. In Java 5.0 and later, the same is true for JFrame and JWindow. Calling the add( ) method of one of these containers automatically places the child in the content pane container for you so that you don't really have to know about these other panes. In earlier versions of Java, you had to add child components to the content pane explicitly. It's not hard to do; we'll cover it now. Whenever you create a new JFrame or JWindow, a content pane is automatically created for you. You can retrieve it with getContentPane( ). Here's an example that creates a JFrame and adds some components to its content pane explicitly: //file: MangoMango1.java import java.awt.*; import javax.swing.*; public class MangoMango1 { public static void main(String[] args) { JFrame frame = new JFrame("The Frame"); Container content = frame.getContentPane( ); content.setLayout(new FlowLayout( )); content.add(new JLabel("Mango")); content.add(new JButton("Mango")); frame.setLocation(100, 100); frame.pack( ); frame.setVisible(true); } } The call to JFrame's pack( ) method tells the frame window to resize itself to the minimum size required to hold all its components. Instead of having to determine the size of the JFrame, pack tells it to be "just big enough." If you do want to set the absolute size of the JFrame yourself, call setSize( ) instead. Again, in Java 5.0 and later, we could omit the step of getting the content pane and simply set the layout on and add the buttons to the frame directly. Another option is to create our own Container and make it the content pane of a JFrame or JWindow with setContentPane( ). Using this strategy, we could rewrite the previous example as follows: //file: MangoMango2.java import java.awt.*; import javax.swing.*; public class MangoMango2 { public static void main(String[] args) { JFrame frame = new JFrame("The Frame"); Container content = new JPanel( ); content.add(new JLabel("Mango")); content.add(new JButton("Mango")); frame.setContentPane(content); frame.setLocation(100, 100); frame.pack( ); frame.setVisible(true); } } We'll cover labels and buttons in Chapter 17 and layouts in Chapter 19. The important thing to remember is that prior to Java 5.0 you can't add components directly to a JFrame or JWindow. Instead, you must add them to the content pane or create an entirely new content pane. If you try to add components directly to one of these containers in an earlier version of Java, you get a runtime exception. |
EAN: 2147483647
Pages: 262
- Article 338 Service-Entrance Cable Types SE and USE
- Article 340 Underground Feeder and Branch-Circuit Cable Type UF
- Annex D. Examples
- Example No. D2(b) Optional Calculation for One-Family Dwelling, Air Conditioning Larger than Heating [See 220.82(A) and 220.82(C)]
- Example No. D5(b) Optional Calculation for Multifamily Dwelling Served at 208Y/120 Volts, Three Phase