Address Book
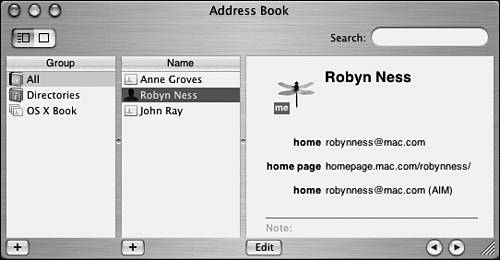
| Address Book is a contact information manager that integrates with Mail. The main window, shown in Figure 4.20, has two view modes: Card and Columns view and Card Only view. To toggle between them, use the View buttons at the upper left. You'll do most of your work with Address Book in Card and Columns view. Figure 4.20. Address Book, shown here in Card and Columns view, keeps track of your contact information with a simple uncluttered interface. Adding and Editing CardsTo add a card, select All from the Group column and then click the + button below the Name column. This opens a blank card in the far-right column where you can type what information you want to save. There are fields for name, work and mobile phone, email address, homepage, AIM name, and address, as well as a space at the bottom for notes. You can tab between fields or click into the ones you want to insert. You can add as much or as little information as you like, but an email address is required if you plan to use the card with Mail.
In the upper-right corner of the card column is the default card icon. If you want to add a custom picture, clicking the default icon opens a sheet from which you can navigate to any image stored on your computer or attached drive. A simple way to add icons for each of your contacts is to select an image from those stored in /Library/User Pictures or drag an image from the Finder into the image well. When you're finished adding information, click outside the card pane. To edit a card you've already created, select the name of the individual from the Name column and click the Edit button below the card column. To delete a card, select it and press the Delete key on your keyboard. You are asked to confirm the action before it's carried out. Adding GroupsYou can organize your cards into your own custom groups, which can be used to send email to a common collection of people.
To create a group, click the + button under the Group column and type a name for it. Then select the All option in the Group column and drag contacts from the Name column to the group's name to populate your new group. You can hold down the Command key to select more than one addressee at a time.
Using Address Book with MailAddress Book integrates neatly into Mail. When you open a compose window, an Address icon appears in the toolbar. Clicking it opens a window, shown in Figure 4.21, that contains all the contacts and groups you've stored in Address Book. Simply double-click the names of everyone you want to send the message to, or select a previously created group, and the addresses appear in the To field. If you want to send a carbon copy, select the names and click the CC: button. Figure 4.21. Mail's Addresses window displays information stored in Address Book. If you receive email and want to save the sender's address, you can add people to the Address Book from within Mail. Select the message and choose Add Sender To Address Book from the Message menu, or use the keyboard shortcut Command-Y. You must edit the card to add information in addition to the name and email address, but it's a start!
Address Book uses the common vCard format (saved as a .vcf file) to store information. When using Mail, you can attach your own vCard to an email by dragging your listing from Address Book into the compose window. To add a vCard someone else has sent you to Address Book, simply drag the vCard attachment from the message window into Address Book. You can open an Address Book window at any time by choosing Address Book from the Window menu. |
EAN: 2147483647
Pages: 349