VMware
|
| < Day Day Up > |
|
VMware Workstation is a product that enables you to run multiple operating systems concurrently. You need to install only one operating system on your workstation (either Windows or Linux) and the VMware software. VMware allows you to create virtual machines—a term that harkens to Java’s OS-independent subsystem.
VMware’s virtual machine, unlike the Java variant, is truly a virtual machine in the sense of power and hardware. You can “power on” a virtual machine and you’ll see it boot up from within VMware, just as you would a real, physical computer. On that virtual machine, you can install any of VMware’s supported guest operating systems, covering nearly every Intel-based operating system from MS-DOS and Windows to Linux, the BSD family, and Solaris x86. If you want to add another OS, you can create another virtual machine. Thus, the bottleneck on the host operating system becomes disk space and memory if you wish to run more than one virtual machine at once.
Download and Installation
This is the first tool we’ve reviewed that doesn’t bear the mark of “free” software in either cost or license. VMware is a commercial product available for download at http://www.vmware.com/. You can register with VMware for a 30-day trial license key. The download for version 4.0 is a bit hefty, weighing in at around 21MB.
Once you’ve obtained VMware’s setup program from its web site or from CD, the installation process is rather simple. We’ll be showing you a Windows workstation installation.
| Note | VMware Workstation is officially supported on Windows (NT, 2000, or XP) and Linux platforms; however, you can also run VMware on Unix systems that support Linux emulation (like FreeBSD). The OS on which VMware is installed is called the Host OS. |
The first window you’ll see when you start setup is the typical-looking Welcome screen.
Accept the license agreement and click Next to move through the wizard dialogs. You may see the following message:
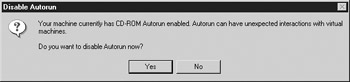
VMware wants to disable CD-ROM Autorun because it sometimes causes problems with a guest OS. As a general practice, it’s a good idea to disable CD-ROM Autorun unless you trust the creator of every CD you put in your computer. Allowing Autorun to run blindly an application on a CD (that may or may not be trustworthy) is no better than opening an unknown executable attachment in an e-mail. Given these two reasons, you should probably click Yes.
In addition to the standard file copying, VMware installs some network utilities. Since the virtual machines under VMware are supposed to be just like physically separate machines, each virtual machine needs to have its own network adapter and IP address. VMware has several different networking options, which we’ll cover later.
After you answer a few more simple questions (and allow VMware to create a shortcut on your Desktop), the VMware installation is complete. In true Windows fashion, you’ll need to reboot before you can start using the application.
| Tip | The VMware Desktop is an excellent tool for testing different system configurations, experimenting with alternate operating systems, and effectively doubling a platform’s capabilities. If you desire to replicate a server farm or run multiple systems from the same platform, the GSX is more appropriate. |
Configuration
After you reboot, double-click the VMware Workstation icon. You’ll be prompted for your license information right off the bat, so make sure you have a legitimate copy. Assuming you get past that, you’ll see a screen similar to the one shown in Figure 3-1.
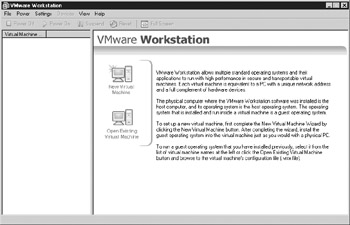
Figure 3-1: VMware startup screen
-
Since this is your first time using VMware, you’ll want to start off by creating a new virtual machine, so click New Virtual Machine. VMware has a wizard that makes this process rather painless.
-
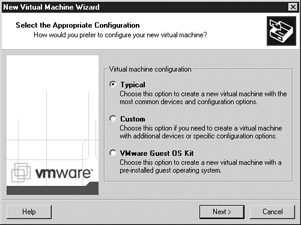
In the next window, choosing the Typical configuration option will usually be fine. The VMware Guest OS Kit option is a newer option. VMware’s Guest OS Kits are simply preconfigured virtual machines with an operating system already installed. As of this book’s writing, VMware has kits for Windows 2000 and Windows XP only. Future Guest OS Kits will be produced to support more operating systems, but each kit will cost you. For our purposes, choose Custom here; seeing some of the more advanced options will lend itself well to a discussion of the under-workings of VMware. Click Next.
-
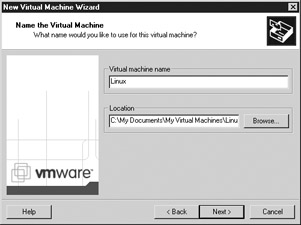
The next screen will ask what kind of virtual machine you want to install. You can choose from Windows variants, MS-DOS, Linux, FreeBSD, or the rather mysterious Other, which is for other Intel-based operating systems (such as Solaris x86 or BeOS) that might work, but aren’t supported. It will also ask you where you want to store the data files for your virtual machine. Make these selections and click Next.
-
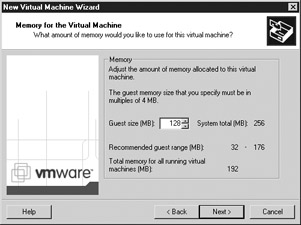
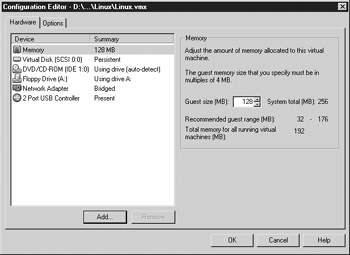
You’re confronted with the first advanced option: memory usage. Even though you’re creating a virtual machine with its own devices and resources, obviously the virtual machine will need to use the host system’s resources for such things as disk space, CPU power, and memory. VMware suggests that you configure your memory allocation so that if you have all of your guest operating systems running at once, you are using at most three-fourths of your total system memory. Anything more than that will bring your virtual machines and your host OS to a grinding halt. If you plan on using only one virtual machine (or one virtual machine at a time), you can feel safe dividing your memory equally in half. Click Next.
-
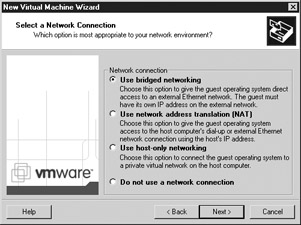
We briefly mentioned networking options earlier. VMware gives you a choice. Bridged networking will create a virtual network interface that, like any physical machine with its own physical network card, will need its own IP address on the network. If you’re on a network where you have an available IP address for use by your guest OS at all times, choosing this option should be fine. However, if you’re using VMware on a laptop or a machine that won’t always have more than one IP address available to it, you can use network address translation (NAT). This method has the guest OS using a “reserved” IP address (such as 10.0.0.1) and has its network-bound traffic masquerade the IP of the host system’s actual IP address. If you only desire to enable your host OS to talk to all your virtual OS, you can use host-only networking. After making a selection, click Next.
Tip VMware 4.0 can support most wireless NICs, but the host and guest systems’ network performance may be adversely affected. If you wish to provide network access to a guest system when the host system uses a wireless network, use NAT network mode instead of Bridged.
-
VMware’s guest systems have virtual hard drives, but in reality those drives are usually just files on the host OS that VMware interprets as disks. Your guest system’s disk space is limited only by the physical space available on the host system. VMware breaks large virtual disks into 2GB slices. Take note that even if you allocate 10GB of virtual disk space to a virtual machine, the disk space is used only when it becomes necessary. In other words, the virtual machine will always have 10GB available to it, but it may be using only 1.5GB of physical space for the operating system. Giving a virtual machine physical disk access is usually not desirable, as you lose some of the advantages of VMware’s virtual machine concept, so you should almost always use virtual disks. If you use virtual disks, one advantage is the ability to undo all changes to the hard drive during a session. We’ll discuss that in more detail shortly.
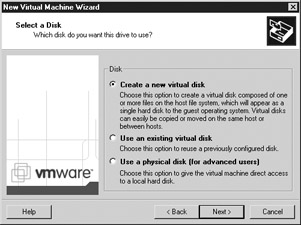
Tip VMware also provides options to shrink and defragment virtual disks, which is a boon for those who wish to micromanage disk space.
-
Next you’re asked about disk file limits. You want to make sure your guest OS disks don’t fill up your physical drives, so be sure to put realistic limits on the size of your guest disks. Keep in mind that the disk space is not allocated at once, so you will not immediately lose the space.
-
Click Finish, and you’re all done.
Now you can see what kind of options you have configured (see Figure 3-2). If you have configured multiple virtual machines, you’ll see them listed in the Workstation window. You can change options by right-clicking the virtual machine name in the list and then choosing Settings. This brings up the Configuration Editor.
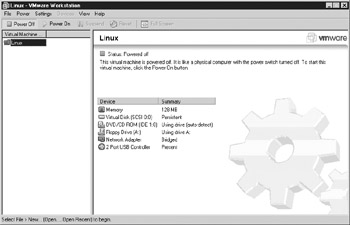
Figure 3-2: Configuration Editor
By selecting devices on the left side of the window, you can change configurations for that device. In the following illustration, we are changing memory settings. If we wanted to change network settings, we’d click Network Adapter.
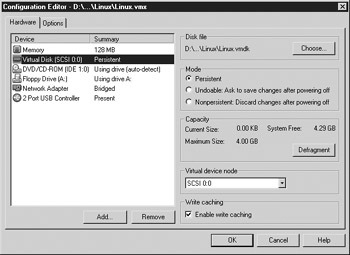
Let’s take a look at the options available with our disk in the Configuration Editor, accessible by clicking the Virtual Disk device. You can change the disk file that a device uses as well as size limits. However, note the Mode settings in the following illustration. By default, disks are persistent. However, one of the nicer features about VMware is that you can make a disk file undoable or nonpersistent. Making a disk nonpersistent is nice if you have set up a machine that you’re going to trash and destroy for a demonstration, presentation, or project that you’ll need to do again. It lets you wipe out any changes you’ve made to the disk since powering the machine on. You could even fdisk your entire virtual hard drive; if your disk is undoable or nonpersistent, you can restore it to its original state. Undoable mode is probably the most popular mode, because it gives you a choice of saving changes to the disk or discarding them.
You can also add devices like other drives, network adapters, sound support, or serial and parallel port support in the Add Hardware Wizard, accessible by clicking on the Add button on the Configuration Editor interface.
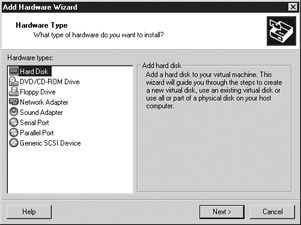
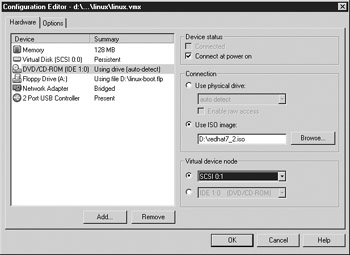
In addition to virtual hard drives, you can use the Add Hardware Wizard to create virtual floppy disks and CD-ROMs. By default, VMware will install floppy and CD devices based on the actual physical drives it finds on your system. In addition to using the physical drives, you can have VMware use floppy or CD (ISO) images.
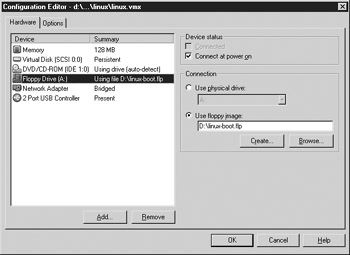
VMware lets you create a floppy image by clicking the Create button, as shown in the following screen. You can then read to and write from the floppy image as if it were an actual floppy disk. ISO images can be created using standard CD-burning software (Adaptec’s Easy CD Creator, for example) or with the Unix utility mkisofs.
Create as many images as you like and use the Add and Remove buttons on the Hardware tab of the Configuration Editor to load and unload the drives as you wish. VMware supports up to two concurrent floppy devices (either physical or virtual images), up to four IDE concurrent devices (hard drives or CD drives, either physical or virtual images), and up to seven SCSI concurrent devices (either physical drives or virtual images as well as scanners and other SCSI devices). In the next illustration, we’re configuring a virtual CD drive that uses a RedHat 7.2 ISO image and one of the seven available SCSI virtual nodes.
These options can really help if you’re running VMware on a portable computer. Instead of carrying floppy disks and CDs when you’re on the go, you can just use the images. Virtual drives are also helpful when your portable system has detachable floppy or CD drives that may not always be available.
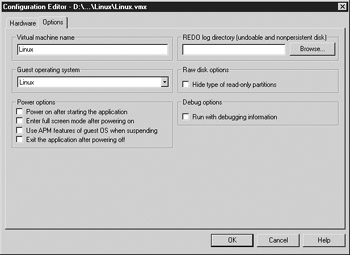
If you’re installing several different virtual Linux machines (perhaps you want to test an application on several different Linux versions or distributions to see how it fares), you can rename your virtual machine in the Configuration Editor’s Options tab. You can also configure debugging and powering options for your machine.
Now we’ve created a virtual machine that’s ready for installation of the guest operating system. We’re going to take advantage of VMware’s “nonpersistent” disks to build a default RedHat 6.0 box, hack the daylights out of it as a demonstration, and have it all go back to the default installation when we reset the box. We see that the machine is currently powered off. Let’s put our RedHat boot media in the physical CD drive of our host OS and try powering on the virtual machine by clicking Power On.
Implementation
When you first turn on power to the virtual machine, a screen will display that’s similar to that of a machine when it is first booting up (see Figure 3-3). It will POST, check its memory, and then attempt to boot.
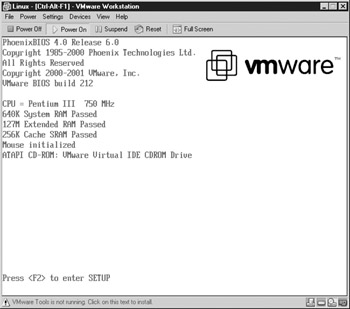
Figure 3-3: VMware boot-up screen
Since we’re booting off the RedHat CD-ROM, it’ll boot the setup program. We see a screen like the one shown in Figure 3-4.
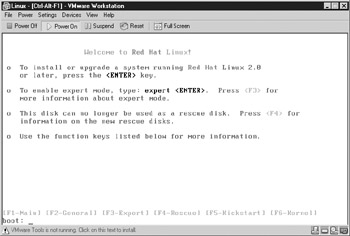
Figure 3-4: VMware—installing the OS
The install program is waiting for input from us. By default, the VMware window won’t accept focus (that is, user input) until we mouse-click in the window. We click in the window and press ENTER. Notice that a tip at the bottom of the screen now says to press CTRL-ALT to release mouse control from the guest OS. Things like mouse/focus interaction and guest OS screen viewing can be configured in the Preferences section of the settings.
| Note | In previous versions of VMware, CTRL-ALT-ESC was used to release mouse control from the guest OS. |
Before we gave the guest OS focus, a message about VMware tools not being installed appeared, as shown in Figure 3-5. VMware tools are a collection of tools specifically designed for each guest OS type that improve video output of the guest OS, mouse interaction between guest and host, and many other things. Unfortunately, you can’t install VMware tools until your guest OS has been installed. So we’ll have to wait until later.
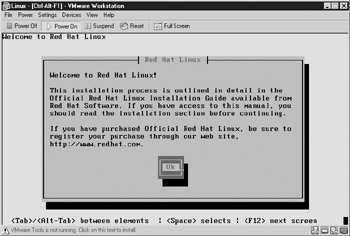
Figure 3-5: VMware—off and running
It looks just like it would if we were installing RedHat 6.0 on an Intel box! Now we can go ahead and interact with our operating system as we normally would.
Keep in mind that if you’re asked to install a boot loader, it’s a boot loader only for the virtual machine. Your actual host machine’s partitions will be unaffected. If your guest OS asks you about video cards and displays when you’re installing, they’ll be the same as those you’re using on the host machine. After finishing the install, boot up the new virtual Linux system (see Figure 3-6), and voila.
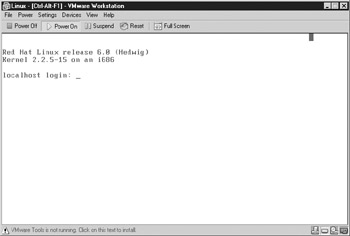
Figure 3-6: Linux running inside VMware
Now that the OS is installed, we can install the VMware tools. After that, we can interact with this Linux box as if it’s just another machine or host on the network.
Keep in mind that we’ve only touched on the Windows VMware Workstation here. The same thing can be done using a Linux host OS and a Windows guest OS so that Linux gurus can still use Windows applications when the time comes. See VMware’s help file or web site for more information on what else you can do with VMware.
Open-Source Alternatives
If your virtual machine desires lie more with experimentation than 100 percent emulation, you may wish to check out the Bochs, plex86, or Wine projects. Bochs (http://bochs.sourceforge.net) strives for full x86 CPU emulation. Thus, it would serve as a test environment for installing any operating system designed for the x86 platform. It has a few drawbacks due to this. First, the project, although actively maintained, is not complete and can run only Linux, Windows 95, or Windows NT somewhat reliably. Second, the code is designed for completeness, not efficiency—guest systems will suffer noticeable performance impacts.
Plex86 (http://plex86.sourceforge.net) also aims for x86 CPU emulation, but it takes a different route from Bochs. Plex86 focuses on the core CPU instructions necessary to run a Linux installation. Thus, performance improves at the cost of comprehensiveness.
Wine (http://www.winehq.com) does not emulate the x86 CPU. Instead, the Wine project attempts to create a Windows API on top of Linux (or BSD). The goal of Wine is not to provide an environment for arbitrary operating systems, but to provide a Windows-like environment on Linux in which native Windows applications can be executed.
Each of these alternatives provide useful functionality but not robust CPU and hardware emulation needed to run virtual machines without error. Nevertheless, they are community projects that will only benefit from use, bug reports, and more developers. If a commercial emulator is not an option, one of these may solve your virtual machine problems.
|
| < Day Day Up > |
|
EAN: 2147483647
Pages: 189