| Once you've selected the correct settings for your project, you can take a closer look at User Preferences, a collection of options that determine how you want to work with Final Cut Pro. These options cover editing choices like preferred pre-roll duration, the level of undos, Timeline options such as number of tracks you want to appear when you create a new sequence, and so on. User Preferences settings apply to all open projects. MORE INFO You can find a precise definition of each preference or setting in the Final Cut Pro 5 User Manual.
1. | Choose Final Cut Pro > User Preferences, or press Option-Q.
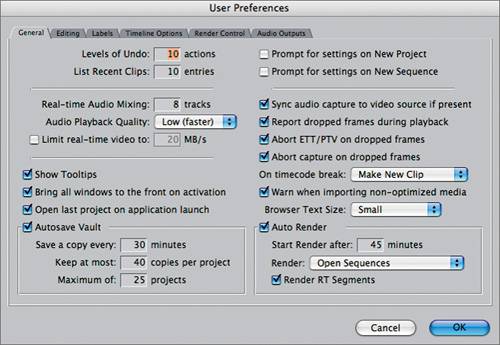
The User Preferences window has six tabs that detail specific preferences. The General tab is where you choose assorted preference settings and those for capturing. Many of these options are covered in detail throughout the book. Two that have not been covered are
- Autosaving Final Cut Pro will automatically save a backup of your project file as you work. You can choose how frequently a project will be saved, how many versions of the project will be saved, and the maximum number of projects saved. When the maximum number of versions is reached, Final Cut Pro moves the oldest version into the Trash before saving the current version.
- Auto Render With auto rendering enabled, Final Cut Pro will automatically render the current sequence in the Timeline or all open sequences, when left idle for a specified amount of time.
 | 2. | Click the Editing tab.
As you have seen before, this is where you set preferences for certain editing functions, such as multi-frame trim size and previewing pre-roll and post-roll.
| 3. | Click the Labels tab.
This is where you rename the color labels you apply to clips and bins. The colors themselves cannot be changed, only the label names.
| 4. | Click the Timeline Options tab.
Here you choose settings for all new sequences. You can determine a default number of tracks so that each new sequence you create has that track configuration, or choose drop frame or non-drop frame timecode to ensure every new sequence displays that mode. Any changes made here will not affect any existing sequences or how they are displayed in the Timeline.
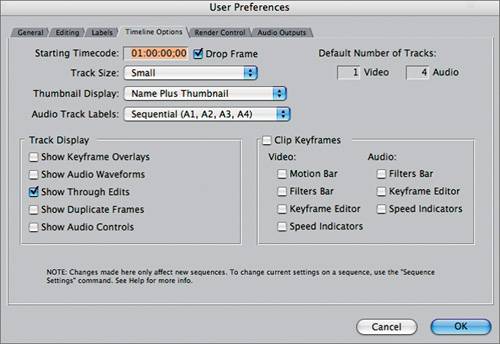 TIP To change Timeline settings for an existing sequence, choose Sequence > Settings and make adjustments in that window. | 5. | Click the Render Control tab.
This is where you enable or disable the most processor-intensive effects in Final Cut Pro.
| 6. | Click the Audio Outputs tab.
Here you can create custom Audio Output configurations. You can use these different settings when laying off various audio tracks to tape. For example, if your hardware supports it, you can create an Audio Output configuration that outputs up to 24 distinct tracks at one time.
| 7. | Click Cancel to leave the preferences unchanged.
|
NOTE To revert to the original Final Cut Pro preferences, quit the application, and find the Final Cut Pro 5 Preferences file in the Final Cut Pro User Data folder. Drag this file to the Trash, and relaunch FCP.
|