Now that you're familiar with the different preset titles and graphics in LiveType, you can build your own title. You begin building a title in the Inspector window. But first, you'll save your project to the Final Cut Pro Lessons folder.
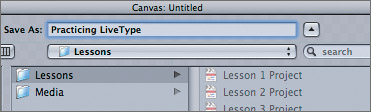
1. | Choose File > Save As, and name this project Practicing LiveType. Choose the Lessons folder as the destination, and click Save.
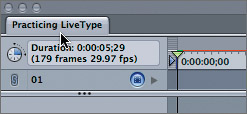
The project name appears at the top of the Canvas, Inspector, and Timeline windows. It is also displayed on the tab in the Timeline, similar to a sequence tab in Final Cut Pro.
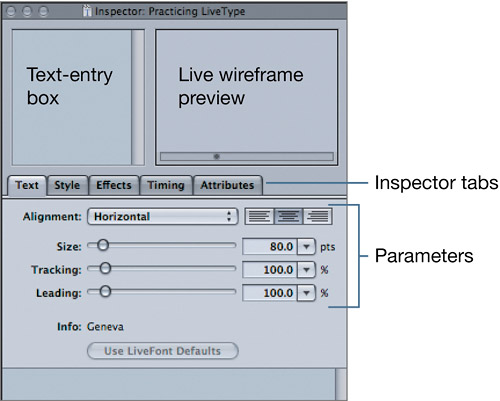
The Inspector window is made up of a text-entry box, a live wireframe preview area, Inspector tabs for choosing different categories of parameters, and the parameter area itself where you adjust values and settings for the elements in the Timeline.
|
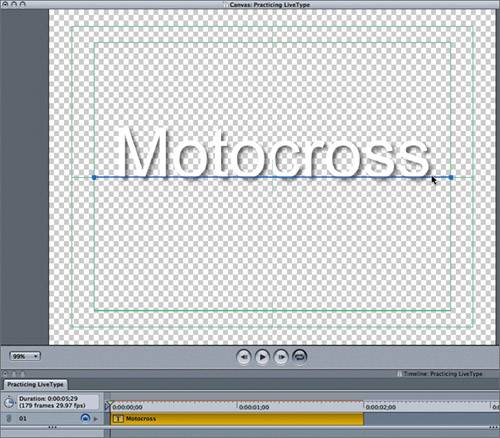
2. | Click the text-entry box in the upper left of the Inspector, and type Motocross.
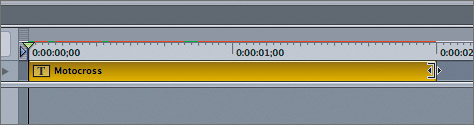
A new title element is automatically added to Track 1 of the Timeline.In the Canvas, the title has a dark blue line under it to show the title's position in the frame. There is a light green title/action safe overlay for reference.
NOTE Make sure the playhead is parked over the new clip in the Timeline to see the text in the Canvas. |
3. | In the Media Browser, click the Fonts tab, and choose Arial Regular as the Font. Click Apply.
 |
4. | Click the Text tab, and drag the Size slider to change the size to 100 points, or enter 100 in the numerical field.
NOTE If you can't see the name on the track in the Timeline, click the right side of the Timeline Zoom to bring the whole title bar into view. 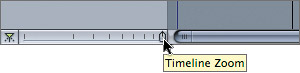
|
5. | In the Inspector, click the Style tab.
A drop shadow is added by default to your text object, as indicated by the Enable check box.
|
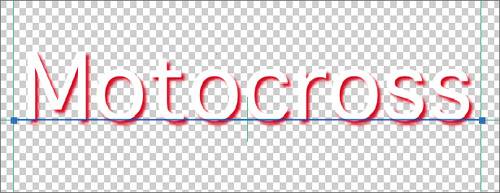
6. | Slide Opacity to 100%. Change the X and Y blur parameters to 3. Make the Offset 4 for both X and Y. From the color swatch, select a deep red, and press Tab.
NOTE When you toggle the small lock to the right of the entry fields to its locked status, any number you enter in one field will also appear in the other. |
7. | Click the Effects tab. Since you haven't added any effects to your title, this window is empty. You will come back to this tab later.
|
8. | Click the Timing tab. Notice that the duration says 2 seconds. In the Timeline, move your pointer over the right edge of the clip. The arrow turns into a resize tool.
|
9. | Click the edge of the clip and drag to resize your clip to 5 seconds. When you release the mouse, notice the duration change in the Inspector.
NOTE You could also simply type 5 in the Duration field of the Inspector and press Enter to change the duration. |
10. | Click the Attributes tab, and make sure the Glyph button is selected. Click the rotate wheel and drag in a circle a few times to sample different rotations. Enter 0 in the rotation and degree boxes to set them back to normal.
|
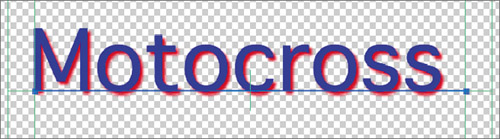
11. | Click the color swatch, and select a dark blue color. Press Tab, and close the color window by clicking the Close button in the upper-left corner.
|
12. | Press Cmd-S to save your project.
|