Drag-and-Drop Editing Basics
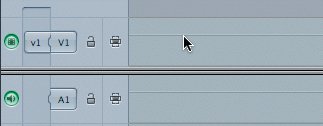
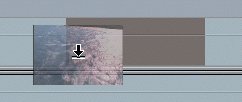
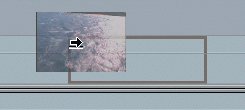
| Drag-and-drop editing is the process of dragging a clip from the Viewer directly to the Timeline. This type of editing creates the same result as any of the other approaches you used when making Overwrite or Insert edits. Drag-and-drop editing is fun and direct and opens the door to many other Timeline editing functions. Although this editing approach is not hard, you need to be aware of some of the automatic functions and responses so that you can control the process. You have already become familiar with selecting and moving clips in the Timeline. Before you start dragging clips directly to the Timeline, let's focus on a few important aspects of this editing process. Positioning the PointerAs you have seen, Final Cut Express has a position-sensitive mouse pointer. When it is positioned over certain parts of a clip in the Timeline, or in the Timeline itself, the pointer automatically changes to a different tool to help you with a particular editing option or Timeline adjustment. For example, when you positioned the pointer over the end of a clip earlier in this lesson, it changed to the left-right resize pointer so that you could select the edit point and not the whole clip. When you drag a clip to the Timeline, the position of your pointer will determine the type of edit you make, either Overwrite or Insert. Each Timeline audio and video track has a thin gray line running across the upper third of the empty track. This is the line you will focus on when making edits directly to the Timeline. Tip The key to dragging clips to the Timeline is to position the pointer correctly in the track.
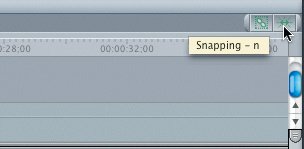
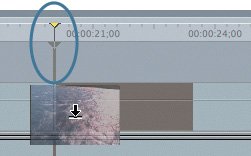
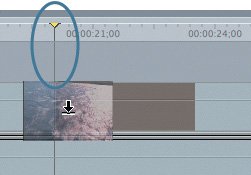
Snapping to the PlayheadWhen you made Overwrite and Insert edits in previous lessons, you always moved the playhead in the Timeline to where you wanted to place the new clip. This is not required in drag-and-drop editing. A new clip can be placed wherever you choose to release it, regardless of the playhead position. However, when you drag a clip to the Timeline, it will snap to the playhead when you move past it, as long as the snapping option is active. The Snapping control is located in the upper-right corner of the Timeline in the Timeline button bar. The snapping icon appears as left and right opposing arrows, indicating the magnetic interaction of clips in the Timeline. Note Each main Final Cut Express window has a button bar, which acts like a well that can hold several shortcut buttons. Customizing these button bars is covered in more detail in Lesson 11. Snapping can be toggled off or on during the editing process and even as you drag a clip or move the playhead. When snapping is active, the icon appears concave, or sunken looking, and the arrows are green. When snapping is inactive, the icon appears convex, and the arrows are gray. In order to fully observe all the aspects of drag-and-drop editing, follow the "don't release the mouse" suggestions in the following steps.
|

EAN: 2147483647
Pages: 174