Recapturing a Project
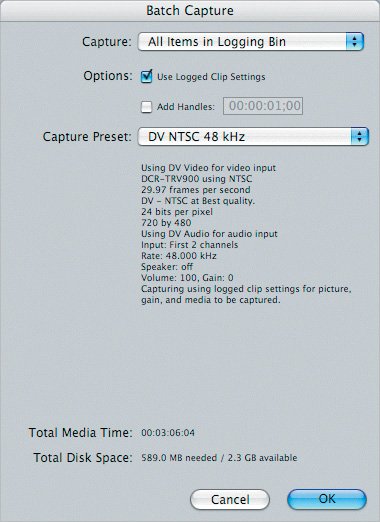
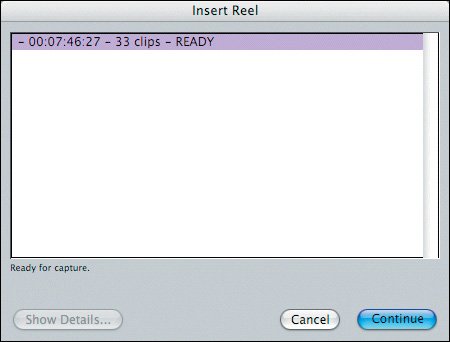
| You've finished editing a project, output a finished copy to tape, and exported a QuickTime movie of the sequence. The next step is the most important thing you can do to back up your hard work: save a copy of your project file somewhere safe. Once you've saved your project file, you can delete the media files to free up hard-drive space and allow room for another project. As soon as you delete the media files associated with a project, or even move them as you saw earlier in this lesson, the clips in the project will become offline. They will appear with a red diagonal line across them in the Browser and will be white clips in the Timeline. But the project file still retains all the information that was used when you originally captured the clips, all the Ins and Outs of the clips in the Timeline, all the filters used or effects created, and so on, even though the media is no longer available. If you ever need to re-edit the original project, you won't have to re-enter any logging information. You can simply open the project file and recapture the media files, using the existing clip information in the project. When you have a need to recapture a project's media files, you can use the following steps as a guide. Note This process will only work correctly if there are no time-code breaks on your tapes.
|
EAN: 2147483647
Pages: 174