| As you edit, you may find you need to add a narration to your sequence. This is also called a voice-over, because you have a voice over your picture, or video clips. To record a voice-over, you can use your camera, an iSight camera, or other audio recording device, such as a USB microphone or internal mic on a laptop computer. Recording an audio track this way creates a new clip directly in the Timeline. This process uses the Voice Over tool. 1. | If you are using an external mic, such as a camera, USB mic, or iSight camera, connect the device to your computer.
| 2. | Open the Voice Over sequence from the Sequences bin in the Browser and play it.
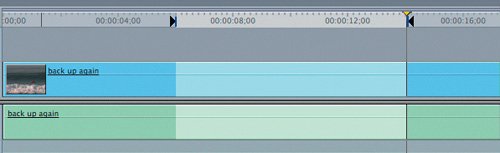
The only clip in this sequence is the back up again clip of Jimbo surfing. It's about 27 seconds long. You will begin recording a voice-over and describe his ride when Jimbo first stands up, as though you were reporting a news story.
| 3. | Move the playhead to where Jimbo first stands up on the surfboard and mark an In point. Then mark an Out point after he falls and gets back up again.
 The voice-over clip will begin recording at the In point and continue until the Out point. The voice-over clip will begin recording at the In point and continue until the Out point.
Note If no In or Out points are marked, the voice-over will begin recording at the playhead location and continue to the end of the sequence. | | | 4. | Choose Tools > Voice Over, or press Option-0, to open the Voice Over tool window.
If a warning appears saying, "No sound recording devices are available," make sure your microphone source is compatible, connected, and turned on.
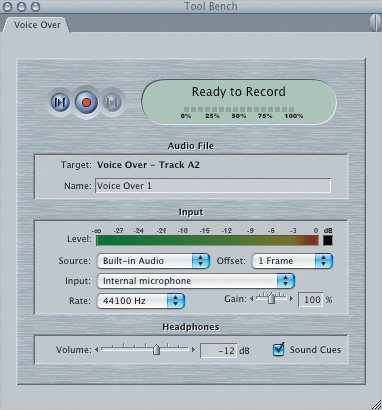
If Final Cut Express detects a microphone source, a Voice Over tab appears in the Tool Bench window. The Voice Over information is divided into four areas: Status, Audio File, Input, and Headphones.
 | | | 5. | In the Audio File area, type narrating surfer as the name for this voice-over track.
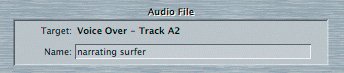 Note Look at the Target information above the Name area to make sure it reflects Track A2 in the Voice Over sequence. The Voice Over function records only one channel of mono audio. It does not record in stereo. It also does not require that you patch or disconnect any other source tracks. It automatically targets the next available track, or creates a new audio track if necessary. | 6. | In the Input area, select the correct source from the Source pop-up menu.
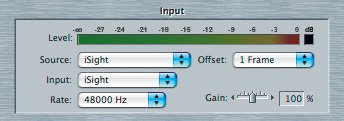 Final Cut Express will display a default Input configuration based on the audio recording device it detects or whatever device you selected. A recording offset amount and sampling rate are included as part of the default settings.
| 7. | If you are using headphones, play the sequence and start talking to set the headphone and gain levels in the Input area.
You may want to turn off the sound for the A1 rack by clicking the A1 Audible control.
 | | | 8. | If you're using headphones, click the Sound Cues box. If you're not using headphones, make sure it's not selected.
Selecting the Sound Cues box will include beeps to count you in and out of the recording. They beep the first three seconds of the five-second pre-roll and countdown before recording. There is another beep at 15 seconds before the recording ends. The beeps come in again on the last five seconds of the recording to count you down and out.
Tip If you're not using headphones and you have Sound Cues selected, the beeps will be picked up and recorded as part of your clip. Deselect the Sound Cues option and instead watch the Starting countdown in the Status area to see when recording begins and ends. | 9. | Look for Ready to Record in the Status area, and when you're ready to begin, click the red Record button.
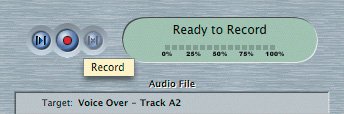 Note If Ready to Record does not appear, make sure your recording device is properly connected. In the Status area, you will see a message counting you down, beginning with Starting...5, 4, and on until 1. When this message changes to Recording, you can begin your voice-over narration. The red Record button becomes a square black Stop button when you are in record mode.
| 10. | The recording will end automatically if you let it continue to your Out point (or the end of the sequence). To stop before that point, click the square black Stop button, which toggles with the red Record button.
| | | 11. | Play the clip back in the Timeline.
You can stop recording and start again by clicking the Stop button and then clicking the Record button. Each time you record a new version, a new clip is placed in another track in the Timeline and is labeled with the next-highest Voice Over number or take.
Tip You can also click the Discard button to discard an unwanted track. This step cannot be undone. |
Project Tasks 1. | Turn the audio of the back up again clip back on and adjust the sound level so that the sound is heard but doesn't overpower the new voice-over track.
| 2. | Save the current project one last time by pressing Cmd-S.
| 3. | Quit Final Cut Express by pressing Cmd-Q, or close this project and continue with the next lesson.
|
|