Creating Clusters
| | ||
| | ||
| | ||
In order to add members to a cluster each member must be part of a repository ( file-based or database), and the members must be the same type (for example, J2EE, Portal and Wireless, or Business Intelligence and Forms). Once the members belong to the same farm, you can create a cluster.
Creating a Cluster Instance
Currently, there are four instances in the farm (three mid tiers and one infrastructure), but no clusters are defined. Before adding mid- tier instances to a cluster, you must first create the cluster itself. From the infrastructure Farm page, click the Create Cluster button, as shown in Figure 21-18.

Figure 21-18: Selecting the Create Cluster button
After clicking the Create Cluster button, you're presented with a prompt to name the cluster, as shown in Figure 21-19.
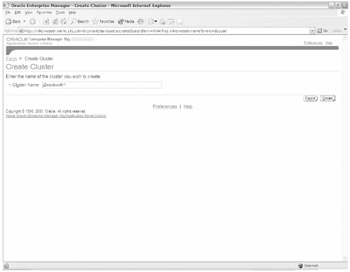
Figure 21-19: Create Cluster name page
In this case you'll name the cluster j2eedevcltr1 and click Create.
After a few seconds, the j2eedevcltr1 is created. The status of the cluster is down on the infrastructure Farm page and it cannot be started until members are added.
Adding Members to a Cluster
You've created the basic cluster definition, but it's necessary to add members to the cluster. However, be careful when adding members to the cluster because the applications deployed to the first cluster member and its configuration settings become the default setup for each new member of the cluster. If subsequent members are added to the cluster, the settings of the first member will overwrite the configuration of the new members. Therefore, it's easiest to initially configure your first cluster instance in the way you want it to act as the template for all other members of the cluster.
-
To add a mid-tier instance to the new cluster, select the instance with the radio button and click the Join Cluster button, as shown in Figure 21-20.
The first farm instance to join the j2eedevcltr1 cluster will be 904mt1 .
-
A warning page appears alerting you to the fact that joining the cluster will overwrite the configuration settings of the mid-tier instance unless it's the first instance to join the cluster. This is shown in Figure 21-21.
-
You'll want to join the cluster with 904mt1 as the default, with its webdev OC4J instance and demo applications. Click Join to join the cluster.
After a minute the 904mt1 joins the cluster.
-
The next step is to add the 904mt2 member to the cluster. To do so, click the Join Cluster button from the infrastructure instance page, as shown in Figure 21-22.
-
Once again the warning page will appear. Ignore it because you want the configuration of 904mt1 to override the settings of 904mt2 .
-
After the second instance has been added to the cluster, start the cluster from the infrastructure Farm page. Do this by clicking the Start button in the Clusters section.

Figure 21-20: Join Cluster button for 904mt1
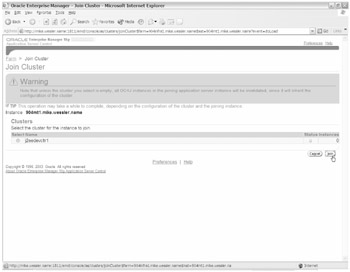
Figure 21-21: Join Cluster warning
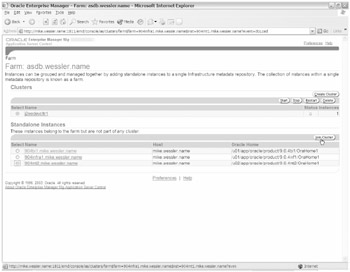
Figure 21-22: Join Cluster button 904mt2
At this point there should now be a two instance J2EE cluster with both instances configured as 904mt1 .
| Note | In some cases during testing an individual component such as Oracle HTTP Server (OHS) would not start up in time and therefore an error message would occur and the entire cluster would appear down. We found that manually starting the individual component using dcmctl start -co HTTP_Server after the failure and refreshing the page remedied the problem. |
Clicking the cluster link j2eedevcltr1 will bring up a cluster member status and management page on which individual members can be stopped , started, restarted, and removed, and new members can be added. Clicking the individual instance link opens the ASC page for that member. This page is shown in Figure 21-23.
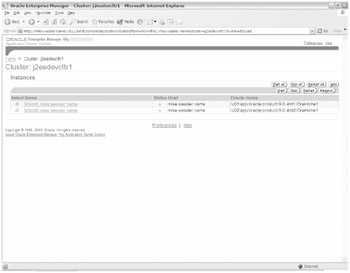
Figure 21-23: Cluster status and management page
In Figure 21-23 you can see that there are two members of the j2eedevcltr1 cluster: 904mt1 and 904mt2 . Both have a status of up and can be individually stopped and started or accessed with the ASC as normal. When accessing the ASC for the individual cluster members, the ias_admin account and password used is the one for that member, not the infrastructure.
Configuring Web Cache
Now that the cluster has two instances and is running, you must establish access to that cluster. Either instance could be accessed directly via the OHS port by using the individual URLs, but that defeats the purposes of clustering. It's far better to have a network load balancer or WC placed in front of the clustered members in order to receive incoming requests and pass them to the individual clustered members.
To set up WC for the new cluster, you need a new WC server that isn't a member of the cluster. To provide the WC software, you'll use a Business Intelligence WC that was already installed in the infrastructure. Any nonclustered WC software could have been used. If you're unfamiliar with WC or its setup and administration, read Chapter 19 for background and details.
In the following procedure, we show you how to start up WC and add the two clustered origin server members 904mt1 and 904mt2 .
-
Start the WC software. Since you want to be able to access the cluster sites on port 80, you set the setuid so that oracle can start the WC software using the webcache_setuser.sh script.
-
Within Web Cache Manager, you must first establish each cluster member as origin servers.
-
Navigate to the Origin Servers page.
-
Click Add to bring up the Add Application Web Server page, as shown in Figure 21-24.
-
Enter the appropriate information for 904mt1 . The hostname will remain mike.wessler.name and you know from $ORACLE_HOME/install/portlist.ini that the HTTP listening port is 7777 . Since you'll have two origin servers (you can later remove the existing default origin server), set the capacity to be 50 (50 percent). The Failover Threshold setting refers to the number of failed ping requests before the node is considered down; you'll set that to be 3 (instead of the default of 5) and they will occur at a ping interval of every 10 seconds.
-
Click Submit to add this origin server.
-
Add another origin server for 904mt2 with identical specifications as you added previously except set the HTTP listening port to be 7782 .

Figure 21-24: Add Application Web Server page
The end result is shown in Figure 21-25.
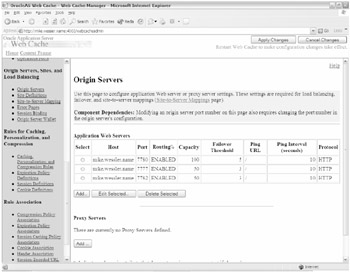
Figure 21-25: Origin Servers for cluster page
At this time, it's not possible to remove the original, default origin server for the WC instance because it's still part of the Site-to-Server Mapping. For this procedure, removing it isn't necessary.
You'll need to add a site definition for the requests coming into the WC. You'll call it j2eedevcltr1.name and have it listen on port 80. This entry will need to be added to DNS to resolve from the browser to the server.
In the following procedure, we show you how to add a site definition for j2eedevcltr1.name and have WC listen on port 80.
-
Open the Site Definitions page.
-
Click Add Site and enter j2eedevcltr1.name , as shown in Figure 21-26.
Now you've named the listening site j2eedevcltr1.name , set it to listen on port 80, specified that it will be the default site, and added a www.j2eedevcltr1.name alias. After adding this information, click Submit.
The Site Definitions page now appears, as shown in Figure 21-27.
-
The next step is to configure WC to listen on port 80. Even though you defined j2eedevcltr1.name for port 80, the WC listener doesn't yet know to listen on that port.
-
Navigate to the Listen Ports page under the Ports section of Web Cache Manager.
-
Click the Add button to add an entry.
The Add page is shown in Figure 21-28.
There's only one WC server, so accept the default setting in the For Cache drop-down box. From the /etc/ hosts file on the WC node, you know the IP address is 192.168.1.11 so enter that information. You only want to listen on port 80 for HTTP traffic.
-
Click Submit to make these changes.
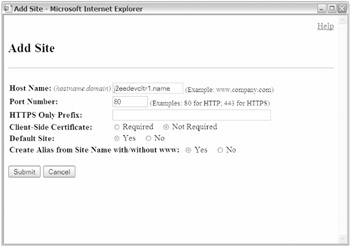
Figure 21-26: Add Site definition for j2eedevcltr1.name
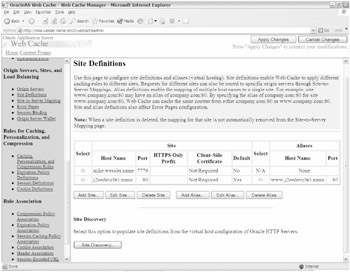
Figure 21-27: Site Definitions page for j2eedevcltr1.name
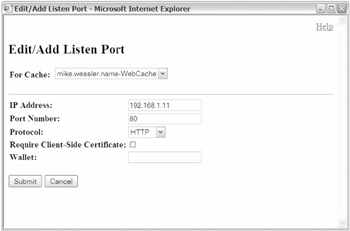
Figure 21-28: Edit/Add Listen Port page
The WC server will now be configured to listen on both port 80 and whatever port it was originally configured to listen on (in our case, port 7779).
The final configuration requirement is to establish site-to-server mappings so that when a request comes to http://j2eedevcltr1.name it will be routed to one of the two cluster member origin servers.
The steps to associate the site http://j2eedevcltr1.name to the two members of the cluster ( 904mt1 and 904mt2 ) are shown in the following steps.
-
Open the Site-to-Server Mappings page.
-
Highlight the first Priority 1 mapping and click Insert Above.
This brings up the Edit/Add Site-to-Server Mapping page, as shown in Figure 21-29.
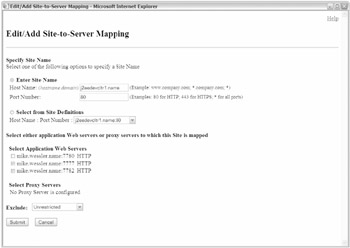
Figure 21-29: Edit/Add Site-to-Server Mapping page for j2eedevcltr1.name
In Figure 21-29 we specified the site to be j2eedevcltr1.name , which is listening on port 80 in both the Enter Site Name selection fields and (for demonstration purposes) the Select from Site Definitions drop-down box.
-
The next selection is key because it determines what origin servers will be associated with the j2eedevcltr1.name mapping. In this example you'll select the two cluster members listening on ports 7777 ( 904mt1 ) and 7782 ( 904mt2 ).
-
Don't select any proxy servers and set the Exclude section to Unrestricted. Then click Submit.
The final configuration for Site-to-Server Mapping is shown in Figure 21-30.
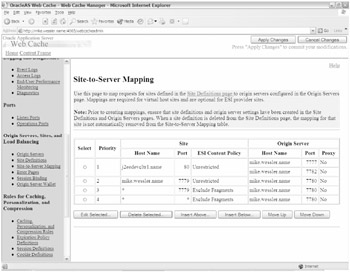
Figure 21-30: Site-to-Server Mapping page for j2eedevcltr1.name
You now have the following mapping in place: client to WC ( j2eedevcltr1.name 80) to cluster members 904mt1 and 904mt2 ( mike.wessler.name 7777 and 7782).
Based on the Origin Server settings page, each of these members is allocated 50 percent of the cache misses unless one of them is down (fails three ping requests at ten-second intervals). In a failure case such as this, the surviving cluster member will receive 100 percent of all cache misses.
The final requirement is to apply these new configuration changes and restart WC so that they are implemented as shown in the following procedure.
-
Click the Apply Changes button at the top right of the Web Cache Manager page to save the configuration changes.
-
Finally, click the Restart button on the Cache Operations page to restart WC so the changes take effect.
-
At this point, WC and the two instance clusters are now set up and running! To test this configuration, enter http://j2eedevcltr1.name/j2ee/servlet/HelloWorldServlet , which will direct you to the j2eedevcltr1.name WC site.
After clicking the preceding link several times in order to generate some statistics, you'll see that the WC server is load balancing requests between the cluster members, as shown in Figure 21-31.

Figure 21-31: Health Monitor page
The HelloWorldServlet isn't cacheable and therefore will be a cache miss . WC routs it to the clustered origin servers based on the rules established earlier. Each origin server should be 50 percent of the cache misses and you can see from the previous figure that this is working. The proof is that of 13 requests for HelloWorldServlet , 7 have gone to mike.wessler.name:7777 ( 904mt1 ) and 6 have gone to mike.wessler.name:7782 ( 904mt2 ).
Based on this evidence, you can say that the two-instance J2EE cluster and the WC server are working.
| | ||
| | ||
| | ||
EAN: 2147483647
Pages: 150