Lab 3A: Making Room for a Navigation Bar
In this lab session, you start with a plain-looking presentation and modify its Slide Master to make room for a menu system on the left side of the slide.
This lab session includes some cleanup work on a "messy" PowerPoint file that is missing a layout needed for some of the slides. This session simulates the type of cleanup situations you might run into in everyday work on older presentation files.
Level of difficulty: Moderate
Time to complete: 15 to 30 minutes
-
Open the file
 Lab03A.pptx from the Labs folder (from the CD accompanying the book) and save it as
  MyLab03A.pptx.
 -
Display the Slide Master. On the View tab, click Slide Master.

-
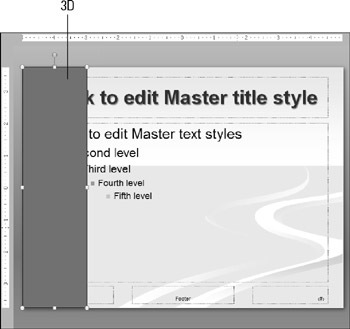
On the top-level Slide Master, draw a rectangle that covers the entire slide vertically and stops at the 3″ mark on the ruler.
-
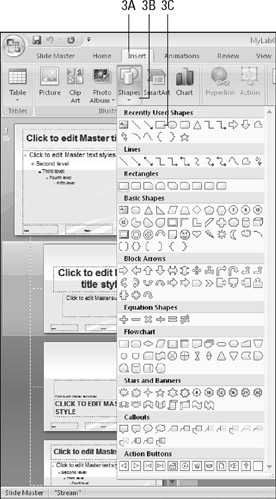
Click the Insert tab.
-
Click Shapes.
-
Click a rectangle.
-
Draw a rectangle that covers 2″ at the left of the slide.
-
-
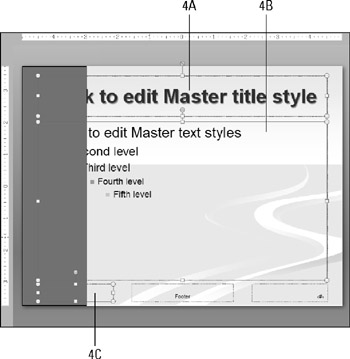
Bring the text boxes to the front so that the rectangle overlaps.
-
Click the Title placeholder box.
-
Hold down the Shift key and click the Content placeholder box.
-
Hold down the Shift key and click the Date placeholder box.
-
Click the Drawing Tools Format tab.
-
Click Bring to Front.

-
-
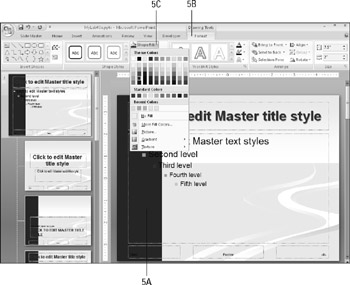
Change the color of the rectangle to a dark blue shade from the second column of the color palette.
-
Select the rectangle.
-
On the Drawing Tools Format tab, click Shape Fill.
-
Click the second square from the bottom in the second column in the Theme Colors section.
-
-
Move the left borders of the title and content placeholder boxes to the right so that they do not overlap the rectangle.
-
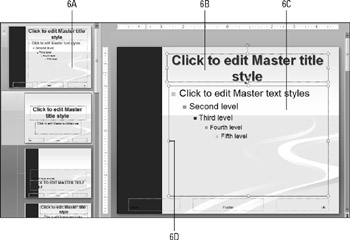
Select the main Slide Master (top slide).
-
Click the title placeholder.
-
Hold down the Shift key and click the content placeholder.
-
Drag the left border of the content placeholder to align with the 3¼″ mark on the horizontal ruler.
-
-
Repeat step 6 for the individual slide layouts that were not affected by step 6.
-
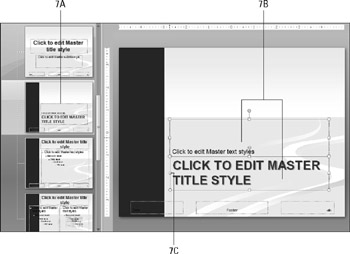
Select the Section Header Layout master (the second slide layout in the list).
-
Select the title and text placeholders.
-
Drag the left border to the right to the 3¼″ mark on the horizontal ruler.
-
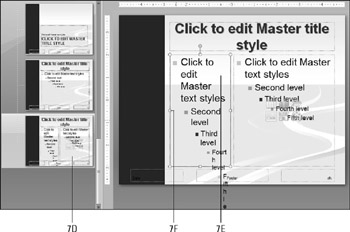
Select the Title, Text, and Content layout (bottom slide layout).
-
Select the left content placeholder.
-
Drag the left border to the right to the 3¼″ mark on the horizontal ruler.
-
-
Exit from Slide Master view and clean up the presentation so that all slides use valid layouts and no content overflows or overlaps.
-
Click Close Master View.

-
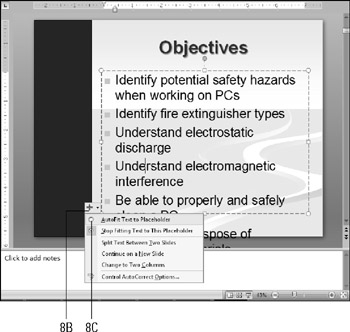
On slide #2, click inside the text box and then click the AutoFit Options button.
-
Click AutoFit Text to Placeholder.
-
Select slides 4 and 5.
-
On the Home tab, click Layout.
-
Click Title and Text.
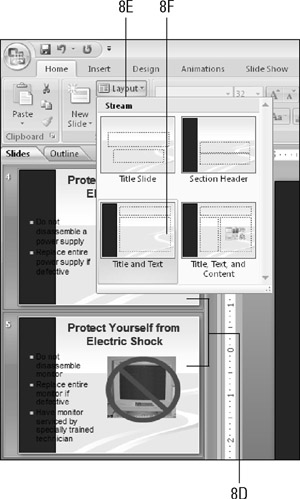
-
Resize and reposition the graphics so that they do not overlap with the text.
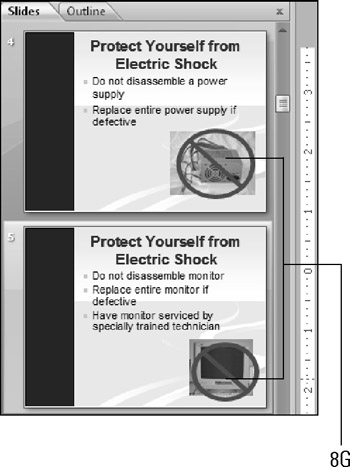
-
Repeat steps 8e through 8g for slides 11, 21, 23, 25, 27, and 29, and repeat steps 8b and 8c for slide 22.
Note Slide #25 has an unusual layout. Only the first bullet is in a placeholder box; the other one is in a manual text box. Adjust as needed.
-
-
Save your work.
EAN: 2147483647
Pages: 268