Lab 3B: Creating a Navigation Bar
In this lab session, you start with a presentation that has an area cleared for a navigation bar (from Lab 3A) and you create hyperlinks on the Slide Master that link to the section titles within the presentation.
Level of difficulty: Moderate
Time to complete: 15 to 20 minutes
-
Open the presentation file if it is not already open. Start in your completed file from the previous project (MyLab3A.pptx), or open Lab3B.pptx from the Labs folder if you did not do the previous lab.
-
Save the file as MyLab3B.pptx.
-
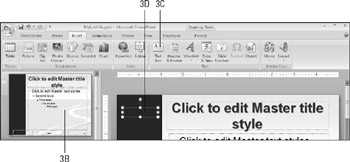
Display the Slide Master and create a text box on top of the blue rectangle.
-
On the View tab, click Slide Master.

-
Click the top-level slide master.
-
On the Insert tab, click Text Box.
-
Drag to create a text box near the top of the blue rectangle.
-
-
Type the names of the section titles in white, from the presentation into the new text box.
-
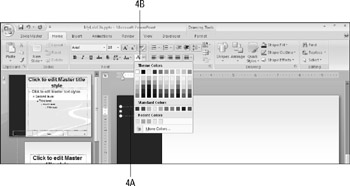
Click in the new text box.
If the insertion point does not appear, right-click the text box and choose Edit Text to make it appear there.
-
On the Home tab, open the Font Color list and click the white square in the Theme Colors section.
-
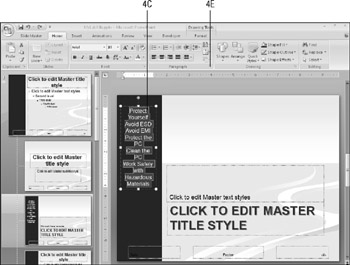
Type the following list into the text box:
-
Protect Yourself
-
Avoid ESD
-
Avoid EMI
-
Protect the PC
-
Clean the PC
-
Work Safely with Hazardous Materials
-
-
With the insertion point inside the text box, press Ctrl+A to select all of the text in it.
-
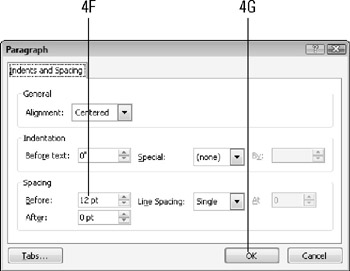
Click the dialog box launcher in the Paragraph group on the Home tab. The Paragraph dialog box appears.
-
In the Spacing section, set the Before value to 12 pt.
-
Click OK.
-
-
Hyperlink each of the paragraphs you just typed to the corresponding slide.
-
In the text box, select Protect Yourself.
-
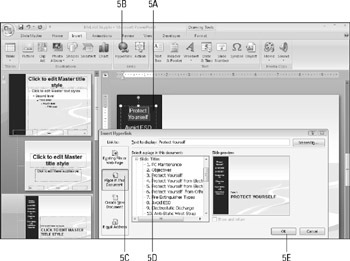
On the Insert tab, click Hyperlink. The Insert Hyperlink dialog box appears.
-
Click Place in This Document.
-
On the Slide Titles list, click Protect Yourself (slide #3).
-
Click OK.
-
Repeat steps 5a through 5e for each of the other section title slides:
-
Avoid ESD: Slide #8
-
Avoid EMI: Slide #13
-
Protect the PC: Slide #16
-
Clean the PC: Slide #19
-
Work Safely with Hazardous Materials: Slide #28
-
-
-
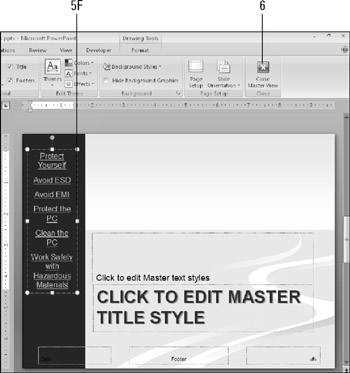
Exit from Slide Master view. On the Slide Master tab, click Close Master View.
-
Try out the presentation in Slide Show view and click each of the links to make sure they work.
-
Save your work.
EAN: 2147483647
Pages: 268