Working with Development Studio Client Version 4.0
You are going to link index.html to a cascading style sheet. The style sheet used in this application is a sample included in the workbench. You will change the heading of the page, add your own logo, and then add some moving text. The first step, however, is to locate the index.html file and open it in Page Designer.
You need to open the Web perspective to find the right dialogs for the task. You then need to copy and paste the index.html file that you work with. This is necessary because Page Designer will remove one line of source from the file (because it assumes that the line is incorrect). Unfortunately, WebFacing needs this line, so after you finish with Page Designer, you will copy this line from your backup copy and add it to the updated index.html. If you do not do this, the links on this page will not work anymore.
After making the backup copy, you are ready to use the index.html file with Page Designer.
Switching to the Navigator View
In the Development Studio Client workbench, open the Web perspective:
-
Select the Perspective option on the workbench menu.
-
Select the Open option on the pull-down menu.
-
Select the Other option from the submenu, as shown in Figure 13.38.
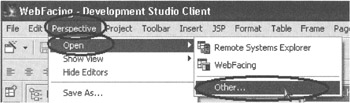
Figure 13.38: Opening the Web perspective
On the Select Perspective dialog, as shown in Figure 13.39,
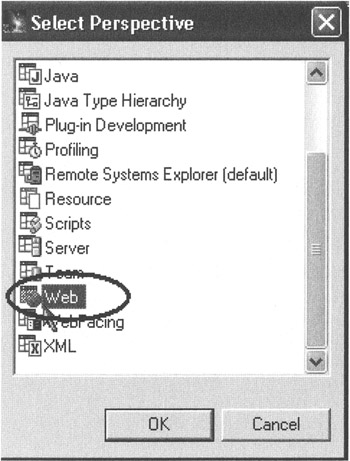
Figure 13.39: Select Perspective dialog
-
Select Web from the list of available perspectives.
-
Click the OK push button.
You should now have the Web perspective open in your workbench with the Navigator view open. You will use this view to locate and then work with the index.html file.
-
Expand the wflabxx project.
-
Expand the webApplication folder.
-
Locate the index.html file in this folder.
As mentioned before, you are making a backup copy of this file:
-
Right-click the index.html icon.
-
Select Copy from the pop-up menu, as shown in Figure 13.40.
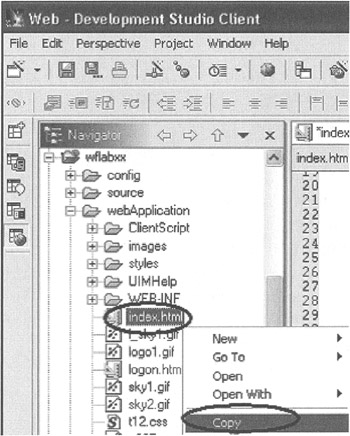
Figure 13.40: Selecting the Copy action
The Folder Selection dialog displays (Figure 13.41).
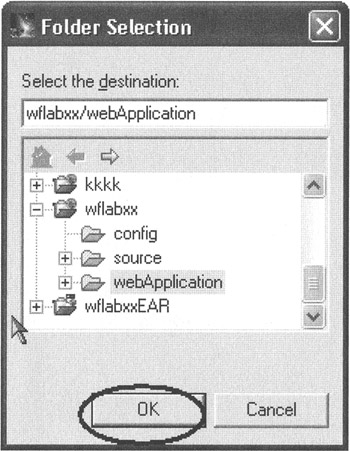
Figure 13.41: Folder Selection dialog
-
Click the OK button on the Folder Selection dialog.
A file with the name Copy of index.html will be created. You will use this file later to copy a line and add it to the original file.
The next step is to examine the index.html page and change it using Page Designer.
Starting Page Designer
Page Designer is comparable to SDA for 5250 panels or GUI windows for GUI pages, but, as its name indicates, it helps with designing Web pages. As in SDA or CODE Designer, you need not type source statements in an editor, because Page Designer creates the source for you from your design choices. Here, the generated source consists of HTML tags instead of DDS statements.
To open Page Designer,
-
Double-click the index.html file.
Page Designer opens on the right side of the workbench.
This is where you can enhance the Web page. You are ready to use Page Designer. You will notice three tabs at the bottom of the Page Designer work area (see Figure 13.42). These tabs allow you to switch between different views.
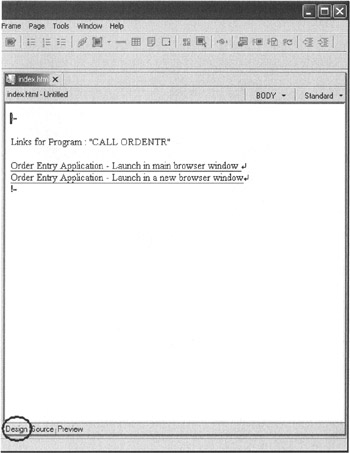
Figure 13.42: Page Designer with three tabs, one of them the Design tab
These views are
-
The normal Design view
-
An HTML Source editor view
-
A Preview view, which shows the page in its current state in a browser window
Make sure you are on the design page by
-
Clicking the Design tab, as shown in Figure 13.43.
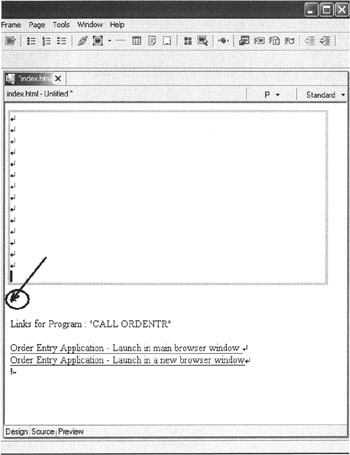
Figure 13.43: Adding blank space to the Web page
Working with Page Properties
-
Move the labels down by clicking before the first tag, which displays as an exclamation mark.
-
Press the Return key a number of times.
-
Right-click the background of the design work area.
-
Select Page Properties from the pop-up menu.
The Attributes dialog (Figure 13.44) opens.
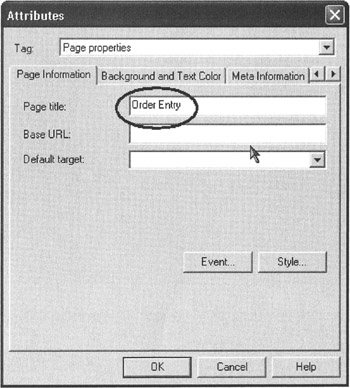
Figure 13.44: Changing the text for the Web page
-
Change the text in the Page title field to Order Entry.
-
Click the OK push button to close the Attributes dialog box.
The page now has a title. Now you will give this page more color , by adding a background and specifying attribute definitions for text and links. This is accomplished by linking this page to a style sheet.
Linking a Cascading Style Sheet to the Web Page
Now you will add a style sheet to the Web page. You can use a style sheet employed by your company or you can use one of the sample style sheets provided with Development Studio Client.
In the lower right pane in the workbench,
-
Click the Thumbnail tab.
At the left bottom pane in the workbench,
-
Click the Gallery tab.
-
Scroll to the bottom of the Gallery view until you can see the Style Sheet icon.
-
Click the Style Sheet icon to select it.
You should see thumbnail icons of all the styles available as shown in Figure 13.45.
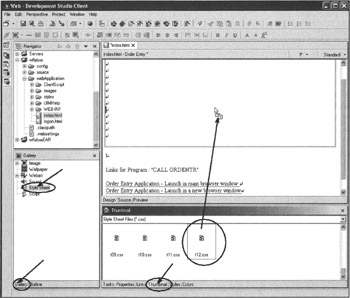
Figure 13.45: Linking a style to the Web page
In the thumbnail view,
-
Scroll to the bottom of the view until you see style sheet t12.css in the list (or select another style sheet that you like best).
-
Click the thumbnail picture of t12.css with your left mouse button.
-

 Keep the left mouse button down and drag the mouse cursor to the Page Designer window. The cursor will change from the circular shape shown in the margin to the shape shown immediately below it. When the latter cursor shape appears in the Page Designer window, let go of the left mouse button.
After a short while, the style sheet properties are applied and the colors in the page change to the style sheet definitions, as shown in Figure 13.46.
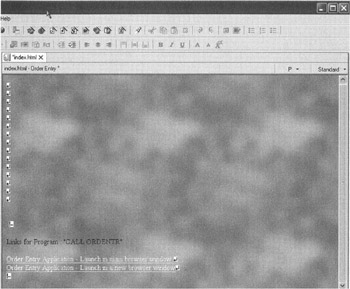
Figure 13.46: index.html page with style properties
Adding a Logo to the Page using the Logo Wizard
Now you will add a Logo using the Logo Wizard, provided with Development Studio Client.
-
Click the first line break tag in the upper left corner of the design page, to position the cursor at the target location for the logo.
-
Select Insert ’ Logo from the workbench main menu bar (Figure 13.47).
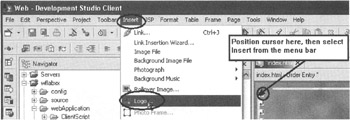
Figure 13.47: Starting Logo Wizard from Insert menu
The Create Logo dialog opens.
In the Text field on top of the wizard page,
-
Type your company name (in my sample, IBM), as shown in Figure 13.48.
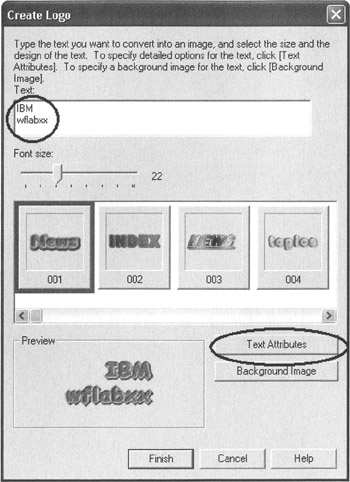
Figure 13.48: Adding text for the logo -
Type wflabxx.
-
Click the Text Attributes push button on the Create Logo page.
The first of four text attribute pages appears (Figure 13.49).
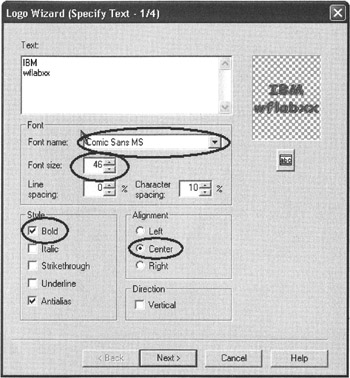
Figure 13.49: Logo Wizard Specify Text page
-
Select Comic Sans MS in the Font name combination box.
-
Select 46 in the Font size combination box.
-
Select the Bold check box.
-
Select the Center radio button.
-
Click the Next push button.
The Select Color page displays (Figure 13.50).
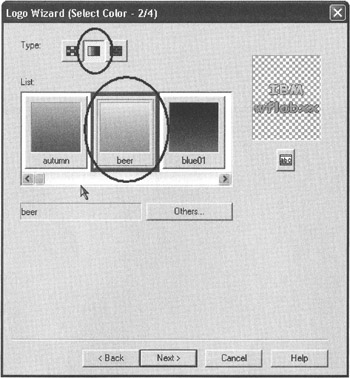
Figure 13.50: Logo Wizard Select Color page
-
For Type select gradation by clicking its push button (the middle of the three Type push buttons ).
-
Click the color beer push button. (Maybe I am influenced by my German background, but I think beer is a really nice color combination. The liquid stuff is not bad either.)
-
Click the Next push button.
The Select Outline page appears, as shown in Figure 13.51:
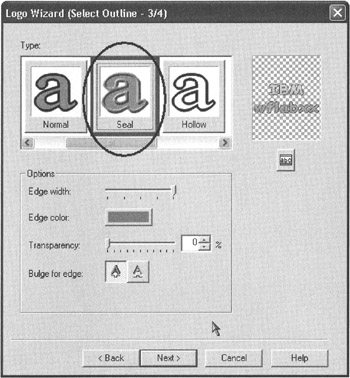
Figure 13.51: Logo Wizard Select Outline page
-
Click the Seal push button from the Type list.
-
Click the Next push button.
The Select Text Effect page appears, as shown in Figure 13.52.
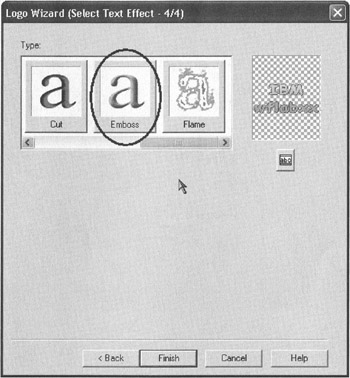
Figure 13.52: Logo Wizard Select Text Effect page
-
Click the Emboss Type push button.
-
Click the Finish push button.
You are back in the Create Logo page. If you like, you might want to select an attractive background for your logo by using the Background Image push button. I will let you discover this feature on your own.
On the Create Logo page,
-
Click the Finish push button (Figure 13.53).
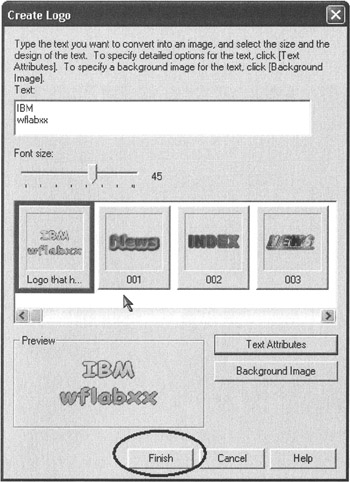
Figure 13.53: Create Logo wizard, ready to Finish
Back in Page Designer, the logo will appear. It will be a bit big, so I want you to resize it:
-
Click the logo.
-
Locate the little square on its right bottom corner.
-
Move the cursor on top of it so that the cursor changes shape to two arrows.
-
Click the rectangle.
-
Drag the rectangle toward the upper left corner to shrink it.
Figure 13.54 gives you an indication of how small it should be, but it does not matter if it is not exactly the way I sized it in the picture. As long as you like your logo and its size, you are doing just fine.
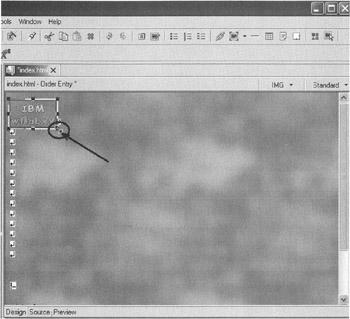
Figure 13.54: Resizing the logo in Page Designer
You are finished with the logo design, but some more work needs to be done.
Adding a Heading 1 Tag to the Page
Now I want you to insert an attractive heading below the logo:
-
Position the cursor just below the logo at the first line break tag as shown in Figure 13.55.
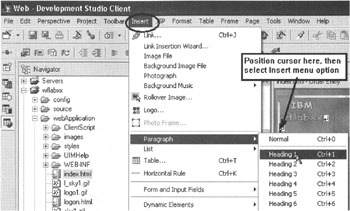
Figure 13.55: Menu structure to insert a Heading 1 tag -
Select Insert from the workbench menu bar.
-
Select Paragraph from the pop-up menu
-
Select Heading 1 from the submenu.
A frame appears where you can enter text:
-
Enter your company name Order Entry Application, as shown in Figure 13.56.
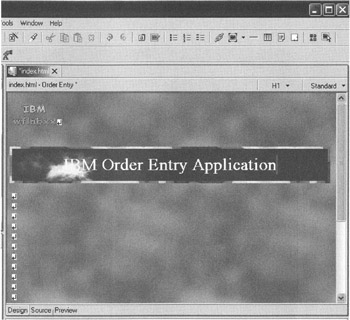
Figure 13.56: Web page with logo and title
Now I want you to further enhance this page by inserting one of the sample pictures that come with Development Studio Client.
Adding a Picture to the Page
In the workbench underneath the Navigator view,
-
Select the Gallery tab.
-
Expand the Image folder.
-
Select the Illustration folder.
On the dialog pane beside the Gallery view,
-
Click the Thumbnail tab to show the selection of illustrations available.
-
Select one of the sample illustrations, as shown in Figure 13.57. (I use file u005cut.gif.)
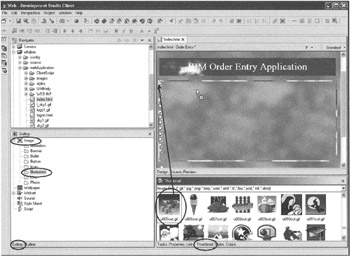
Figure 13.57: Dragging a picture onto the design page -
Drag that picture onto the design window to a position below the heading.
The design window now contains a picture, as shown in Figure 13.58.
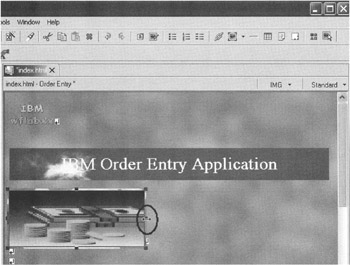
Figure 13.58: Design window with picture added
You might want to resize the picture to fill more of the page.
You are almost finished. You just need to add some moving text to the page.
Adding Moving Text to the Page
-
Position the cursor in the design window underneath the picture.
-
Select Insert from the workbench menu bar.
-
Select Paragraph from the pull-down menu.
-
Select Heading 3 from the submenu.
A Heading 3 frame is created on the design page, as shown in Figure 13.59.
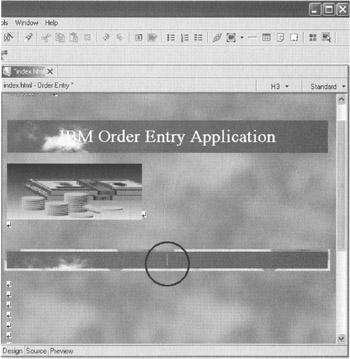
Figure 13.59: Web page with Heading 3 frame
Leave the cursor positioned inside the Heading 3 frame.
-
Select Insert from the workbench menu bar.
-
Select Others from the pull-down menu.
-
Select Marquee from the submenu, as shown in Figure 13.60.
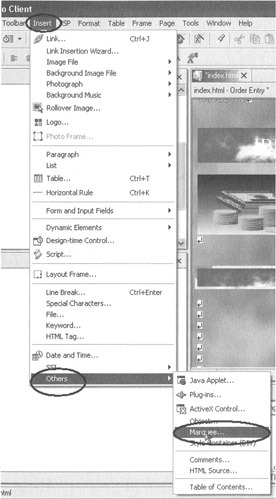
Figure 13.60: Selection of the Marquee option
The Attributes dialog displays, as shown in Figure 13.61.
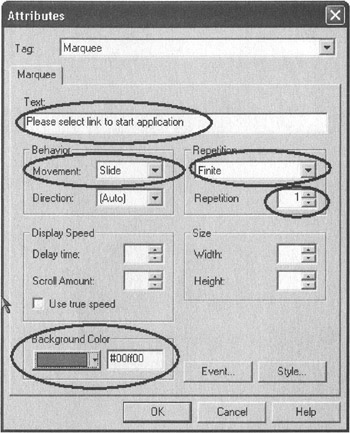
Figure 13.61: Attributes dialog
-
Enter the following in the Text entry field: Please select link to start application.
-
Select Slide in the Movement combination box.
-
Select Finite in the Repetition combination box.
-
Select 1 in the Repetition combination box.
Those two last selections just specify that the text is not to slide indefinitely. If you think your user would prefer some more movement on the page, feel free to change these settings.
-
Select a green color in the Background Color combination box.
-
Click the OK push button.
The design page should look like Figure 13.62.
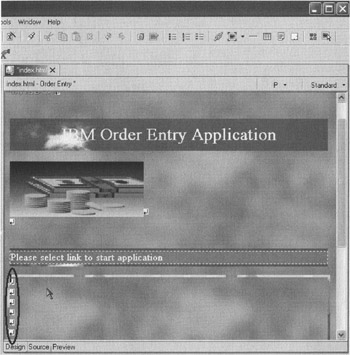
Figure 13.62: Design page with Header 3 text
To save some space, remove some of the line break tags:
-
Position the cursor on the line break tags, as shown in Figure 13.25.
-
Press the Delete key until the links appear on your page as shown in Figure 13.63.
Figure 13.63: Page designer design page with completed page
To see the page as it would appear in a browser,
-
Click the Preview tab at the bottom of the design page.
You will notice that your Heading 3 text is sliding (see Figure 13.64).
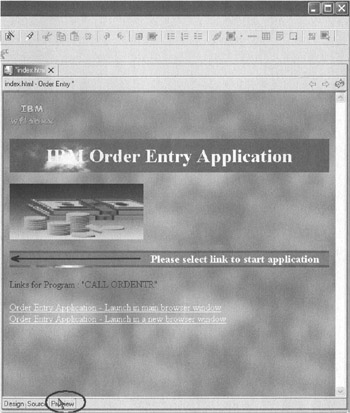
Figure 13.64: Web page shown in browser, with text moving
Changing the Text Color in Page Designer
You might notice that the text color in the Heading 1 area and the background color interfere a little bit with each other. One easy way to change this problem is to apply another color to certain areas of the text. To complete that task, go back to the design page:
-
Click the Design tab.
-
Select the text ( IBM in Figure 13.65) you want to change by swiping the area with the mouse cursor.

Figure 13.65: Selecting color for selected text area
On the bottom dialog underneath the Page Designer window,
-
Select the Colors tab.
-
Select a color with your mouse cursor from the color palette.
-
Select the Text Color option from the Colors dialog menu bar.
-
Select the Text Color option from the pull-down menu.
Except for a bit of clean-up, you are finished; now the selected text displays with the color you selected.
Cleaning up the Page
One more thing you need to do is remove the default text added by the WebFacing Tool, as shown in Figure 13.66.
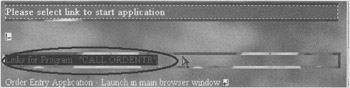
Figure 13.66: Text to be deleted from Web page
-
Select the text.
-
Press the Delete key.
-
Select the Preview tab to view your completed page; it should look like Figure 13.67.
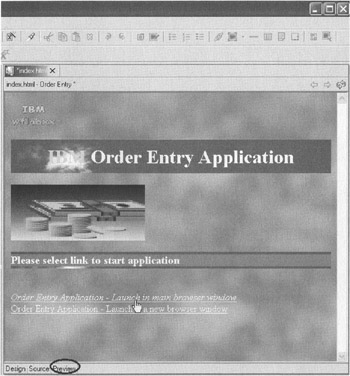
Figure 13.67: Completed Web page in Preview window -
Save the index.html file.
You are almost ready to run the application again. As I mentioned in the beginning of this section, Page Designer deletes one line from the HTML source, which it assumes is incorrect, even though it is actually needed on the page. Version 5.0 of Page Designer fixed this problem, but I will show you how to fix it for Version 4.0.
In the Navigator view, you need to open Page Designer with the backup copy of the index.html file:
-
Double-click the Copy of index.html file (Figure 13.68).
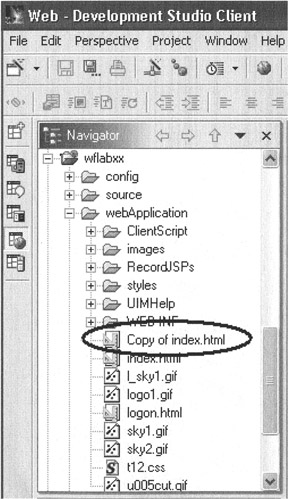
Figure 13.68: Loading file Copy of index.html
Another Page Designer session opens for the Copy of index.html file. In this new Page Designer session,
-
Click the Source tab.
In the source editor, as shown in Figure 13.69,
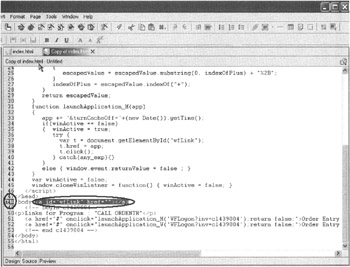
Figure 13.69: Editor with source of Copy of index.html
-
Scroll down to near the bottom.
Around line 47 you will see a line with a warning icon:
-
Select the <a id=?wfLink? href=? ?> </a> string, beside the body tag, as shown in Figure 13.32.
-
Right-click the selected text.
-
Select Copy from the pop-up menu.
Page Designer should still be open with the index.html file. If not, you need to open it:
-
Click the Page Designer window bar of the open index.html file, to give it focus.
-
Click the Source tab, to switch to the source editor window.
In the source editor window of the index.html file,
-
Locate the line with the <body> tag.
-
Position the cursor behind the <body> tag, as indicated by the arrow in Figure 13.33.
-
Add a blank character behind the <body> tag.
-
Right-click after the added blank character.
-
Select Paste from the pop-up menu.
The string from the Copy of index.html file is now inside the index.html file, as shown in Figure 13.70.
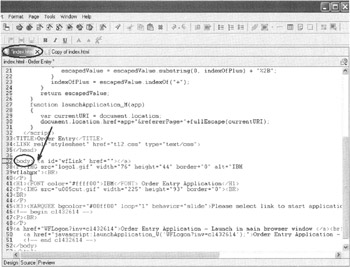
Figure 13.70: Page Designer with index.html file and copied string
-
Close the Copy of index.html file in Page Designer.
-
Save the index.html file.
-
Close the index.html file in Page Designer.
Switch to the WebFacing perspective:
-
Click its icon on the side toolbar of the workbench, as shown in Figure 13.71

Figure 13.71: Workbench side toolbar with open perspectives
In the Navigator view or WebFacing Projects view,
-
Right-click the wflabxx project.
-
Select Run on Server from the pop-up menu.
Your newly designed index.html page displays, and you can run your application.
EAN: 2147483647
Pages: 153