Color Management Fundamentals
| < Day Day Up > |
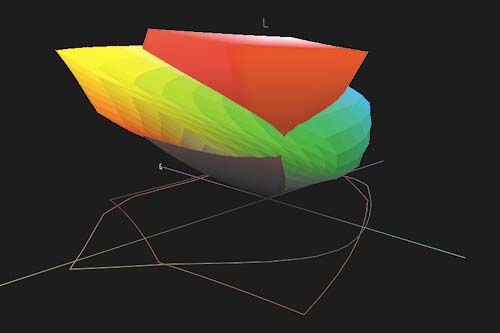
| There are a few basic concepts to understand when working with color and color management systems. These will help you understand why color discrepancies exist and how color management works. Device GamutEvery color device is capable of reproducing a range of colors, better known as its gamut. Each device, such as a display or printer, has a unique gamut that is dictated by the characteristics of that device the types of inks it uses to print, the type of technology a scanner uses to capture images, and so on. When the gamuts of two devices don't overlap, the colors that do not overlap can't be reproduced consistently across the devices. It's as if the devices speak different languages. Even devices of the same type (say, two color printers) may have different gamuts or language dialects. The colors seen on a display are typically much brighter and more saturated than the color that comes out of a printer. The reason for this is that the color on a display is in gamut for the display, but it is not in gamut for the printer. The printer simply cannot reproduce all of the colors contained in the image. In this case, the color is said to be device dependent whether the desired color is produced depends on the capabilities of a particular device. Note
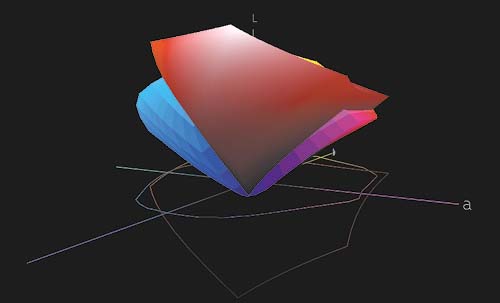
To see this, let's use ColorThink to compare the gamuts of a display and color printer.
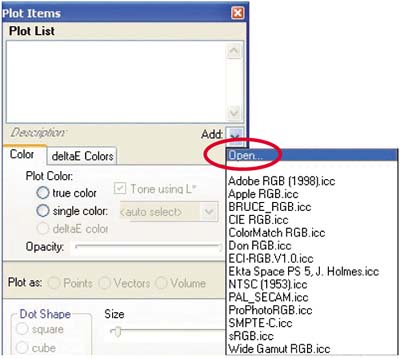
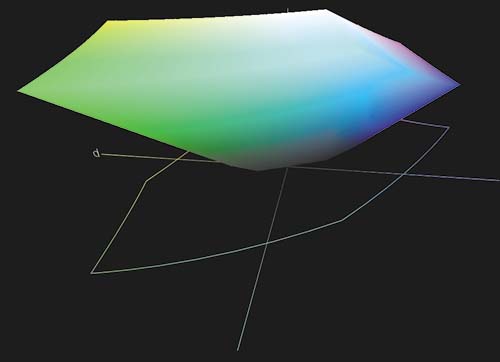
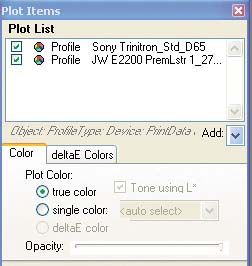
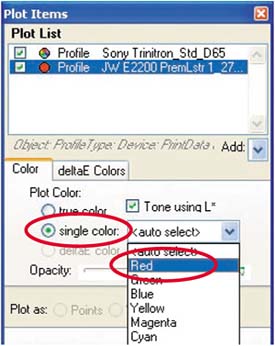
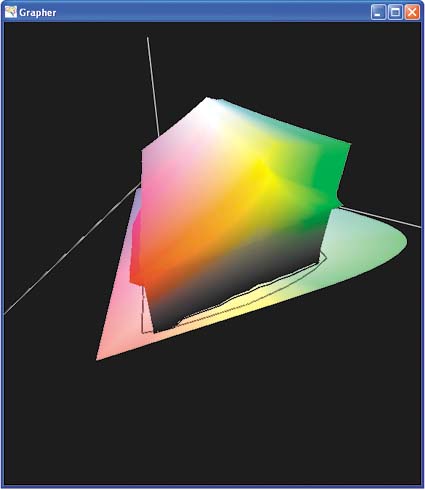
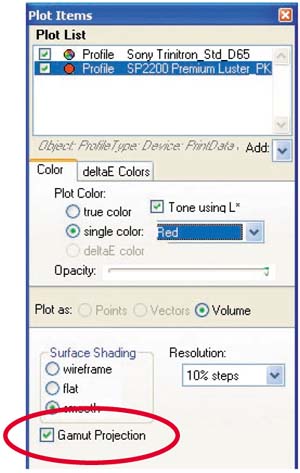
Color SpacesColor scientists use various mathematical models to represent color, and these models can be visualized, as demonstrated in the previous exercise. For the purposes of color management, models that represent the visible spectrum are used, as they easily contain all of the colors that an imaging device can capture or reproduce. The gamuts of desktop devices, such as displays and printers, are relatively small when compared with the visible spectrum of light. These are color spaces where the definition of a color is not dependent on any particular device they are said to be device independent. In 1931, the CIE (Commission Internationale de l'Eclairage) established standards for a series of color spaces that represented the visible spectrum 60 years before the arrival of desktop color! The CIE color spaces form the foundation of device-independent color for color management. Many of these spaces, such as CIE XYZ and CIE Lab, are widely used in color management systems today. The following illustration shows the gamut of the Epson Stylus Photo 2200 with Premium Luster paper compared with the CIE color space. Figure 1.18.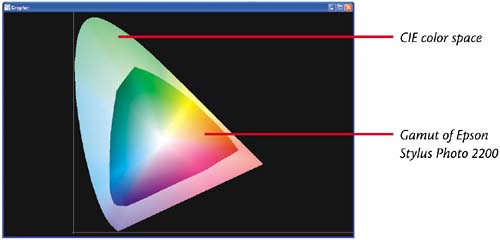 In ColorThink, you can include the color space by selecting the Gamut Projection check box at the bottom of the Plot Items window. Figure 1.19.
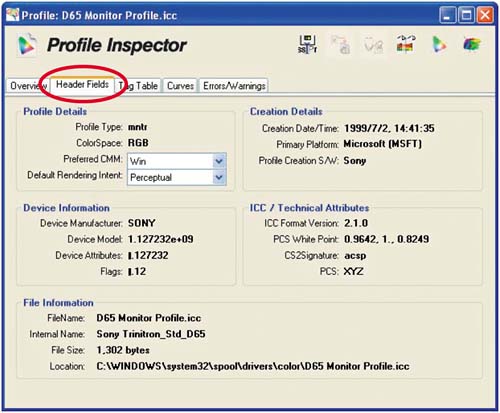
Color spaces are used by color management systems in the process of transforming data from one device to another. Color from one device is mapped from the device-specific value to a device-independent value in a color space. Once in an independent space, the color can be mapped to another device-specific space. Device ProfilesProfiles are files similar to dictionaries that contain data on a specific device's color information, including its gamut, color space, colorants, and modes of operation. In other words, profiles contain all the unique color characteristics of a device and are essential to making the whole system work. The process of creating profiles is known as device characterization. Device characterization is typically performed with highly sensitive color measurement devices. You'll learn how to create profiles in Chapters 3 and 4. Early color management systems used proprietary profile formats, which weren't compatible with each other. This made them very difficult to use in an open environment, such as on a PC running Adobe Photoshop. Fortunately, the International Color Consortium was founded to establish color management standards, the first of which was the ICC profile. ICC profiles are based on a well-defined, open standard and are now supported by virtually all vendors of color imaging hardware and software, as well as platform vendors such as Apple and Microsoft. ICC profiles come in different flavors, or classes:
The ICC profile specification supports other profile classes, albeit uncommon ones, such as the following:
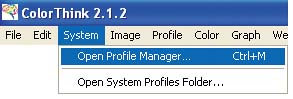
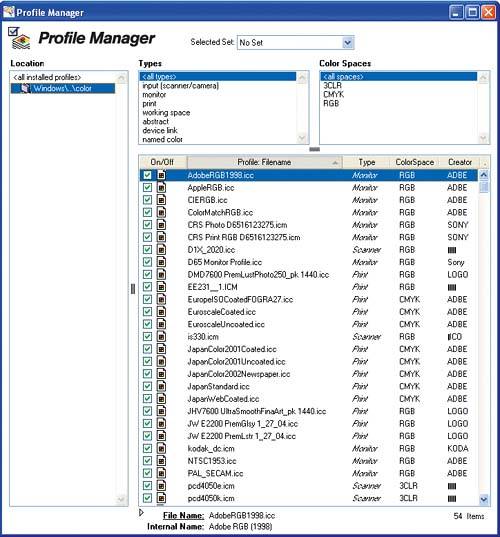
ColorThink provides a catalog of profiles installed on your system and can display them by class. In the following exercise, we'll use ColorThink to view the ICC profiles that are installed on your system.
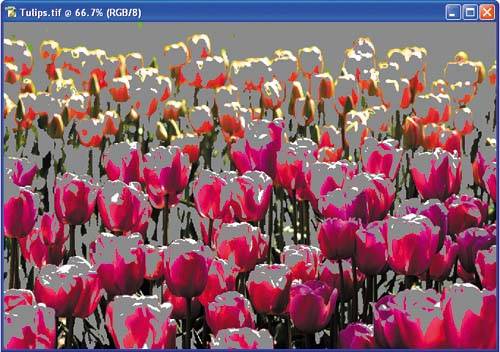
Color Matching MethodThe CMM color matching method or color management module is the color engine that performs the transformations of color data between different profiles. The color management system in Windows XP, known as Image Color Management, or ICM, includes a high-quality CMM. You'll also find that some applications come with their own CMMs. For example, all Adobe applications ship with the Adobe Color Engine (ACE), but they let you choose between ACE and Microsoft's ICM. Gamut ChecksDevice profiles and the color matching method are used to transform color data between devices to ensure accurate reproduction. Specifically, the CMM translates data from one device's colors to another's via a device-independent color space. The CMM receives the necessary information from the relevant profiles so that it can accurately transform a color from one device to another, producing color that is predictable from device to device. Remember that it is not possible to achieve perfect color matches between all devices due to inherent differences in each device's color gamut. But what happens when a color is out of gamut if, for example, you want to print a photograph that contains colors your printer can't produce? Without color management, you'd have no way of predicting or controlling what happens to those colors, or even of knowing that they were out of gamut. One of the key benefits of color management is that it can tell you that a color is out of gamut. The hard way to discover this is to print an image and wonder why that bright blue color on your monitor prints like muddy blue from your printer. The easier way, which the next exercise illustrates, is to use a neat feature of color management called the gamut check, or as Adobe calls it, the Gamut Warning. This feature applies a device profile to an image and tells you if certain colors can't be reproduced. Note
When a color is in gamut for one device but not another, the CMM must select the next-closest reproducible color. This is called gamut mapping. Because the use of color data varies, the intended use of a color must be specified to produce the best possible results. The ICC profile specification supports four gamut-mapping options, called rendering intents. Fortunately, each profile includes a default rendering intent, so if you're not sure which one to pick, ICM will use the default set in the profile. Color management can also be used to simulate, or proof, the appearance of the output, including the effect of gamut mapping on out-of-gamut colors. Rendering IntentsThe ICC profile specification supports four rendering intents for mapping out-of-gamut colors:
Color Management System InterfacesColor management systems such as ICM include an interface that allows software developers to use and manage the color management capabilities of the system. These interfaces, known as application programming interfaces, or APIs, contain code that can be used as part of another application. |


| < Day Day Up > |
EAN: 2147483647
Pages: 103