| In this section, you learn how to build three custom JavaScript controls. You start with a simple sample of a custom control that renders JavaScript. We build a NewWindowLink control that enables you to open a new browser window when you click a button. Next, we build a WebWindow control that enables you to render a virtual browser window. This control enables you to simulate multiple windows in a single web form page. Finally, we create a ClientTabs control. This control enables you to switch between different tabs of content on the client without a postback to the server. Building a NewWindowLink Control Being a good web developer is hard. To be a good web developer, you need to know HTML, Cascading Style Sheets, SQL, XML, and JavaScript. You also need to know about the different implementations of these technologies in the case of different browsers and different operating systems. One of the main jobs of a framework, such as the ASP.NET Framework, is to shield you from all the underlying technologies on which the framework is built. If you integrate JavaScript into a custom control, then you can learn the JavaScript for five minutes and then never need to worry about it again. For example, in this section, we build a NewWindowLink control that opens a new browser window (see Figure 32.1). The JavaScript required to open a new window is quite simple. However, the advantage of creating a control that opens a new window is that you don't need to remember the JavaScript in the future. Figure 32.1. Opening a new browser window with the NewWindowLink control. 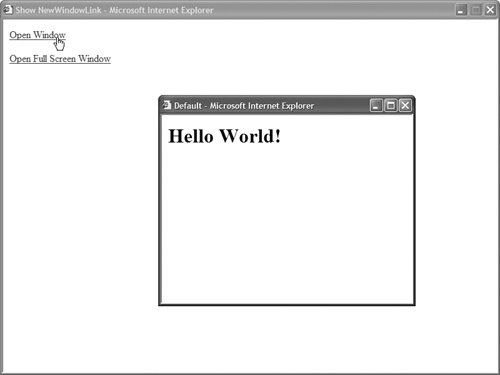
The code for the NewWindowLink control is contained in Listing 32.1. Listing 32.1. NewWindowLink.vb| [View full width] Imports System Imports System.Web Imports System.Web.UI Imports System.Web.UI.WebControls Namespace myControls Public Class NewWindowLink Inherits WebControl Private _text As String = "Click Here!" Private _navigateUrl As String Private _target As String = "_blank" Private _windowWidth As Integer = 400 Private _windowHeight As Integer = 300 Private _windowLeft As Integer = 100 Private _windowTop As Integer = 100 Private _fullScreen As Boolean = False Private _resizable As Boolean = True Public Property Text() As String Get Return _text End Get Set(ByVal Value As String) _text = value End Set End Property Public Property NavigateUrl() As String Get Return _navigateUrl End Get Set(ByVal Value As String) _navigateUrl = value End Set End Property Public Property Target() As String Get Return _target End Get Set(ByVal Value As String) _target = value End Set End Property Public Property WindowWidth() As Integer Get Return _windowWidth End Get Set(ByVal Value As Integer) _windowWidth = value End Set End Property Public Property WindowHeight() As Integer Get Return _windowHeight End Get Set(ByVal Value As Integer) _windowHeight = value End Set End Property Public Property WindowLeft() As Integer Get Return _windowLeft End Get Set(ByVal Value As Integer) _windowLeft = value End Set End Property Public Property WindowTop() As Integer Get Return _windowTop End Get Set(ByVal Value As Integer) _windowTop = value End Set End Property Public Property FullScreen() As Boolean Get Return _fullScreen End Get Set(ByVal Value As Boolean) _fullScreen = value End Set End Property Public Property Resizable() As Boolean Get Return _resizable End Get Set(ByVal Value As Boolean) _resizable = value End Set End Property Protected Overrides Sub AddAttributesToRender(ByVal writer As HtmlTextWriter) Dim fullscreenValue As String = "no" If (_fullScreen) Then fullscreenValue = "yes" End If Dim resizableValue As String = "no" If (_resizable) Then resizableValue = "yes" End If Dim features As String = "width={0},height={1},left={2},top={3},fullscreen={4}  , resizable={5},status=no,toolbar=no,menubar=no,location=no" Dim featuresValue As String = String.Format(features, _windowWidth, _windowHeight, _windowLeft, _ windowTop, fullscreenValue, resizableValue) Dim script As String = String.Format("window.open('{0}','{1}','{2}');return false;", Page.ResolveUrl(_navigateUrl), _target, featuresValue) writer.AddAttribute(HtmlTextWriterAttribute.Onclick, script) writer.AddAttribute(HtmlTextWriterAttribute.Href, Page.ResolveUrl(_navigateUrl)) MyBase.AddAttributesToRender(writer) End Sub Protected Overrides Sub RenderContents(ByVal writer As HtmlTextWriter) writer.Write(_text) End Sub Protected Overrides ReadOnly Property TagKey() As HtmlTextWriterTag Get Return HtmlTextWriterTag.A End Get End Property End Class End Namespace , resizable={5},status=no,toolbar=no,menubar=no,location=no" Dim featuresValue As String = String.Format(features, _windowWidth, _windowHeight, _windowLeft, _ windowTop, fullscreenValue, resizableValue) Dim script As String = String.Format("window.open('{0}','{1}','{2}');return false;", Page.ResolveUrl(_navigateUrl), _target, featuresValue) writer.AddAttribute(HtmlTextWriterAttribute.Onclick, script) writer.AddAttribute(HtmlTextWriterAttribute.Href, Page.ResolveUrl(_navigateUrl)) MyBase.AddAttributesToRender(writer) End Sub Protected Overrides Sub RenderContents(ByVal writer As HtmlTextWriter) writer.Write(_text) End Sub Protected Overrides ReadOnly Property TagKey() As HtmlTextWriterTag Get Return HtmlTextWriterTag.A End Get End Property End Class End Namespace
|
The majority of the code in Listing 32.1 is devoted to declaring a set of properties. The NewWindowLink control includes properties for the new window's position and size. It also includes properties you can set to open a window that is resizable or full screen. The JavaScript for opening the window is contained in the AddAttributesToRender() method. This method adds a client-side OnClick handler to the link rendered by the control. When you click the link, the window.open() method is called on the client. The page in Listing 32.2 illustrates how you can use the NewWindowLink control in an ASP.NET page. The page contains two instances of the NewWindowLink control. The first instance opens a normal window. The control opens the page specified by its NavigateUrl property in a new window. The second instance of the NewWindowLink control opens a full-screen window. A full-screen window is supported only with Internet Explorer. (You get a normal new window when the control is used with other browsers such as Firefox.) After you open a full-screen window, you can close it by selecting Alt+F4. Listing 32.2. ShowNewWindowLink.aspx <%@ Page Language="VB" %> <%@ Register TagPrefix="custom" Namespace="myControls" %> <!DOCTYPE html PUBLIC "-//W3C//DTD XHTML 1.0 Transitional//EN" "http://www.w3.org/TR/xhtml1/DTD/xhtml1-transitional.dtd"> <html xmlns="http://www.w3.org/1999/xhtml" > <head runat="server"> <title>Show NewWindowLink</title> </head> <body> <form runat="server"> <div> <custom:NewWindowLink Text="Open Window" NavigateUrl="~/Default.aspx" Runat="server" /> <br /><br /> <custom:NewWindowLink Text="Open Full Screen Window" NavigateUrl="~/Default.aspx" FullScreen="true" Runat="server" /> </div> </form> </body> </html>
|
Building a WebWindow Control There are several disadvantages that result from using separate browser windows in a web application. First, communicating information between multiple browser windows is difficult. When you update one window, you must reload the other windows to reflect the new information. Furthermore, new browser windows can be blocked by pop-up blockers. A better alternative is to create virtual windows by creating floating <div> tags. Unlike true browser windows, you don't run into problems communicating information between virtual windows. Furthermore, a virtual window will never be blocked by a pop-up blocker. By taking advantage of a little JavaScript, you can even drag and drop a virtual window. In other words, you can position a virtual window at different locations on the screen. The code for the virtual window control, the WebWindow control, is contained in Listing 32.3. Listing 32.3. WebWindow.vb| [View full width] Imports System Imports System.Web.UI Imports System.Web.UI.WebControls Imports System.ComponentModel Namespace myControls <ParseChildren(False)> _ Public Class WebWindow Inherits WebControl Implements IPostBackEventHandler Private _windowTitleText As String = "Untitled" Public Event Closed As EventHandler Public Property WindowTitleText() As String Get Return _windowTitleText End Get Set(ByVal Value As String) _windowTitleText = value End Set End Property Protected Overrides Sub OnPreRender(ByVal e As EventArgs) If Not Page.ClientScript.IsClientScriptIncludeRegistered("WebWindow") Then Page.ClientScript.RegisterClientScriptInclude("WebWindow", Page .ResolveClientUrl("~/ClientScripts/WebWindow.js")) End If Dim startupScript As String = String.Format("WebWindow.init('{0}');", Me.ClientID) Page.ClientScript.RegisterStartupScript(Me.GetType(), Me.ClientID, startupScript, True) End Sub Protected Overrides Sub RenderContents(ByVal writer As HtmlTextWriter) RenderTitleBar(writer) writer.AddAttribute(HtmlTextWriterAttribute.Class, "webWindowBody") writer.RenderBeginTag(HtmlTextWriterTag.Div) Me.RenderChildren(writer) writer.RenderEndTag() End Sub Private Sub RenderTitleBar(ByVal writer As HtmlTextWriter) writer.AddAttribute(HtmlTextWriterAttribute.Class, "webWindowTitleBar") writer.AddAttribute("onmousedown", "WebWindow.mouseDown(event)") writer.AddStyleAttribute(HtmlTextWriterStyle.TextAlign, "right") writer.RenderBeginTag(HtmlTextWriterTag.Div) writer.AddAttribute(HtmlTextWriterAttribute.Class, "webWindowTitleText") writer.RenderBeginTag(HtmlTextWriterTag.Span) writer.Write(_windowTitleText) writer.RenderEndTag() RenderCloseButton(writer) writer.RenderEndTag() End Sub Private Sub RenderCloseButton(ByVal writer As HtmlTextWriter) Dim eventRef As String = Page.ClientScript.GetPostBackEventReference(Me, String.Empty) writer.AddAttribute(HtmlTextWriterAttribute.Class, "webWindowClose") writer.AddAttribute(HtmlTextWriterAttribute.Onclick, eventRef) writer.RenderBeginTag(HtmlTextWriterTag.Span) writer.Write("X") writer.RenderEndTag() End Sub Protected Overrides Sub AddAttributesToRender(ByVal writer As HtmlTextWriter) writer.AddStyleAttribute(HtmlTextWriterStyle.Position, "absolute") writer.AddAttribute(HtmlTextWriterAttribute.Class, "webWindow") MyBase.AddAttributesToRender(writer) End Sub Protected Overrides ReadOnly Property TagKey() As HtmlTextWriterTag Get Return HtmlTextWriterTag.Div End Get End Property Public Sub RaisePostBackEvent(ByVal eventArgument As String) Implements IPostBackEventHandler.RaisePostBackEvent RaiseEvent Closed(Me, EventArgs.Empty) End Sub End Class End Namespace
|
The RenderContents() method in Listing 32.3 is responsible for rendering the virtual window. This method renders a title bar that contains a close button. It also renders a <div> tag that contains the window's contents. All the magic happens in an external JavaScript file. A JavaScript include is rendered by the WebWindow control in its OnPreRender() method. The control assumes that a JavaScript file named WebWindow.js is located in a subfolder named ClientScripts. The contents of the WebWindow.js file are contained in Listing 32.4. Listing 32.4. ClientScripts\WebWindow.js var WebWindow = new Object(); WebWindow.init = function(winId) { eval("place=" + this.getCookie(winId + "_place")); place = place || {left:20, top:20}; var win = document.getElementById(winId); win.style.left = place.left; win.style.top = place.top; } WebWindow.mouseDown = function(e) { var e = e || window.event; var src = e.target || e.srcElement; var win = src.offsetParent; var startWinX = win.offsetLeft; var startWinY = win.offsetTop; var startMouseX = e.clientX; var startMouseY = e.clientY; var move = function(e) { var e = e || window.event; win.style.left = (startWinX - (startMouseX - e.clientX)) + 'px'; win.style.top = (startWinY - (startMouseY - e.clientY)) + 'px'; if (document.all) { e.cancelBubble = true; e.returnValue = false; } if (e.preventDefault) { e.preventDefault(); } } var up = function(e) { document.onmousemove = null; document.onmouseup = null; WebWindow.setCookie(win.id + "_place", "{left:'" + win.style.left + "', top:'" + win.style.top + "'}"); } document.onmousemove = move; document.onmouseup = up; } WebWindow.setCookie = function(name, value) { var expires = new Date(); expires.setTime( expires.getTime() + 365 * 24 * 60 * 60 * 1000 ); document.cookie = name + "=" + escape(value) + ";expires=" + expires.toGMTString(); } WebWindow.getCookie = function(name) { var aCookie = document.cookie.split("; "); for (var i=0; i < aCookie.length; i++) { var aCrumb = aCookie[i].split("="); if (name == aCrumb[0]) return unescape(aCrumb[1]); } return null; }
|
The JavaScript file in Listing 32.4 contains the methods that enable you to drag the WebWindow around the page. When you click your mouse on the WebWindow's title bar, the WebWindow.mouseDown() method executes and records your current mouse position. As you move your mouse, the move() method executes and updates the WebWindow's position on the screen by modifying the left and top style properties of the WebWindow's containing div element. Whenever you move a WebWindow, its new position is recorded in a browser cookie. The next time that you open the page, the WebWindow appears in the same location. Warning Be careful about where you declare the WebWindow control in a page. Do not declare the control inside of another <div> tag or you might encounter difficulties when you attempt to drag the control outside of its containing <div> tag. I've tested the WebWindow control with Internet Explorer 6.0, Firefox 1.0, and Opera 8.0.
The page in Listing 32.5 illustrates how you can use the WebWindow control in an ASP.NET page. When the page first opens, the WebWindow is not visible by default. When you click the Open Window link, the WebWindow is displayed (see Figure 32.2). Finally, when you click the WebWindow's Close button, the WebWindow1_Closed() event handler executes and the WebWindow is hidden. Listing 32.5. ShowWebWindow.aspx <%@ Page Language="VB" %> <%@ Register TagPrefix="custom" Namespace="myControls" %> <!DOCTYPE html PUBLIC "-//W3C//DTD XHTML 1.0 Transitional//EN" "http://www.w3.org/TR/xhtml1/DTD/xhtml1-transitional.dtd"> <script runat="server"> protected sub lnkOpenWindow_Click(sender As object, e As EventArgs) WebWindow1.Visible = true End Sub protected sub WebWindow1_Closed(sender As object, e As EventArgs) WebWindow1.Visible = false End Sub </script> <html xmlns="http://www.w3.org/1999/xhtml" > <head runat="server"> <style type="text/css"> .webWindow { width:400px; height:400px; border:Outset; background-color:white; } .webWindowBody { padding:10px; } .webWindowTitleBar { font:14px Verdana,Sans-Serif; padding-left:10px; background-color:Blue; color:white; cursor:move; } .webWindowTitleText { float:left; } .webWindowClose { background-color:Red; cursor:pointer; } </style> <title>Show WebWindow</title> </head> <body> <form runat="server"> <div> <asp:LinkButton Text="Open Window" OnClick="lnkOpenWindow_Click" Runat="server" /> </div> <custom:WebWindow WindowTitleText="The WebWindow Title" Visible="false" OnClosed="WebWindow1_Closed" Runat="server"> Here is some content </custom:WebWindow> </form> </body> </html>
|
Figure 32.2. Displaying a virtual window with the WebWindow control. 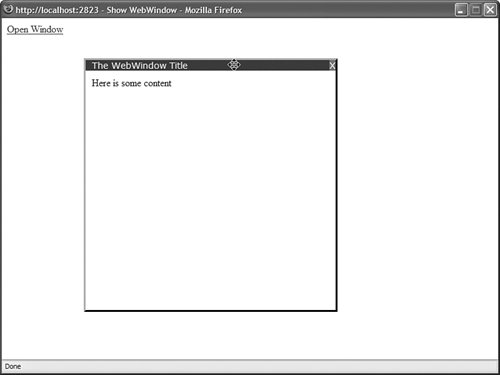
Building a ClientTabs Control In Chapter 4, "Using the Rich Controls," you learned how to use the Menu control with the MultiView control to display tabbed content in a page. The drawback of using these controls is that they require you to post the page containing the controls back to the server each and every time you click a tab. In this section, you learn how to create a client-side tab control named the ClientTabs control (see Figure 32.3). This control renders the contents of all the tabs to the browser. However, it hides the contents of all the tabs except for the selected tab. When you select a new tab, JavaScript is executed on the browser to hide the contents of all the tabs except the newly selected tab. Figure 32.3. Displaying tabs with the ClientTabs control. 
Unfortunately, the entire code for the ClientTabs control is too long to include in the body of this book. However, the complete source code (in both Visual Basic .NET and C#) is included on the CD that accompanies this book. Listing 32.6 contains a partial listing of the ClientTabs control. Listing 32.6. ClientTabs.vb (Partial Listing)| [View full width] Namespace myControls <ParseChildren(False)> _ Public Class ClientTabs Inherits WebControl Implements IPostBackDataHandler ''' <summary> ''' Render tabs and tab content ''' </summary> Protected Overrides Sub RenderContents(ByVal writer As HtmlTextWriter) RenderTabs(writer) RenderTabContent(writer) End Sub ''' <summary> ''' Render the tab strip ''' </summary> Private Sub RenderTabs(ByVal writer As HtmlTextWriter) writer.AddAttribute(HtmlTextWriterAttribute.Class, "tabs") writer.RenderBeginTag(HtmlTextWriterTag.Table) writer.RenderBeginTag(HtmlTextWriterTag.Tbody) writer.AddAttribute(HtmlTextWriterAttribute.Id, TabContainerID) writer.RenderBeginTag(HtmlTextWriterTag.Tr) Dim index As Integer For index = 0 To Controls.Count - 1 Step index + 1 Dim currentTab As Tab = CType(Controls(index), Tab) Dim script As String = String.Format("ClientTabs.selectTab('{0}','{1}')", Me.ClientID, currentTab.ClientID) writer.AddAttribute(HtmlTextWriterAttribute.Onclick, script) If index = SelectedIndex Then writer.AddAttribute(HtmlTextWriterAttribute.Class, "tab selectedTab") Else writer.AddAttribute(HtmlTextWriterAttribute.Class, "tab unselectedTab") End If writer.AddAttribute(HtmlTextWriterAttribute.Id, currentTab.ClientID + "_tab") writer.RenderBeginTag(HtmlTextWriterTag.Td) writer.Write(currentTab.Text) writer.RenderEndTag() Next writer.RenderEndTag() writer.RenderEndTag() writer.RenderEndTag() End Sub ''' <summary> ''' Render the tab contents ''' </summary> Private Sub RenderTabContent(ByVal writer As HtmlTextWriter) writer.AddAttribute(HtmlTextWriterAttribute.Id, TabContentContainerID) writer.AddAttribute(HtmlTextWriterAttribute.Class, "tabContent") writer.RenderBeginTag(HtmlTextWriterTag.Div) Dim index As Integer For index = 0 To Controls.Count - 1 Step index + 1 Dim currentTab As Tab = CType(Controls(index), Tab) If index <> SelectedIndex Then currentTab.Style.Add("display", "none") End If currentTab.RenderControl(writer) Next writer.RenderEndTag() End Sub End Class End Namespace
|
Listing 32.6 contains the code for rendering the tabs. When the ClientTab control renders its contents, it iterates through its child controls in two passes. First, it renders the tab links. Next, it renders the body of each tab. Any tab that is not selected is hidden by the CSS display:none property. One special feature of the ClientTabs control needs to be explained. Imagine that each of the tabs contains a separate form with a separate button. When you click the button and submit the form to the server, you want the same tab to be displayed again when the page is reloaded. In other words, to function properly, the ClientTabs control needs to retain state across postbacks. The ClientTabs control registers a hidden form field in its OnPreRender() method. When you select a new tab, the ID of the selected tab is assigned to the hidden form field. When the page is posted back to the server, the value of the hidden form field is used to determine the currently selected tab. That way, when the ClientTab control renders its tabs again, the tab selected on the client remains selected when the control is rendered on the server. The ClientTabs control uses a Cascading Style Sheet file to format the appearance of the tabs. This Cascading Style Sheet file is added to the page containing the ClientTabs control by the ClientTabs control's OnPreRender() method. The contents of the Cascading Style Sheet file are contained in Listing 32.7. Listing 32.7. ClientScripts\ClientTabs.css .tab { padding:2px 25px; border:solid 1px black; cursor:pointer; } .unselectedTab { background-color:#eeeeee; } .selectedTab { background-color:White; border-bottom:solid 1px white; } .tabs { position:relative; top:3px; left:15px; } .tabContent { border:Solid 1px black; background-color:White; padding:10px; }
|
Finally, the ClientTabs control executes a client-side JavaScript function named ClientTabs.selectTab() when a user selects a new tab. The JavaScript library is added to the page in the ClientTabs control's OnPreRender() method. The ClientTabs control assumes that there is a JavaScript file named ClientTabs.js that is located in the ClientScripts folder. The contents of this JavaScript file are contained in Listing 32.8. Listing 32.8. ClientScripts\ClientTabs.js var ClientTabs = new Object(); ClientTabs.selectTab = function(controlId, tabId) { // Get previous value var hiddenField = document.getElementById(controlId + '_hidden'); var prevTabId = hiddenField.value; // Hide previous tab document.getElementById(prevTabId + '_tab').className = 'tab unselectedTab'; document.getElementById(prevTabId).style.display = 'none'; // Show new tab document.getElementById(tabId).style.display = 'block'; document.getElementById(tabId + '_tab').className = 'tab selectedTab'; // Update hidden value hiddenField.value = tabId; }
|
The page in Listing 32.9 illustrates how you can use the ClientTabs control within an ASP.NET page. The page in Listing 32.9 contains a ClientTabs control that contains three Tab controls. The final Tab control includes a simple form with a Button control. Notice that after you submit the page to the server, the correct tab is selected when the tabs are rendered back to the client. Listing 32.9. ShowClientTabs.aspx <%@ Page Language="VB" %> <%@ Register TagPrefix="custom" Namespace="myControls" %> <!DOCTYPE html PUBLIC "-//W3C//DTD XHTML 1.0 Transitional//EN" "http://www.w3.org/TR/xhtml1/DTD/xhtml1-transitional.dtd"> <html xmlns="http://www.w3.org/1999/xhtml" > <head runat="server"> <title>Show ClientTabs</title> </head> <body> <form runat="server"> <div> <custom:ClientTabs Runat="server"> <custom:Tab Text="First Tab" runat="server"> Contents of the first tab </custom:Tab> <custom:Tab Text="Second Tab" runat="server"> Contents of the second tab </custom:Tab> <custom:Tab Text="Third Tab" runat="server"> Contents of the third tab <br /><br /> <asp:Label Text="User Name:" AssociatedControl Runat="server" /> <asp:TextBox Runat="server" /> <asp:Button Text="Submit" Runat="server" /> </custom:Tab> </custom:ClientTabs> </div> </form> </body> </html>
|
|