Processing Postback Data and Events


The ASP.NET Framework is built around web forms. ASP.NET controls pass information from the browser to the server by submitting a form to the server. This process of posting a form back to the server is called a postback.

When an ASP.NET page processes a form that has been posted back to the server, two types of information can be passed to the controls in the page. First, if a control initiates a postback, then a server-side event can be raised when the form is posted to the server. For example, if you click a Button control, then a Click event is raised on the server when the form containing the Button is posted back to the server. This event is called a postback event.

Second, the form data contained in the web form can be passed to a control. For example, when you submit a form that contains a TextBox control, the form data is passed to the TextBox control when the web form is submitted to the server. This form data is called the postback data.

When building a custom control, you might need to process either postback data or a postback event. In this section, you learn how to implement the required control interfaces for processing postbacks.

Handling Postback Data

If your control needs to process form data submitted to the server, then you need to implement the IPostbackDataHandler interface. This interface includes the following two methods:

  • LoadPostData() Receives the form fields posted from the browser.

  • RaisePostDataChangedEvent() EnablesReceives the form fields posted from the browser. you to raise an event indicating that the value of a form field has been changed.

For example, the control in Listing 31.16 is a simple TextBox control. It implements the IPostbackDataHandler interface to preserve the state of an input field across postbacks.

Listing 31.16. CustomTextBox.vb

[View full width]

Imports System Imports System.Web.UI Imports System.Web.UI.WebControls Imports System.Collections.Specialized Namespace myControls     Public Class CustomTextBox         Inherits WebControl         Implements IPostBackDataHandler         Public Event TextChanged As EventHandler         Public Property Text() As String             Get                 If ViewState("Text") Is Nothing Then                     Return String.Empty                 Else                     Return CType(ViewState("Text"), String)                 End If             End Get             Set(ByVal Value As String)                 ViewState("Text") = value             End Set         End Property         Protected Overrides Sub AddAttributesToRender(ByVal writer As HtmlTextWriter)             writer.AddAttribute(HtmlTextWriterAttribute.Type, "text")             writer.AddAttribute(HtmlTextWriterAttribute.Value, Text)             writer.AddAttribute(HtmlTextWriterAttribute.Name, Me.UniqueID)             MyBase.AddAttributesToRender(writer)         End Sub         Protected Overrides ReadOnly Property TagKey() As HtmlTextWriterTag             Get                 Return HtmlTextWriterTag.Input             End Get         End Property         Public Function LoadPostData(ByVal postDataKey As String, ByVal postCollection As  NameValueCollection) As Boolean Implements IPostBackDataHandler.LoadPostData             If postCollection(postDataKey) <> Text Then                 Text = postCollection(postDataKey)                 Return True             End If             Return False         End Function         Public Sub RaisePostDataChangedEvent() Implements IPostBackDataHandler .RaisePostDataChangedEvent             RaiseEvent TextChanged(Me, EventArgs.Empty)         End Sub     End Class End Namespace 

The LoadPostData() Receives the form fields posted from the browser. method in Listing 31.16 is passed a collection of all the form fields posted to the server. The postDataKey represents the name of the field that corresponds to the current control.

Note

If the name of a form field rendered by a control does not match the name of the control, then you need to notify the page containing the control to pass the form data to the control. You can call the Page.RegisterRequiresPostBack() method inside (or before) the control's PreRender() event to notify the page that the control is interested in receiving the postback data. In other words, if you discover that your control's LoadPostData() method is never being called, then call the Page.RegisterRequiresPostBack() method in your control.


If the value of the form field has changedin other words, it does not match the current value of the control's Text propertythen the Text property is updated and the method returns the value true. Otherwise, the method returns the value False.

When the LoadPostData() method returns TRue, the RaisePostDataChangedEvent() method is executed. Typically, you implement this method to raise a change event. In Listing 31.16, this method is used to raise the TextChanged event, indicating that the contents of the TextBox have been changed.

The page in Listing 31.17 illustrates how you can use the custom TextBox control in a page (see Figure 31.7).

Figure 31.7. Handling postback data.


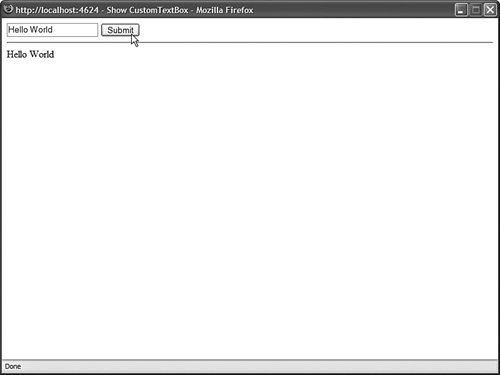
Listing 31.17. ShowCustomTextBox.aspx

[View full width]

<%@ Page Language="VB" %> <%@ Register TagPrefix="custom" Namespace="myControls" %> <!DOCTYPE html PUBLIC "-//W3C//DTD XHTML 1.0 Transitional//EN" "http://www.w3.org/TR /xhtml1/DTD/xhtml1-transitional.dtd"> <script runat="server">     Sub CustomTextBox1_TextChanged(ByVal sender As Object, ByVal e As EventArgs)         lblResults.Text = CustomTextBox1.Text     End Sub </script> <html xmlns="http://www.w3.org/1999/xhtml" > <head  runat="server">     <title>Show CustomTextBox</title> </head> <body>     <form  runat="server">     <div>     <custom:CustomTextBox                  OnTextChanged="CustomTextBox1_TextChanged"         Runat="server" />     <asp:Button          Text="Submit"         Runat="server" />     <hr />     <asp:Label                  Runat="server" />     </div>     </form> </body> </html> 

The custom TextBox control works in a very similar manner as the standard ASP.NET TextBox control. The control preserves its state across postbacks and it raises a TextChanged event when its contents have been modified.

Note

You will discover that you'll need to implement the IPostbackDataHandler interface quite often when building custom JavaScript controls. A common method of passing data from a JavaScript control back to the server is to use a hidden form field. You can process the contents of the hidden form field by using the IPostBackDataHandler interface. You'll see this, for example, when the ClientTabs control is built in the next chapter.


Handling Postback Events

Only one control in a page at a time can cause a form to be submitted back to the server. When a control initiates a postback, the control can raise a postback event.

To process a postback event, you need to implement the IPostBackEventHandler interface. This interface includes a single method:

  • RaisePostBackEvent() Called on the server when a control initiates a postback.

The control in Listing 31.18 illustrates how you can implement the IPostBackEventHandler interface.

Listing 31.18. CustomLinkButton.vb

[View full width]

Imports System Imports System.Web.UI Imports System.Web.UI.WebControls Namespace myControls     Public Class CustomLinkButton         Inherits WebControl         Implements IPostBackEventHandler         Public Event Click As EventHandler         Private _Text As String         Public Property Text() As String             Get                 Return _Text             End Get             Set(ByVal Value As String)                 _Text = value             End Set         End Property         Protected Overrides Sub AddAttributesToRender(ByVal writer As HtmlTextWriter)             Dim eRef As String = Page.ClientScript.GetPostBackClientHyperlink(Me, String .Empty)             writer.AddAttribute(HtmlTextWriterAttribute.Href, eRef)             MyBase.AddAttributesToRender(writer)         End Sub         Protected Overrides ReadOnly Property TagKey() As HtmlTextWriterTag             Get                 Return HtmlTextWriterTag.A             End Get         End Property         Protected Overrides Sub RenderContents(ByVal writer As HtmlTextWriter)             writer.Write(_Text)         End Sub         Public Sub RaisePostBackEvent(ByVal eventArgument As String) Implements  IPostBackEventHandler.RaisePostBackEvent             RaiseEvent Click(Me, EventArgs.Empty)         End Sub     End Class End Namespace 

The control in Listing 31.18 is a simple custom LinkButton control. It works very much like the standard ASP.NET LinkButton control. When you click the link rendered by the control on the browser, the form containing the control is posted back to the server and the RaisePostBackEvent() method is called. In Listing 31.18, the RaisePostBackEvent() method simply raises the Click event.

Notice that the Page.ClientScript.GetPostBackClientHyperlink() method is called in the control's AddAttributesToRender() method. The GetPostBackClientHyperLink() method returns the JavaScript that initiates the form postback in the browser. When this method is called in Listing 31.18, it returns the following JavaScript:

javascript:__doPostBack('CustomLinkButton1','') 


The __doPostBack() JavaScript method calls the client-side form submit() method, which causes the form to be submitted back to the web server. (You can see all this by selecting View Source in your web browser.)

Note

There is a closely related method to the GetPostBackClientHyperLink() method named the GetPostBackEventReference() method. The GetPostBackClientHyperLink() method includes the "JavaScript:" prefix, whereas the GetPostBackEventReference() does not.


The page in Listing 31.19 demonstrates how you can use the custom LinkButton in an ASP.NET page.

Listing 31.19. ShowCustomLinkButton.aspx

[View full width]

<%@ Page Language="VB" %> <%@ Register TagPrefix="custom" Namespace="myControls" %> <!DOCTYPE html PUBLIC "-//W3C//DTD XHTML 1.0 Transitional//EN" "http://www.w3.org/TR /xhtml1/DTD/xhtml1-transitional.dtd"> <script runat="server">     Sub CustomLinkButton1_Click(ByVal sender As Object, ByVal e As EventArgs)         lblResults.Text = txtUserName.Text     End Sub </script> <html xmlns="http://www.w3.org/1999/xhtml" > <head  runat="server">     <title>Show CustomLinkButton</title> </head> <body>     <form  runat="server">     <div>     <asp:Label                  Text="User Name:"         AssociatedControl         Runat="server" />     <asp:TextBox                  Runat="server" />     <br /><br />     <custom:CustomLinkButton                  Text="Submit"         OnClick="CustomLinkButton1_Click"         runat="server" />     <hr />     <asp:Label                  EnableViewState="false"         Runat="server" />     </div>     </form> </body> </html> 

The page in Listing 31.19 contains a TextBox control and the custom LinkButton control. When you click the LinkButton, the form is posted back to the server. The Click handler displays the value of the TextBox control's Text property in a Label control (see Figure 31.8).

Figure 31.8. Using the CustomLinkButton control.
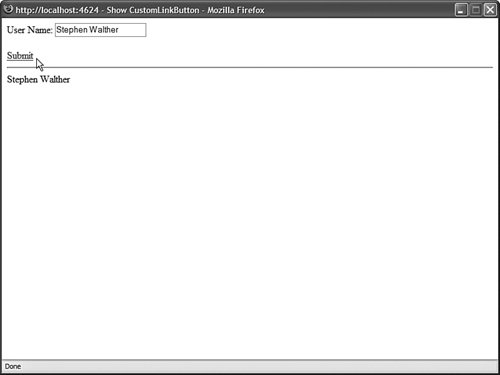

Passing Postback Event Arguments

When you call the GetPostBackClientHyperLink() method, you can supply the method with an optional argument. The argument is passed from the browser to the server when a postback is initiated. The value of the argument is passed to the RaisePostBackEvent() method on the server.

Imagine, for example, that you want to create a custom pager control that you could use with the GridView control. You want the custom control to display a list of page numbers you can click to navigate to a particular page of records displayed by a GridView.

To create this control, you need to render multiple links that initiate a postback event. Each link needs to pass the correct page number.

Listing 31.20 contains the custom pager control.

Listing 31.20. Pager.vb

[View full width]

Imports System Imports System.Web.UI Imports System.Web.UI.WebControls Namespace myControls     Public Class Pager         Inherits WebControl         Implements IPostBackEventHandler         Private _controlToPage As String         Public Property ControlToPage() As String             Get                 Return _controlToPage             End Get             Set(ByVal Value As String)                 _controlToPage = value             End Set         End Property         Protected Overrides Sub RenderContents(ByVal writer As HtmlTextWriter)             Dim grid As GridView = GetControlToPage()             Dim i As Integer             For i = 0 To grid.PageCount - 1 Step i + 1                 Dim eRef As String = Page.ClientScript.GetPostBackClientHyperlink(Me, i .ToString())                 writer.Write("[")                 If i = grid.PageIndex Then                     writer.AddStyleAttribute(HtmlTextWriterStyle.FontWeight, "bold")                 End If                 writer.AddAttribute(HtmlTextWriterAttribute.Href, eRef)                 writer.RenderBeginTag(HtmlTextWriterTag.A)                 writer.Write("{0}", i + 1)                 writer.RenderEndTag()                 writer.Write("] ")             Next         End Sub         Private Function GetControlToPage() As GridView             If String.IsNullOrEmpty(_controlToPage) Then                 Throw New Exception("Must set ControlToPage property")             End If             Return CType(Page.FindControl(_controlToPage), GridView)         End Function         Public Sub RaisePostBackEvent(ByVal eventArgument As String) Implements  IPostBackEventHandler.RaisePostBackEvent             Dim grid As GridView = GetControlToPage()             grid.PageIndex = Int32.Parse(eventArgument)         End Sub     End Class End Namespace 

In Listing 31.20, the RenderContents() method renders the page numbers. Each page number is rendered as a link. When you click a link, the associated GridView control changes the page that it displays (see Figure 31.9).

Figure 31.9. Using the Pager control.


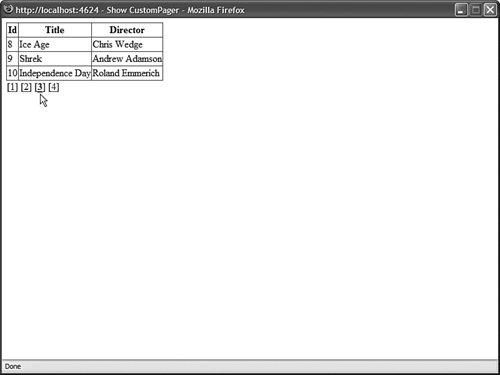
The href attribute for each link is created by calling the GetPostBackClientHyperLink() method. The page number is passed as an argument to this method. When the pager is rendered to the browser, the following series of links is rendered:

[<a href="javascript:__doPostBack('Pager1','0')" style="font-weight:bold;">1</a>] [<a href="javascript:__doPostBack('Pager1','1')">2</a>] [<a href="javascript:__doPostBack('Pager1','2')">3</a>] [<a href="javascript:__doPostBack('Pager1','3')">4</a>] 


When you click a page number link, the corresponding page number is posted back to the server. The RaisePostBackEvent() method receives the page number and changes the page displayed by its associated GridView.

The page in Listing 31.21 illustrates how you can use the pager control to navigate to different pages of records displayed by a GridView control.

Listing 31.21. ShowPager.aspx

[View full width]

<%@ Page Language="VB" %> <%@ Register TagPrefix="custom" Namespace="myControls" %> <!DOCTYPE html PUBLIC "-//W3C//DTD XHTML 1.0 Transitional//EN" "http://www.w3.org/TR /xhtml1/DTD/xhtml1-transitional.dtd"> <html xmlns="http://www.w3.org/1999/xhtml" > <head  runat="server">     <title>Show CustomPager</title> </head> <body>     <form  runat="server">     <div>     <asp:GridView                  DataSource         AllowPaging="true"         PageSize="3"         PagerSettings-Visible="false"         Runat="server" />     <custom:Pager                  ControlToPage="GridView1"         Runat="server" />     <asp:SqlDataSource                  ConnectionString="Data Source=.\SQLExpress;Integrated Security=True;             AttachDbFileName=|DataDirectory|MyDatabase.mdf;User Instance=True"         SelectCommand="SELECT Id,Title,Director FROM Movies"         Runat="server" />     </div>     </form> </body> </html> 

Using Postback Options

Postbacks are more complicated in the ASP.NET 2.0 Framework than they were in the previous version of the Framework. For example, the ASP.NET 2.0 Framework supports cross-page posts, validation groups, and programmatic control of control focus. To implement these advanced features in a custom control, you need to be able to specify advanced postback options.

You specify advanced postback options by taking advantage of the PostBackOptions class. This class has the following properties:

  • ActionUrl Enables you to specify the page where form data is posted.

  • Argument Enables you to specify a postback argument.

  • AutoPostBack Enables you to add JavaScript necessary for implementing an AutoPostBack event.

  • ClientSubmit Enables you to initiate the postback through client-side script.

  • PerformValidation Enables you to specify whether validation is performed (set by the CausesValidation property).

  • RequiresJavaScriptProtocol Enables you to generate the JavaScript: prefix.

  • TargetControl Enables you to specify the control responsible for initiating the postback.

  • trackFocus Enables you to scroll the page back to its current position and return focus to the control after a postback.

  • ValidationGroup Enables you to specify the validation group associated with the control.

Imagine that you need to create a form that enables users to place a product order. However, imagine that you want to create an advanced options check box. When someone clicks the advanced options check box, the current form data is submitted to a new page that includes a more complex form.

The AdvancedCheckBox control in Listing 31.22 supports cross-page posts. When you click the check box, the form data is submitted to the page indicated by its PostBackUrl property.

Note

Cross-page posts are covered during the discussion of Button controls in Chapter 2, "Using the Standard Controls."


Listing 31.22. AdvancedCheckBox.vb

Imports System Imports System.Web.UI Imports System.Web.UI.WebControls Namespace myControls     Public Class AdvancedCheckBox         Inherits WebControl         Private _Text As String         Private _PostBackUrl As String         Public Property Text() As String             Get                 Return _Text             End Get             Set(ByVal Value As String)                 _Text = Value             End Set         End Property         Public Property PostBackUrl() As String             Get                 Return _PostBackUrl             End Get             Set(ByVal Value As String)                 _PostBackUrl = Value             End Set         End Property         Protected Overrides Sub AddAttributesToRender(ByVal writer As HtmlTextWriter)             Dim options As PostBackOptions = New PostBackOptions(Me)             options.ActionUrl = _PostBackUrl             Dim eRef As String = Page.ClientScript.GetPostBackEventReference(options)             writer.AddAttribute(HtmlTextWriterAttribute.Onclick, eRef)             writer.AddAttribute(HtmlTextWriterAttribute.Name, Me.UniqueID)             writer.AddAttribute(HtmlTextWriterAttribute.Type, "checkbox")             MyBase.AddAttributesToRender(writer)         End Sub         Protected Overrides Sub RenderContents(ByVal writer As HtmlTextWriter)             If Not String.IsNullOrEmpty(_Text) Then                 writer.AddAttribute(HtmlTextWriterAttribute.For, Me.ClientID)                 writer.RenderBeginTag(HtmlTextWriterTag.Label)                 writer.Write(_Text)                 writer.RenderEndTag()             End If         End Sub         Protected Overrides ReadOnly Property TagKey() As HtmlTextWriterTag             Get                 Return HtmlTextWriterTag.Input             End Get         End Property     End Class End Namespace 

In the AddAttributesToRender() method in Listing 31.22, an instance of the PostBackOptions class is created. The ActionUrl property is modified to support cross-page posts. The instance of the PostBackOptions class is passed to the GetPostBackEventReference() method to generate the JavaScript for initiating the postback.

The page in Listing 31.23 illustrates how you can use the AdvancedCheckBox control to submit form data to a new page when you click the check box (see Figure 31.10). Notice that the AdvancedCheckBox control's PostBackUrl property is set to the value ShowAdvancedOptions.aspx. When you click the check box, the form data is posted to this page.

Figure 31.10. Using the AdvancedCheckBox control.


Listing 31.23. ShowAdvancedCheckBox.aspx

[View full width]

<%@ Page Language="VB" %> <%@ Register TagPrefix="custom" Namespace="myControls" %> <!DOCTYPE html PUBLIC "-//W3C//DTD XHTML 1.0 Transitional//EN" "http://www.w3.org/TR /xhtml1/DTD/xhtml1-transitional.dtd"> <script runat="server">     Public ReadOnly Property ProductName() As String         Get             Return txtProductName.Text         End Get     End Property </script> <html xmlns="http://www.w3.org/1999/xhtml" > <head  runat="server">     <title>Show AdvancedCheckBox</title> </head> <body>     <form  runat="server">     <div>     <asp:Label                  Text="Product Name:"         AssociatedControl         Runat="server" />     <asp:TextBox                  Runat="server" />     <br /><br />     <custom:AdvancedCheckBox                  Text="Advanced Options"         PostBackUrl="AdvancedOptions.aspx"         Runat="server" />     </div>     </form> </body> </html> 


ASP. NET 2.0 Unleashed
ASP.NET 2.0 Unleashed
ISBN: 0672328232
EAN: 2147483647
Year: 2006
Pages: 276

flylib.com © 2008-2017.
If you may any questions please contact us: flylib@qtcs.net