Using Serialization
| Serialization is the process of converting an object, or group of objects, into a form that can be persisted . For example, you can serialize an object to the file system or a database table. After an object has been saved to a persistent medium, you can deserialize the object to recover the object. NOTE When I think of serialization, I tend to think of the scene in The Empire Strikes Back when Han Solo is frozen into a block of graphite. In the next movie, Return of the Jedi , Han Solo is unfrozen without any loss of state. Serialization enables you to take a snapshot of an object's state at any moment in time. When you serialize an object, you also serialize the values of its properties. For example, if you serialize an ArrayList to disk, then both the ArrayList itself and all its elements are saved to disk. The .NET Framework includes the following classes for serializing and deserializing objects:
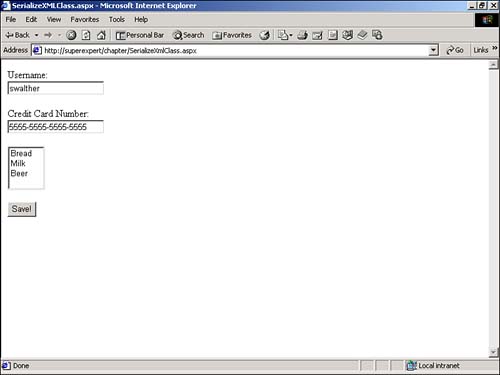
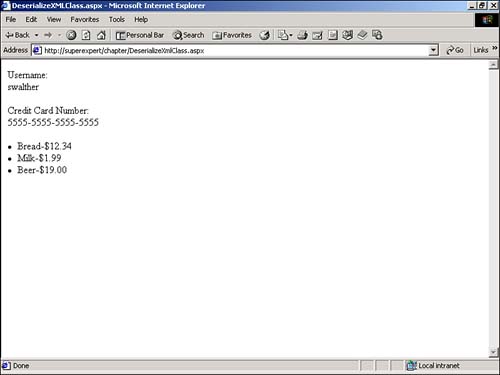
In the following sections, you'll learn how to use the BinaryFormatter and XMLSerializer classes to serialize objects, such as ArrayLists and custom classes to files and databases. NOTE I won't be covering the SoapFormatter directly. However, the SoapFormatter works in a similar fashion to the BinaryFormatter . Using Binary SerializationThe BinaryFormatter enables you to serialize an object or group of objects into a binary format. The BinaryFormatter class has two main methods : Serialize and Deserialize . To serialize an object, you pass an instance of a stream and the object to the Serialize method. To Deserialize an object, you pass an instance of a stream to the Deserialize method. You can use the BinaryFormatter to serialize many, but not all, classes in the .NET Framework. For example, you can serialize ArrayLists , DataSets , and Arrays but not other objects, such as DataReaders or TextBox controls. To serialize a class, the class must have the Serializable attribute or implement the ISerializable interface. The BinaryFormatter differs from the XMLSerializer class in two important aspects. First, when you use the BinaryFormatter to serialize an object, both the private and public members of the class are serialized. The BinaryFormatter captures the complete internal state of an object. The XMLSerializer , on the other hand, only captures the state of public members of a class. Second, unlike the XMLSerializer , you cannot read the output of the BinaryFormatter . The BinaryFormatter serializes an object into a binary format. The advantage of a binary format is that it is relatively compact. You bloat files with XML tags when you serialize an object with the XMLSerializer . Serializing an ArrayListLet's start with a simple example of serialization. This example serializes an ArrayList to the file system. The page in Listing 25.8 takes an ArrayList and serializes it to a file named myArrayList.data . Listing 25.8 SerializeArrayList.aspx<%@ Import Namespace="System.IO" %> <%@ Import Namespace="System.Runtime.Serialization.Formatters.Binary" %> <% Dim colArrayList As ArrayList Dim objFileStream As FileStream Dim objBinaryFormatter As BinaryFormatter colArrayList = New ArrayList() colArrayList.Add( "Milk" ) colArrayList.Add( "Oranges" ) colArrayList.Add( "Beer" ) objFileStream = New FileStream( MapPath( "myArrayList.data" ), FileMode.Create ) objBinaryFormatter = New BinaryFormatter objBinaryFormatter.Serialize( objFileStream, colArrayList ) objFileStream.Close() %> All Done! The C# version of this code can be found on the CD-ROM. In Listing 25.8, an ArrayList is created with three elements: Milk, Oranges, and Beer. Next, a FileStream is initialized around a file named myArrayList.data . The ArrayList is serialized with the BinaryFormatter . An instance of the BinaryFormatter is created and the Serialize method of the BinaryFormatter is called. If you execute the page in Listing 25.8, you'll end up with a new file on your hard drive named myArrayList.data that contains a snapshot of the colArrayList ArrayList . The page in Listing 25.9 illustrates how you can use the Deserialize method to reconstitute the ArrayList from the file. Listing 25.9 DeserializeArrayList.aspx<%@ Import Namespace="System.IO" %> <%@ Import Namespace="System.Runtime.Serialization.Formatters.Binary" %> <% Dim colArrayList As ArrayList Dim objFileStream As FileStream Dim objBinaryFormatter As BinaryFormatter Dim strItem As String objFileStream = New FileStream( MapPath( "myArrayList.data" ), FileMode.Open ) objBinaryFormatter = New BinaryFormatter colArrayList = CType( objBinaryFormatter.Deserialize( objFileStream ), ArrayList ) objFileStream.Close() For Each strItem In colArrayList Response.Write( "<li>" & strItem ) Next %> All Done! The C# version of this code can be found on the CD-ROM. In Listing 25.9, a FileStream is initialized for reading from the myArrayList.data file. Next, an instance of the BinaryFormatter is created and its Deserialize method is called to re-create the ArrayList . Notice that the CType function must be used to explicitly specify the type of object being created from the Deserialize method. In this case, you need to explicitly cast the deserialized object as an ArrayList . Finally, the page iterates through all the elements of the ArrayList and displays the value of each element. Serializing a ClassThis section tackles a more complicated example of serialization ”serializing a custom class to a database table. This custom class represents user information. The class is contained in Listing 25.10. Listing 25.10 UserInfo.vbImports System Namespace myComponents <serializable()> Public Class UserInfo Public Username As String Public Password As String Public Email As String End Class End Namespace The C# version of this code can be found on the CD-ROM. The UserInfo class in Listing 25.10 contains three public properties: Username , Password , and Email . Notice that the class is declared with the <serializable()> attribute. Without this attribute, you could not serialize the class. Before you can use the UserInfo class, you'll need to compile it. Execute the following statement from the command line: vbc /t:Library UserInfo.vb Next, copy the compiled class, UserInfo.dll , to your application /bin directory. Placing the UserInfo.dll file in your /bin directory exposes the class to your ASP.NET application. Next, you need to create the Microsoft SQL Server database table where you will store the serialized version of the UserInfo class. You'll serialize the class to an Image column. The SQL CREATE TABLE statement in Listing 25.11 creates the necessary database table when executed from Query Analyzer. Listing 25.11 CreateUserList.sqlCREATE TABLE UserList ( user_id INT NOT NULL IDENTITY, username VARCHAR( 50 ), userinfo Image ) The C# version of this code can be found on the CD-ROM. Now that you have the UserInfo class and a database table in which to store it, you can create a page that serializes the UserInfo class. The page in Listing 25.12 enables you to assign values to the properties of the UserInfo class through a form and serialize it to the UserList database table. NOTE The SerializeClass.aspx page opens a connection to a database named myData . You'll need to modify the database connection string to open a connection to the particular database where you created the UserList table. Listing 25.12 SerializeClass.aspx<%@ Import Namespace="myComponents" %> <%@ Import Namespace="System.IO" %> <%@ Import Namespace="System.Runtime.Serialization.Formatters.Binary" %> <%@ Import Namespace="System.Data.SqlClient" %> <Script runat="Server"> Sub Button_Click( s As Object, e As EventArgs ) Dim objUserInfo As UserInfo Dim objMemoryStream As MemoryStream Dim objBinaryFormatter As BinaryFormatter Dim conMyData As SqlConnection Dim cmdInsert As SqlCommand objUserInfo = New UserInfo objUserInfo.Username = txtUsername.Text objUserInfo.Password = txtPassword.Text objUserInfo.Email = txtEmail.Text objMemoryStream = New MemoryStream objBinaryFormatter = New BinaryFormatter objBinaryFormatter.Serialize( objMemoryStream, objUserInfo ) conMyData = New SqlConnection( "Server=localhost;UID=sa;PWD=secret;Database=myData" ) cmdInsert = New SqlCommand( _ "Insert Userlist ( username, userinfo ) Values ( @username, @userinfo )", _ conMyData ) cmdInsert.Parameters.Add( "@username", txtUsername.Text ) cmdInsert.Parameters.Add( "@userinfo", objMemoryStream.ToArray() ) conMyData.Open() cmdInsert.ExecuteNonQuery() conMyData.Close() End Sub </Script> <html> <head><title>SerializeClass.aspx</title></head> <body> <form runat="Server"> Username: <br><asp:TextBox id="txtUsername" runat="Server" /> <p> Password: <br><asp:TextBox id="txtPassword" runat="Server" /> <p> Email: <br><asp:TextBox id="txtEmail" runat="Server" /> <p> <asp:Button Text="Submit!" OnClick="Button_Click" runat="Server" /> </form> </body> </html> The C# version of this code can be found on the CD-ROM. When you submit the form in Listing 25.12, the Button_Click subroutine is executed. This subroutine creates an instance of the UserInfo class and assigns the values from the form fields to the properties of the class. NOTE A MemoryStream is similar to a FileStream . However, it does not represent a file on the disk drive. A MemoryStream represents a block of memory. Next, a BinaryFormatter is created and the UserInfo class is serialized to a MemoryStream . Finally, a SQL Insert statement is executed to add the serialized UserInfo class to the Userlist database table. NOTE The ASP.NET Framework uses the same method discussed in this section when storing session state in a database table. All the objects stored in session state are serialized and stored to a temporary database table named ASPStateTempSessions . The page in Listing 25.13 performs the opposite operation. It deserializes the UserList class from the database table and displays the values of its properties. Listing 25.13 DeserializeClass.aspx<%@ Import Namespace="myComponents" %> <%@ Import Namespace="System.IO" %> <%@ Import Namespace="System.Runtime.Serialization.Formatters.Binary" %> <%@ Import Namespace="System.Data.SqlClient" %> <Script runat="Server"> Sub Button_Click( s As Object, e As EventArgs ) Dim objUserInfo As UserInfo Dim objMemoryStream As MemoryStream Dim objBinaryFormatter As BinaryFormatter Dim conMyData As SqlConnection Dim cmdSelect As SqlCommand Dim dtrUserInfo As SqlDataReader Dim arrByte As Byte() conMyData = New SqlConnection( "Server=localhost;UID=sa;PWD=secret;Database=myData" ) cmdSelect = New SqlCommand( _ "SELECT username, userInfo FROM Userlist WHERE username=@username", _ conMyData ) cmdSelect.Parameters.Add( "@username", txtUsername.Text ) conMyData.Open() dtrUserInfo = cmdSelect.ExecuteReader() If dtrUserInfo.Read Then arrByte = dtrUserInfo( "userinfo" ) objMemoryStream = New MemoryStream( arrByte ) objBinaryFormatter = New BinaryFormatter objUserInfo = CType( _ objBinaryFormatter.Deserialize( objMemoryStream ), _ UserInfo ) txtPassword.Text = objUserInfo.Password txtEmail.Text = objUserInfo.Email End If conMyData.Close() End Sub </Script> <html> <head><title>DeserializeClass.aspx</title></head> <body> <form runat="Server"> Username: <br><asp:TextBox id="txtUsername" runat="Server" /> <p> <asp:Button Text="Retrieve!" OnClick="Button_Click" runat="Server" /> <hr> Password: <br><asp:Label id="txtPassword" EnableViewState="False" runat="Server" /> <p> Email: <br><asp:Label id="txtEmail" EnableViewState="False" runat="Server" /> <p> </form> </body> </html> The C# version of this code can be found on the CD-ROM. The page in Listing 25.13 contains a form that enables you to enter a username. If you submit a username, the Button_Click subroutine is executed. The Button_Click subroutine retrieves the UserInfo field that matches the username entered into the form from the Userlist database table. Next, the UserInfo field is converted into a MemoryStream . The BinaryFormatter is then used to deserialize the UserInfo field. Finally, the Password and Email properties of the UserInfo class are read and assigned to two Label controls. The UserInfo class has been fully recovered from the database table. CAUTION If you declare a class in one ASP.NET page, and copy and paste the code for the class to another ASP.NET page, the two classes are not the same class. To serialize and deserialize a class, you must declare the class in a single, separate file. Using XML SerializationThe XmlSerializer enables you to serialize and deserialize an object, or group of objects, into an XML format. The XMLSerializer is different from the BinaryFormatter in two important respects. First, the XmlSerializer only captures the public members of a class. The states of any private members, such as private properties, are not persisted. Second, because the XmlSerializer serializes a class into an XML format, you can read the output of the XmlSerializer . In other words, the end result of XML serialization is a human-readable XML document. NOTE The XMLSerializer is used, behind the scenes, by ASP.NET XML Web Services to transmit messages across the network. For more information on Web Services see Part VI of this book, "Building ASP.NET Web Services." Serializing a ClassThe general method for serializing and deserializing a class to XML is to create an instance of the XmlSerializer class and call its Serialize and Deserialize methods. You can serialize a class to persistent mediums, such as files and databases. For example, the page in Listing 25.14 serializes a class that represents a shopping cart to an XML file (see Figure 25.3). Listing 25.14 SerializeXmlClass.aspx<%@ Import Namespace="System.IO" %> <%@ Import Namespace="System.Xml" %> <%@ Import Namespace="System.Xml.Serialization" %> <Script runat="Server"> Public Class ShoppingCart Public Username As String Public CreditCardNumber As String Public CartItems() As CartItem End Class Public Class CartItem Public ProductName As String Public ProductPrice As Decimal End Class Sub Button_Click( s As Object, e As EventArgs ) Dim objShoppingCart As ShoppingCart Dim colCartItems As ArrayList Dim objCartItem As CartItem Dim objItem As ListItem Dim objStreamWriter As StreamWriter Dim objXMLSerializer As XMLSerializer ' Create the Shopping Cart objShoppingCart = New ShoppingCart objShoppingCart.Username = txtUsername.Text objShoppingCart.CreditCardNumber = txtCCnumber.Text colCartItems = New ArrayList For Each objItem in lstCart.Items objCartItem = New CartItem objCartItem.ProductName = objItem.Text objCartItem.ProductPrice = objItem.Value colCartItems.Add( objCartItem ) Next objShoppingCart.CartItems = colCartItems.ToArray( GetType( CartItem ) ) ' Save to XML File objStreamWriter = File.CreateText( MapPath( "ShoppingCart.xml" ) ) objXMLSerializer = New XMLSerializer( GetType( ShoppingCart ) ) objXMLSerializer.Serialize( objStreamWriter, objShoppingCart ) objStreamWriter.Close End Sub </Script> <html> <head><title>SerializeXMLClass.aspx</title></head> <body> <form runat="Server"> Username: <br><asp:TextBox id="txtUsername" runat="Server" /> <p> Credit Card Number: <br><asp:TextBox id="txtCCnumber" runat="Server" /> <p> <asp:ListBox id="lstCart" Runat="Server" > <asp:ListItem Text="Bread" Value="12.34" /> <asp:ListItem Text="Milk" Value="1.99" /> <asp:ListItem Text="Beer" Value="19" /> </asp:ListBox> <p> <asp:Button Text="Save!" OnClick="Button_Click" Runat="Server" /> </form> </body> </html> The C# version of this code can be found on the CD-ROM. Figure 25.3. Serializing a class to an XML file. The page in Listing 25.14 contains declarations for two classes. The first class, named ShoppingCart , is used to represent a user's shopping cart. It contains public properties that represent a username, credit card number, and list of items. Another class named CartItem represents each item in the shopping cart. The CartItem class has public properties that represent the name and price of each product. When you submit the form in Listing 25.14, the Button_Click subroutine is executed. The Button_Click subroutine creates an instance of the ShoppingCart class that represents all the information in the form. The instance of the ShoppingCart class is serialized to a file named ShoppingCart.xml by calling the Serialize method of the XmlSerializer class. You should notice that the XmlSerializer is initialized with the following line of code: objXMLSerializer = New XMLSerializer( GetType( ShoppingCart ) ) When you instantiate the XmlSerializer , you must supply the type of the root class being serialized. In Listing 25.14, two classes are serialized: the ShoppingCart and CartItem classes. Because the ShoppingCart class contains instances of the CartItem class, you instantiate the XmlSerializer with the type of the ShoppingCart class. The process of deserializing a class from XML is similar to the process of serializing a class. The page in Listing 25.15 illustrates how the ShoppingCart class can be recovered from the file system (see Figure 25.4). Listing 25.15 DeserializeXmlClass.aspx<%@ Import Namespace="System.IO" %> <%@ Import Namespace="System.Xml" %> <%@ Import Namespace="System.Xml.Serialization" %> <Script runat="Server"> Public Class ShoppingCart Public Username As String Public CreditCardNumber As String Public CartItems() As CartItem End Class Public Class CartItem Public ProductName As String Public ProductPrice As Decimal End Class Sub Page_Load Dim objShoppingCart As ShoppingCart Dim objItem As CartItem Dim objStreamReader As StreamReader Dim objXMLSerializer As XMLSerializer ' Retrieve XML File objStreamReader = File.OpenText( MapPath( "ShoppingCart.xml" ) ) objXMLSerializer = New XMLSerializer( GetType( ShoppingCart ) ) objShoppingCart = CType( _ objXMLSerializer.Deserialize( objStreamReader ), _ ShoppingCart ) objStreamReader.Close() ' Display Shopping Cart txtUsername.Text = objShoppingCart.Username txtCCnumber.Text = objShoppingCart.CreditCardNumber For Each objItem in objShoppingCart.CartItems lblCart.Text &= "<li>" & objItem.ProductName lblCart.Text &= "-" & objItem.ProductPrice.ToString( "c" ) Next End Sub </Script> <html> <head><title>DeserializeXMLClass.aspx</title></head> <body> <form runat="Server"> Username: <br><asp:Label id="txtUsername" runat="Server" /> <p> Credit Card Number: <br><asp:Label id="txtCCnumber" runat="Server" /> <p> <asp:Label id="lblCart" Runat="Server" /> </form> </body> </html> The C# version of this code can be found on the CD-ROM. Figure 25.4. Deserializing a class from an XML file. In the Page_Load subroutine in Listing 25.15, a FileStream is opened to the ShoppingCart.xml file. Next, an instance of the XmlSerializer is instantiated . The Deserialize method is called to retrieve the ShoppingCart from the FileStream . Finally, the properties of the ShoppingCart are displayed with ASP.NET Label controls. NOTE Notice that the ShoppingCart and CartItem classes are defined separately within Listing 25.14 and Listing 25.15. Because the XmlSerializer does not store type information, the class used to serialize an object does not have to be the same as the class used to deserialize the same object. Controlling SerializationIn the previous section, you serialized a class representing a shopping cart to the file system. The serialized ShoppingCart class is contained in Listing 25.16. Listing 25.16 ShoppingCart.xml [View full width] <?xml version="1.0" encoding="utf-8"?> <ShoppingCart xmlns:xsi="http://www.w3.org/2001/XMLSchema-instance" xmlns:xsd="http://www The C# version of this code can be found on the CD-ROM. If you look closely at the XML file in Listing 25.16, you'll notice that each of the properties of the ShoppingCart class and CartItem class are represented as separate XML elements. When you create an XML document, you must make a choice about whether a property should be represented by an XML element or an XML attribute. Some people prefer to represent individual properties as elements, while other people prefer attributes. By default, the XmlSerializer converts class properties to XML elements. However, you can override this default behavior by supplying a special attribute when declaring properties of a class. You can use any of the following attributes to control exactly how a class is serialized or deserialized to XML:
For example, if the ShoppingCart and CartItem classes are declared like this: <XmlRootAttribute("UserShoppingCart")> Public Class ShoppingCart <XmlAttributeAttribute()> Public Username As String <XmlIgnoreAttribute()> Public CreditCardNumber As String Public CartItems() As CartItem End Class Public Class CartItem <XmlAttributeAttribute()> Public ProductName As String <XmlAttributeAttribute()> Public ProductPrice As Decimal End Class then the classes will be serialized like this: [View full width]
Notice that the Username , ProductName , and ProductPrice properties are serialized as XML attributes instead of as elements. The CreditCardNumber property is ignored. |
EAN: 2147483647
Pages: 263