Using Files and Directories
| All the classes for working with files and directories can be found in the System.IO namespace. The classes in this namespace can be roughly divided into three groups: classes for working with directories, classes for working with files, and classes for working with streams. There are two main classes for working with directories:
There are also two main classes for working with files:
The System.IO namespace includes several classes for working with file streams:
Finally, the System.IO namespace contains the following useful utility class:
In the following sections, you'll learn how to use these classes to read and write to a file, work with directories, and work with file system paths. Creating and Reading Text FilesThe general approach to reading or writing to a text file is to use one of the shared methods of the File class to return an appropriate stream. When writing to a file, you'll use an instance of the StreamWriter class. When reading from a file, you'll use an instance of the StreamReader class. Writing to a Text FileThe easiest method to write to a file is to call the CreateText method of the File class to return a StreamWriter . After you have created a StreamWriter , you can call its Write method to write text to a file. For example, the ASP.NET page in Listing 25.1 takes whatever text you enter into the TextBox control and saves it to a file named myFile.txt . Listing 25.1 WriteText.aspx<%@ Import Namespace="System.IO" %> <Script Runat="Server"> Sub Button_Click( s As Object, e As EventArgs ) Dim objStreamWriter As StreamWriter objStreamWriter = File.CreateText( MapPath( "myFile.txt" ) ) objStreamWriter.WriteLine( txtInput.Text ) objStreamWriter.Close End Sub </Script> <html> <head><title>WriteText.aspx</title></head> <body> <form runat="Server"> <h1>Write to a Text File:</h1> <br> <asp:TextBox ID="txtInput" Runat="Server" /> <asp:Button Text="Write!" OnClick="Button_Click" Runat="Server" /> </form> </body> </html> The C# version of this code can be found on the CD-ROM. In Listing 25.1, a text file is created in the Button_Click subroutine. An instance of the StreamWriter class is returned by the CreateText method. The WriteLine method is called to write text to a file named myFile.txt . Finally, calling the Close method closes the StreamWriter . The page in Listing 25.1 overwrites any existing file when you submit new text. If you want to append text to a file, then you need to use the AppendText method instead of the CreateText method. The page in Listing 25.2 illustrates how to use the AppendText method in an ASP.NET page. Listing 25.2 AppendText.aspx<%@ Import Namespace="System.IO" %> <Script Runat="Server"> Sub Button_Click( s As Object, e As EventArgs ) Dim objStreamWriter As StreamWriter objStreamWriter = File.AppendText( MapPath( "myFile.txt" ) ) objStreamWriter.WriteLine( txtInput.Text ) objStreamWriter.Close End Sub </Script> <html> <head><title>AppendText.aspx</title></head> <body> <form runat="Server"> <h1>Append to a Text File:</h1> <br> <asp:TextBox ID="txtInput" Runat="Server" /> <asp:Button Text="Append Text!" OnClick="Button_Click" Runat="Server" /> </form> </body> </html> The C# version of this code can be found on the CD-ROM. The page in Listing 25.2 is almost exactly the same as the page in Listing 25.1. However, when you submit text with the page in Listing 25.2, the text is appended to the file instead of overwriting the file. Reading from a Text FileThe easiest method of reading from a text file is to call the OpenText method of the File class to return a StreamReader . After you have created a StreamReader , you can call the ReadLine method to retrieve each line of text from the stream. For example, the page in Listing 25.3 reads every line of text from a file named myFile.txt . Listing 25.3 OpenText.aspx<%@ Import Namespace="System.IO" %> <Script Runat="Server"> Sub Page_Load Dim objStreamReader As StreamReader Dim strInput As String If File.Exists( MapPath( "myFile.txt" ) ) Then objStreamReader = File.OpenText( MapPath( "myFile.txt" ) ) strInput = objStreamReader.ReadLine() While strInput <> Nothing lblContents.Text &= "<li>" & strInput strInput = objStreamReader.ReadLine() End While objStreamReader.Close Else lblContents.Text = "myFile.txt does not exist!" End If End Sub </Script> <html> <head><title>OpenText.aspx</title></head> <body> <h1>Contents of myFile.txt</h1> <asp:Label ID="lblContents" Runat="Server" /> </body> </html> The C# version of this code can be found on the CD-ROM. In Listing 25.3, every line of text is read from a file named myFile.txt and displayed in a Label control. Each line is retrieved by calling the ReadLine method within a WHILE...WEND loop. When the end of the file is reached, the ReadLine method returns the value Nothing . Notice that the Exists method is called to check whether the myFile.txt file exists before the file is opened. The Exists method returns True when a file with the specified path exists, and False otherwise . Creating and Reading Binary FilesMany types of files stored on your computer file system, such as GIF and JPEG images, are not stored as text files. To work with these types of files, you'll need to use the classes for working with binary files. The general method for working with binary files is to create an instance of the FileStream class to represent a file stream around the binary file. After you have created a FileStream , you can use the BinaryWrite method to write to the file, and the BinaryRead method to read from the file. Writing to a Binary FileThe first step in writing to a binary file is to create an instance of the FileStream class. The FileStream class has several constructors. In the simplest case, you can construct a new instance of the FileStream class by providing the path to a binary file and a FileMode like this: objFileStream = New FileStream( MapPath( "myFile.data" ), FileMode.Create ) This statement creates a new binary file named myFile.data . If the file doesn't exist, it creates it. If the file already exists, it overwrites it. The FileMode enumeration has the following values:
After you have an instance of the FileStream class, you can use the instance to initialize a BinaryWriter like this: objBinaryWriter = New BinaryWriter( objFileStream ) You can use the Write method of the BinaryWriter class to write to a binary file. There are several overloaded versions of the Write method. For example, you can use the Write method to write Integers, Boolean values, Chars, or Bytes to a binary file. NOTE For a complete list of the overloaded methods of the Write method, see the .NET Framework SDK Documentation. The page in Listing 25.4 writes the numbers 0 to 50 to a binary file named myFile.data . Listing 25.4 BinaryWriter.aspx<%@ Import Namespace="System.IO" %> <% Dim objFileStream As FileStream Dim objBinaryWriter As BinaryWriter Dim intCounter As Integer objFileStream = New FileStream( MapPath( "myFile.data" ), FileMode.Create ) objBinaryWriter = New BinaryWriter( objFileStream ) For intCounter = 0 To 50 objBinaryWriter.Write( intCounter ) Next objBinaryWriter.Close %> Created binary file! The C# version of this code can be found on the CD-ROM. If you execute the page in Listing 25.4 and open the myFile.data file in Notepad, you'll get an unreadable garble of text. The numbers have been stored as integers, not as strings. NOTE Visual Basic Integers are mapped to the System.Int32 data type in the .NET Framework. Reading from a Binary FileTo read from a binary file, you must create an instance of both the FileStream class and BinaryReader class. You use the FileStream class to initialize the BinaryReader class. The BinaryReader class contains several methods for reading a binary file. For example, if you want to read Visual Basic Integers from a binary file, then you use the ReadInt32 method; if you want to read bytes, then you use the ReadByte method; if you want to read Boolean values, then you use the ReadBoolean method. The page in Listing 25.5 opens a binary file named myFile.data that contains Integer values and displays all the file's contents. Listing 25.5 BinaryReader.aspx<%@ Import Namespace="System.IO" %> <% Dim objFileStream As FileStream Dim objBinaryReader As BinaryReader Dim intCounter As Integer objFileStream = New FileStream( MapPath( "myFile.data" ), FileMode.Open ) objBinaryReader = New BinaryReader( objFileStream ) For intCounter = 0 to 50 Response.Write( "<li>" & objBinaryReader.ReadInt32() ) Next objBinaryReader.Close %> All Done! The C# version of this code can be found on the CD-ROM. Displaying the Contents of a DirectoryIf you want to retrieve a list of items in a directory, you can use either the Directory or DirectoryInfo class. The Directory class contains shared methods for working with directories and the DirectoryInfo class contains instance methods. For example, the Directory class contains the following three methods:
The ASP.NET page in Listing 25.6 returns a list of all files in a directory named myDir (see Figure 25.1). Listing 25.6 GetFiles.aspx<%@ Import Namespace="System.IO" %> <Script runat="Server"> Sub Page_Load dgrdFiles.Datasource = Directory.GetFiles( "c:\myDir" ) dgrdFiles.DataBind() End Sub </Script> <html> <head><title>GetFiles.aspx</title></head> <body> <asp:DataGrid ID="dgrdFiles" CellPadding="10" Runat="Server" /> </body> </html> The C# version of this code can be found on the CD-ROM. Figure 25.1. Displaying the contents of a directory. You also can pass a pattern to the GetFiles , GetDirectories , or GetFileSystemEntries methods. For example, if you want to return a list of only those files with the extension . aspx , then you would call the GetFiles method like this: Directory.GetFiles( "c:\myDir", "*.aspx" ) The pattern is not case sensitive. So both *.txt and *.TXT match any text files. Retrieving Path InformationThe System.IO namespace includes a useful utility class named the Path class. This class has the following methods:
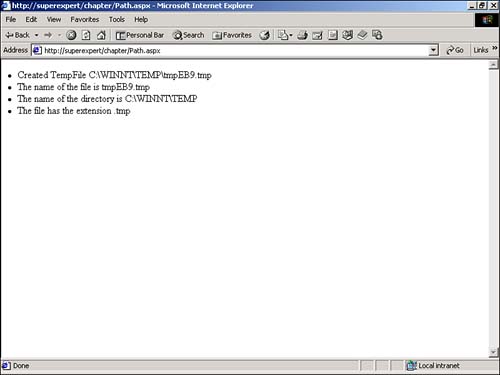
The page in Listing 25.7 illustrates how to use several of these methods. Listing 25.7 Path.aspx<%@ Import Namespace="System.IO" %> <% Dim strPath As String ' Get a Temporary File strPath = Path.GetTempFileName Response.Write( "<li>Created TempFile " & strPath ) ' Retrieve File Name Response.Write( "<li>The name of the file is " ) Response.Write( Path.GetFileName( strPath ) ) ' Retrieve Directory Name Response.Write( "<li>The name of the directory is " ) Response.Write( Path.GetDirectoryName( strPath ) ) ' Retrieve File Extension Response.Write( "<li>The file has the extension " ) Response.Write( Path.GetExtension( strPath ) ) %> The C# version of this code can be found on the CD-ROM. In the page in Listing 25.7, a new file is created with the GetTempFileName method. Next, the filename, the directory path, and the file extension are retrieved and displayed (see Figure 25.2). Figure 25.2. Using methods of the Path class. |

EAN: 2147483647
Pages: 263