Installing the Right Version of Visual Studio
Installing the "Right" Version of Visual StudioWhen Visual Studio first went to market, it appeared in a dizzying array of versions. These include "Express", "Standard", "Professional", and "Team" SKUs[3]. I won't attempt to describe the differences between these versions, as Microsoft has done a pretty good job of doing so[4]. Consider that I'm developing the materials for the book using the Team Edition (for Software Developers). This version exposes the (copious) project management as well as code analysis tools used to build and test the code. Nope, this edition is probably too expensive for many development shops. At almost $3,000, it's fairly pricy. While the Express editions are freely downloadable, they lack many of the features you'll need in order to create, test, and deploy serious applications. I expect you'll want to use the Standard ($200) or (more likely) the Professional Edition ($2,500). Given the prices, you might find it more cost-effective to sign up for an MSDN subscription. Many of the developers I meet at conferences are subscribersgenerally, they find the ability to download whatever tools they need on demand is a substantial benefit and worth the price. If you're a student, check with your school or instructor or that guy in the dorm that seems to have everything. Most institutions offer academic discountsexcept those that advocate use of open source. Just don't get caught with a pirated version. There's no telling what it can do to your system.
Each version of Visual Studio is designed for a specific version of the .NET Framework. This means that you won't be able to reference any other version of the Framework. The original Visual Studio .NET (1.0) supports development against the 1.0 version of the .NET Framework. Visual Studio .NET 2003 supports the 1.1 Framework and Visual Studio 2005 supports the 2.0 Framework. No, you won't be able to create applications targeted to a down-level (or up-level) version of the .NET Framework. The Orcas version promises to address this (somehow), but it's not at all clear what that means in reality. Dealing with CTP or Beta ShardsSince this book will appear long after the beta and community tech preview (CTP) releases of Visual Studio 2005, you should not have to worry about installing Visual Studio on a system that has had one of the pre-release versions installed. However, there are CTP versions of Orcas being distributed as I write this book. To be perfectly clear, you should never try to install a pre-released copy of any software (Microsoft or not) on a system that you can't afford to reformat or re-image with ease. Please understand that it's virtually impossible to uninstall software as complex as Visual Studio or SQL Serverit's like trying to remove all of the rice from your suitcases after your honeymoon. I've had mixed success using the "uninstaller" utilities that Microsoft (and others) provide. Yes, some folks report that these utilities work fine and, in one case, one of these utilities was able to clean up one of my systems (after several hours) to permit a full install. However, my concern is that if they "seem" to work but don't clear out every jagged shard of the previous installation left behind after the uninstall, your application development experience might be plagued with problems that are hard (to impossible) to nail down. Again, I recommend that you set up your Visual Studio 2005 on a "clean" systemone that has never had any beta software installed. Walking Through a Typical InstallationThe installation dialogs in Visual Studio are easier than ever to run. The Setup program (launched by autostart on the DVD) begins with a "navigator" dialog, as shown in Figure 4.1 Figure 4.1. The initial setup dialog for Visual Studio 2005.
I'm installing the Professional Edition in this walkthrough. The Express, Standard, and Team editions use different (albeit similar) setup programs. The Express setup has only two optionsinstall SQL Server Express Edition or not. It's from here that you can install (step by step) Visual Studio and the documentation and check for updates. As Setup completes each phase, it returns to this dialog. Click on "Install Visual Studio 2005" to proceed. As Setup continues, it checks to see if any recognizable shards of the beta or CTP versions remain on your systemno, it does not always find them all. It also checks to see if you're running one of the acceptable OS and hardware configurations.
If you're running CP/M and have figured out how to start setup, you'll find that it won't get very far. If your system passes muster, you'll see the first dialog that asks if you want to send information about your setup experience to Microsoft (see Figure 4.2). If you choose this option, Microsoft sends a report back to the mother ship if Setup gets that far. This data (supposedly) helps Microsoft refine the setup routineseither that or it helps identify the types of systems people are trying to use or the brand of cigars you smoke. Figure 4.2. Do you want to send information back to Microsoft?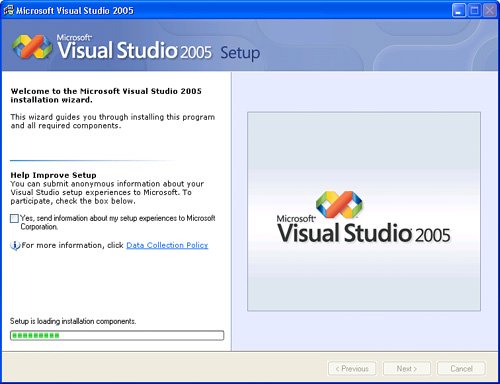 The next dialog you'll (eventually) see (Figure 4.3) reports on the setup components already installed on your system. In this case, I've already installed the "Professional" version of Visual Studio 2005, so Setup found many of the fundamental components already in placelike the 2.0 Framework. Enter the product key as provided with Visual Studio 2005 and click Nextafter you accept the terms of the End User License Agreement (EULA). Of course, I recommend that you read this contract carefully or get your attorney to do so. It has been rumored that earlier versions of the EULA contained references to your first-born child and periods of unpaid servitude. Figure 4.3. Enter the product key provided in your Visual Studio packaging.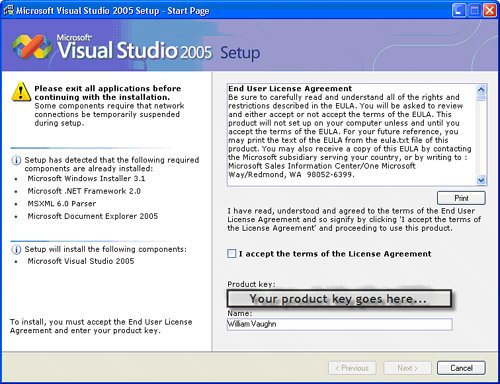 Once you've accepted the EULA, you'll be asked to choose what type of installation you want (see Figure 4.4). I recommend that you choose "Custom". This way, you can enable or disable specific languages that you intend to use. This approach can mean a faster install and fewer irrelevant bits being dumped on your hard drive. This dialog also reports on available disk space and the amount of space your choice (might) require. You'll get another chance to set this path in the next dialog (if you choose "Custom"). Figure 4.4. Choose "Custom" to permit selection of the languages and features to install.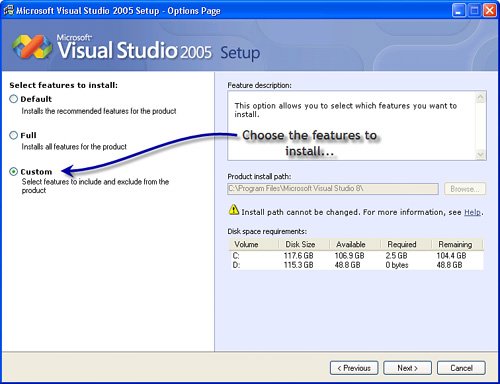 On the "Custom" options page, you can disable installation of any of the languages or features that you don't need. In this case, I disabled the "Visual C++" language. Note that as you uncheck languages or features, the amount of disk space required for the installation is adjusted accordingly. Note that Visual Source Safe is not listed here as an option. You'll have to install that separately if your SKU includes it. If you see a green box in one of the option checkboxes, it means that only part of that feature is to be installed. You'll need to drill into each of these items to enable/disable specific components. SQL Server Express edition is one of the options you'll see in some Visual Studio SKUs. If you choose to install it, the Setup program will take all of the default options and install a named instance (SQLEXPRESS) of SQL Server on your system. I'll discuss how to tune up that instance later in this chapter. However, if you want to customize the SQL Server Express installation (and many of you will want to), uncheck the SQL Server Express option. Once Visual Studio has installed, you can go back and run the SQL Server Express setup independentlyyou'll be able to customize the location and other attributes of the installation at that time. Figure 4.5. Check or uncheck the features and languages you need or don't need.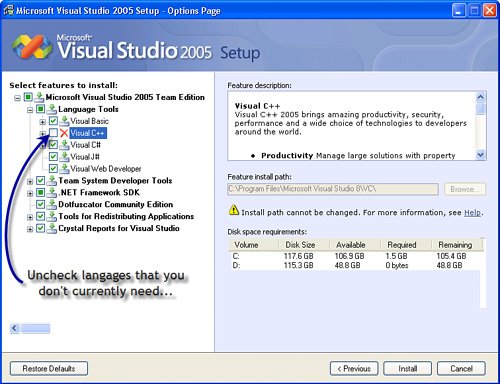 Once you click "Install", setup proceeds to install the selected languages and features on your hard disk. When it's finished installing, you'll get a report on any issues that remain (as shown in Figure 4.6). In this case, I choose the Office 2003 development features, but I don't have Office 2003 installed on the machine. I can ignore this warning. Figure 4.6. The install phase of the Setup program is completed. This completes phase 1 of the installation routine. When you click "Finish", the Setup program returns to the initial navigator dialog, as shown in Figure 4.1. Installing the MSDN DocumentationIn phase 2 of the installation, you install the MSDN product documentation. Again, these dialogs let you install all or part of the documentation on your local hard drive. Note that MSDN documentation (more current documentation) is available online directly from the MSDN web sites, so the locally installed documentation might be of less interest unless you don't have live online connectivity. The dialog shown in Figure 4.7 permits you to choose from the list of MSDN documentation modules to install. Remember that you can return to this dialog later to add or remove any of these items. Figure 4.7. Choose the documentation files to install.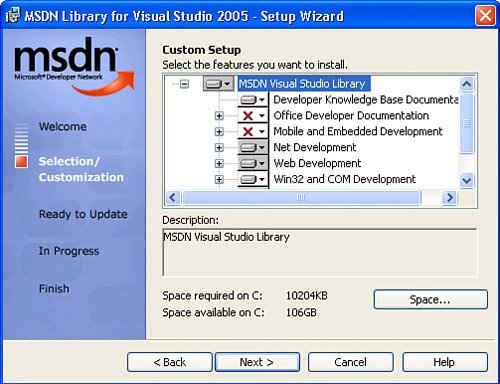 Once the documentation is installed (you can usually go to lunch while it's copying files), you'll return again to the navigator dialog (see Figure 4.1). At this point, you can check for service releases. Basically, this returns you to the online Windows Update site that lets your system scan for services updates that apply to your system. |

EAN: 2147483647
Pages: 227