Monitoring Performance
Monitoring the performance of your Windows Server 2003 servers is an essential task that is often overlooked until something goes wrong. Fortunately Windows Server 2003 comes with a variety of tools that can be used to track the performance of your server and assist in quickly diagnosing any performance-related problems. Using Task ManagerThe Task Manager utility is included in Windows Server 2003 to give administrators a way to monitor and manage the state of currently running applications and processes. Almost a mini performance utility, this tool provides a quick glance into a system's health. In addition, Task Manager provides the administrator with a summarized view of the basic system resources in use. The Task Manager can be used to monitor the state of active applications, including a real-time view of the system resources assigned to each application. Task Manager also allows you to observe applications that have stopped responding and to terminate them. Task Manager can be started several ways:
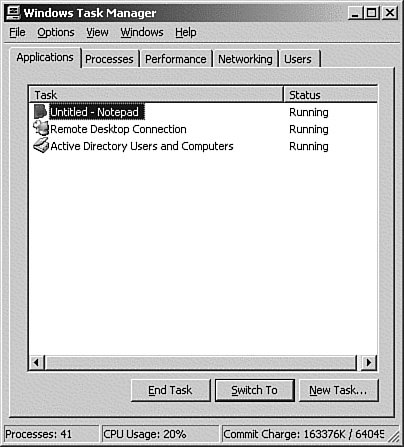
The Task Manager window has five tabs: Applications, Processes, Performance, Networking, and Users. Each tab is discussed in the sections that follow. Applications TabThe Applications tab, shown in Figure 14.1, displays a list of the currently active applications, along with their statuseither Running or Not Responding. The default status for a program is Running; however, there are times when a program temporarily displays a status of Not Responding. This usually occurs when another program or programs have a higher priority and receive the bulk of the system resources, or if a program is performing a computationally heavy task and is too busy to acknowledge any requests. Figure 14.1. The Task Manager's Applications tab, showing running applications. If the application not responding is not automatically restored to Running status after the other applications have completed, you probably need to terminate it manually. This can be accomplished by right-clicking the application and selecting End Task from the pop-up menu or by clicking the End Task button at the bottom of the Task Manager window. Unfortunately, if the application has any files open, your data will not be saved. Task Manager also allows you to terminate running applications. There are also three methods to start applications using Task Manager:
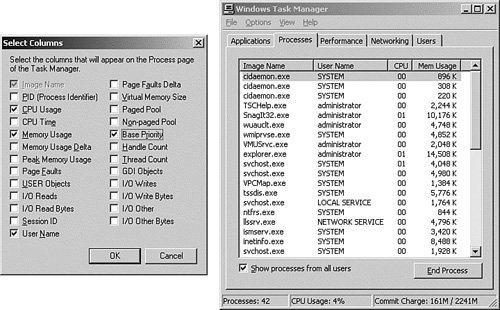
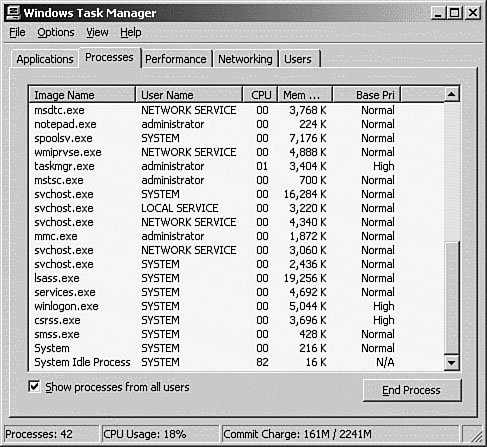
Processes TabThe Processes tab, shown in Figure 14.2, displays a list of the currently active processes, along with the resources they are using. Even on a system that displays few applications running, there will always be multiple processes running in the background. Figure 14.2. The Task Manager's Processes tab, showing processes sorted by CPU time. There are two reasons for this. First, operating system processes won't be displayed on the Applications tab. The second reason is that if you start an application called go.exe, for example, odds are the application will start multiple background processes. This is where the Processes tab can be pretty handy because the main application might not be using a lot of resources, but one of the background processes could be maxing out the CPU! The default view shows the processes running for the currently logged-on user, but the processes for all users can be shown by selecting the Show Processes from All Users check box in the lower-left corner of the dialog box. The default resources displayed are CPU % (abbreviated as CPU) and Memory Usage. However, additional items, such as Page Faults, I/O Writes, and Peak Memory Usage, can be added by selecting View, Set Columns from the Task Manager menu bar. Using the Processes tab, you can immediately see which processes are using the majority of the system resources. In the default view, you can sort the processes by name (Image Name), username, CPU percentage used (CPU), or memory used (Mem Usage). For example, to sort the processes by the amount of CPU percentage used, click the CPU heading twice. This allows you to identify a process that is hogging the resources and starving the other processes. This can indicate a process that is having a problem and needs to either be terminated or set to a lower priority. Under normal conditions, the System Idle Process should have the highest percentage in the CPU column. Understanding PriorityWindows Server 2003 provides a fast, reliable, multitasking environment that supports preemptive multitasking and the execution of applications in separate address spaces. In preemptive multitasking, the operating system controls which application has access to the CPU and for how long. The operating system is free to switch resources at any time to an application with a higher priority. This also allows the operating system to revoke resources from a defective or a poorly designed program that tries to dominate resources. Windows Server 2003 supports multiple units of execution for a single process, using a process called multithreading. In a multithreaded environment, a process can be broken up into subtasks, called threads, which can execute independently of the main process. This allows a program to perform multiple tasks simultaneously instead of sequentially. For example, when you are using Microsoft Outlook, you can read messages or create a new message while downloading or sending messages. Multithreading means one process does not have to wait for another to finish. In a preemptive multitasking system, individual tasks cannot dictate how long they use the system resources. This means that some type of priority system is necessary to ensure that critical tasks get a larger share of the processor's time. The priority system is part of the operating system, but the individual tasks can tell the OS what priority they need. This works well in theory, but there are always situations in which a system might get loaded with high-priority tasks that keep the low-priority tasks from getting any system resources at all. Windows Server 2003 uses a dynamic priority system that allows it to adjust the priority of tasks to reflect constantly changing system conditions. For example, if a low-priority task is passed over in favor of a high-priority task, Windows Server 2003 increases the priority of the low-priority task until it gets some system resources. After a high-priority task runs for a while, Windows Server 2003 lowers that task's priority. The dynamic priority system ensures that some tasks get more system resources than others and that every task gets at least some system resources. A foreground application is one that is made active by selecting it on the Windows Server 2003 desktop, thus bringing it to the foreground. All other applications running are then termed background applications, with respect to the foreground application. By default, Windows Server 2003 assigns more resources and a higher priority to a background application than to foreground applications in the same priority class. This is, of course, because Windows Server 2003 is a server operating system, and servers typically host background operations such as file sharing and print services. Windows Server 2003 uses priority to allocate processor time in small chunks to applications. This is called time slicing. Windows Server 2003 allocates multiple, short, variable-length time slices to foreground applications, while allocating longer, fixed-length, but less-frequent time slices to background applications or services. To change the default behavior, open the System applet in the Control Panel (see Figure 14.3). From the Advanced tab, click the Settings button in the Performance area. From the Performance Options dialog box, you can select the Advanced tab to optimize the responsiveness of your system. Two choices are available: Programs and Background Services. The default is Background Services, in which the server assigns more resources to applications running in background sessions, such as mail or database servers. This results in a more responsive system, and it's recommended for servers that are not running foreground applications. Figure 14.3. The Advanced tab of System Properties, showing performance options.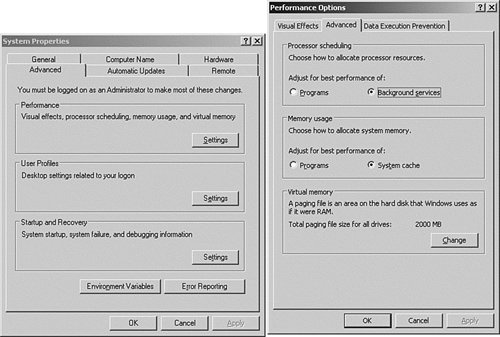 Note: Processor Scheduling On a server, there is rarely a good reason to change the configuration to adjust performance for programs, except on Terminal Servers running in Application mode. Windows Server 2003 further subdivides processing time to applications using different classes of priority levels. Priority levels are assigned numbers from 0 to 31. Applications and noncritical operating system functions are assigned levels of 0 to 15, whereas real-time functions, such as the operating system kernel, are assigned levels of 16 to 31. The normal base priority is 8. By default, priority levels are not displayed in the Task Manager window. To configure Task Manager to display the priority level of running applications, perform the procedure outlined in Step by Step 14.1.
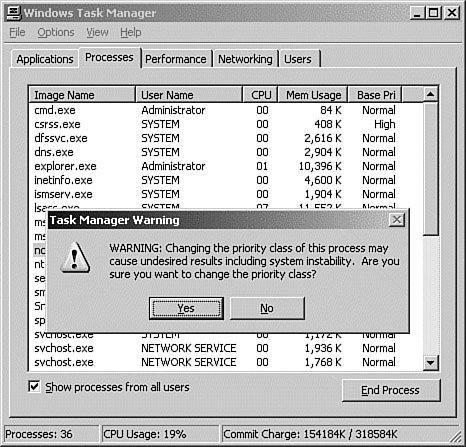
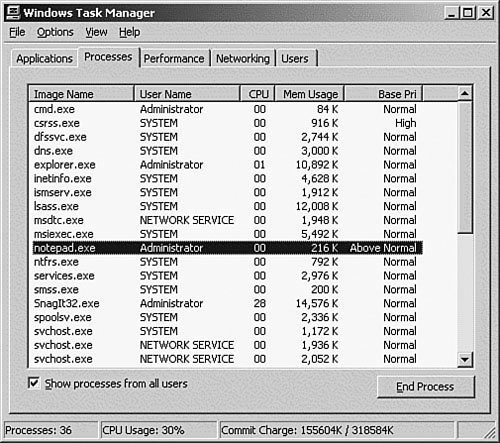
Figure 14.5. Task Manager reconfigured to display the priority of all processes. If a process is running at a low priority, and a real-time process is started, the real-time process receives more system resources than the process running at low priority. This can sometimes cause the application that the lower-priority process is controlled by to show a status of Not Responding on the Task Manager's Applications tab. To keep a real-time process from starving a lower-priority process, you can manually set the priority of the lower-priority process to a higher value. To set a process to a higher priority, perform the procedure outlined in Step by Step 14.2.
As you might have noticed in the previous exercise, Task Manager does not allow you to set a process to a specific number: It allows you to set only priority classes. The priority classes are as follows:
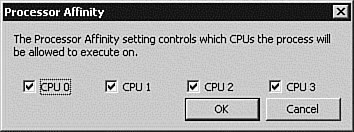
Using Task Manager to tune an application in this manner is a temporary fix because after you reboot your system or stop and start the application, you lose the priority properties. Exam Alert: Real-Time Rights To use the Realtime option, you must be logged on as a user with Administrator rights. It is important to know this for the exam. Normally, there should be no need to change the priority of processes. However, suppose you have a database query process that cannot complete because the process is not getting enough CPU time. In this case, you can temporarily change the priority of the process to High to enable the task to complete successfully. Be warned that if you run applications at High priority, this can slow overall performance because other applications get less I/O time. Caution: Be Careful with Realtime Changing the base priority of an application to Realtime makes the priority of the application higher than the process that monitors and responds to keyboard input. If the process you set to Realtime completes successfully, fine. However, if it requires any input for processing or recovery, your only option is to reboot the system. In some situations, a process must be terminated. You can either terminate a specific process or terminate the process and all other processes linked to it. This is accomplished by right-clicking the process entry in the Processes tab of the Task Manager and selecting End Process to terminate a specific process or by selecting End Process Tree to terminate that process and any other processes it has started. For example, if you terminate the process for a word processing program, you can select End Process Tree to additionally terminate the spell checker and grammar processes started by the word processor process. Exam Alert: Expect Process-Related Questions Not all processes can be terminated using Task Manager. The Kill utility, included in the Windows Server 2003 Resource Kit, terminates most processes, including services or system processes. Use it very carefully because terminating system processes can make your server unstable. On a multiprocessor server, an additional menu item called Set Affinity appears on the pop-up menu on the Processes tab. The Set Affinity command allows you to limit a process to a specific CPU. To set a process to use a specific CPU, perform the procedure outlined in Step by Step 14.3.
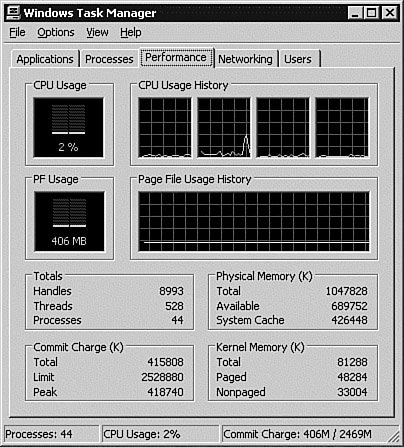
Caution: Processor Affinity The processor affinity option should be used with care because it could potentially decrease the performance of the process. This can occur in a situation where the processor that you have selected starts to get overloaded. Unlike other processes that can use time slices from any processor, your process is locked on to the overloaded processor. Performance TabThe Performance tab, shown in Figure 14.10, displays the CPU and memory usage for your server. The display includes graphs of the current usage, plus additional histograms showing recent usage. Below the graphs are numerical statistics for the CPU and memory usage. Figure 14.10. The Task Manager's Performance tab, showing server-usage statistics on a multi-processor system. The information shown here can give you a quick overview of the performance characteristics of your server. Any abnormalities displayed here indicate that you should investigate further using some of the other Windows Server 2003 utilities. Networking TabThe Networking tab is displayed if you have a NIC installed. The default view displays the state, link speed, and network utilization of each NIC, as shown in Figure 14.11. Figure 14.11. The Task Manager's Networking tab, showing network-utilization statistics.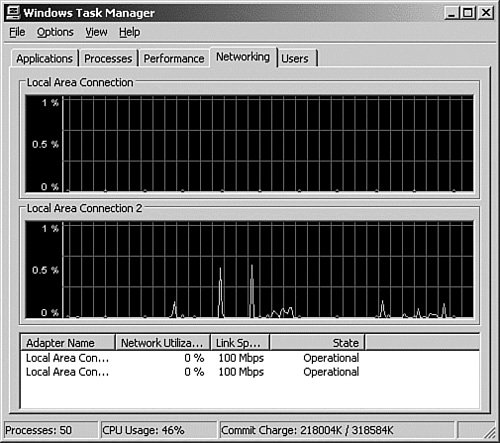 The information available on the Networking tab gives you an overview of the performance of your network connections. At a glance, you can see what connections are active, how much bandwidth is being consumed, and which connection is seeing the most traffic. This information can be helpful in your initial problem determination because you can immediately see how your network connections are performing. As with the other tabs in Task Manager, a multitude of additional items can be displayed. For a complete listing, from the System menu click View, Select Columns. Users TabThe Users tab displays the users currently logged on to your server. This includes users logged on to the console, users connected via the Remote Desktop Protocol (RDP) client in Remote Administration mode, and Terminal Services users connected in Application mode. Each session is assigned a session ID, with session 0 always representing the console session. In addition to the username session ID and session type, the status of the session and the name of the client computer are displayed, as shown in Figure 14.12. Figure 14.12. The Task Manager's Users tab, showing the users who are logged on to the server. You have the option to log off, disconnect, or send messages to the user sessions.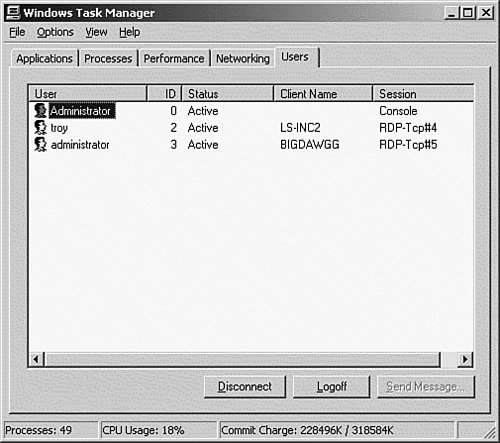 It is important to remember that if your Windows Server 2003 server is not running in Terminal Services Application mode, only three connections are allowed into your server. Two of these are remote administrative sessions, and the third is the console session, which can be either local or connected via RDP. If an administrator logs on to one of the sessions, and then goes off to lunch (or otherwise keeps the session active), other administrators are prevented from connecting to that server. From this interface, you have the option to send the administrator a message asking him to log off. Alternatively, if he is away from his workstation, you can either log him off or disconnect his session. |


EAN: 2147483647
Pages: 219
- ERP System Acquisition: A Process Model and Results From an Austrian Survey
- Enterprise Application Integration: New Solutions for a Solved Problem or a Challenging Research Field?
- Intrinsic and Contextual Data Quality: The Effect of Media and Personal Involvement
- Healthcare Information: From Administrative to Practice Databases
- Relevance and Micro-Relevance for the Professional as Determinants of IT-Diffusion and IT-Use in Healthcare