Changing the Size of Graphic Elements Flash gives you several ways to resize, or scale, graphic elements. You can scale selected elements interactively on the Stage, or you can set specific scale percentages or dimensions for your element via menu commands, panels, or the Property Inspector. To resize a graphic element interactively: -
In the Toolbox, select the fre -transform tool (Figure 3.55). Figure 3.55. The free-transform tool enables you to select and scale elements interactively. 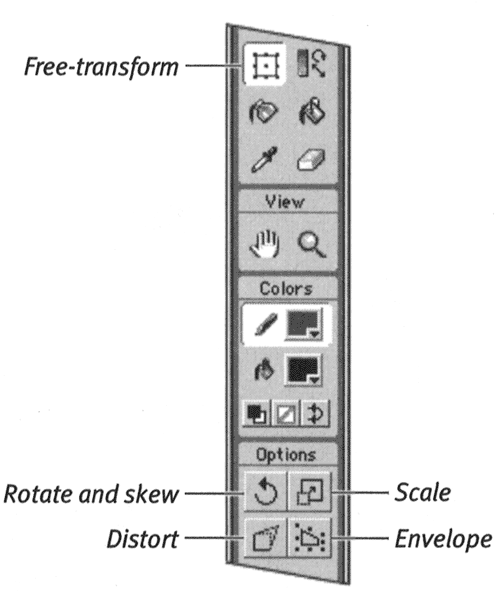 -
On the Stage, click the element you want to resize. Flash selects and highlights the element, and places transformation handles on all four sides and at the corners of the element's bounding box. -
In the Toolbox, choose the Scale modifier. -
Position the pointer over a handle. The pointer changes to a double-headed arrow, indicating the direction in which the element will grow or shrink as you pull or push on the handles. -
To change the graphic element's width, click and drag one of the side handles. Dragging toward the center of the element narrows it; dragging away widens it (Figure 3.56). Figure 3.56. Activating the free-transform tool's Scale modifier places a set of handles around a selected element. Click and drag the handles to change the size of the element. 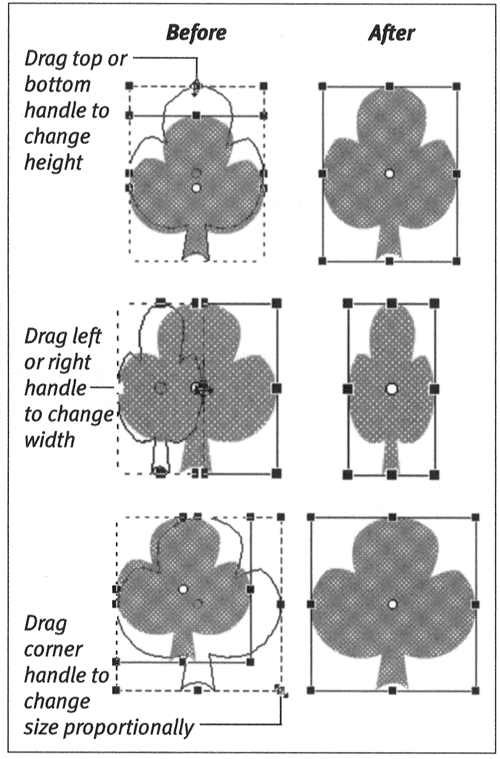 -
To change the element's height, click and drag the top or bottom handle. Dragging toward the center of the element shortens it; dragging away makes it taller. -
To change the size of the element proportionately, click and drag one of the corner handles. Dragging toward the center of the element reduces it; dragging away enlarges it.  Tips Tips -
If you have made a selection with the arrow tool, you can activate transformational handles for the selection by choosing Modify > Transform > Scale. Flash chooses the free-transform tool and its Scale modifier in the Toolbox. Or you can just click the free-transform tool and its Scale modifier directly in the Toolbox yourself. -
In the default scaling mode, the selection scales from the control point opposite the one you are dragging. When you drag the center handle of a square's right side, the left side of the square stays fixed. As you pull, the right side moves away from the left to make a rectangle. To scale relative to the center of a selection, hold down the Option key (Mac) or Alt key (Win) as you drag. The left- and right-side handles both move away from the center of the selection as you drag. -
With one exception, you can select a whole graphic element, part of an element, or multiple elements to scale with any of the selection methods discussed at the beginning of this chapter. You cannot use the subselection tool to select an element by its path, because choosing the free-transform tool automatically deselects the selected path .
To resize a graphic element with the Scale and Rotate command: -
Select the element you want to resize. -
From the Modify menu, choose Transform > Scale and Rotate. The Scale and Rotate dialog box appears (Figure 3.57). Figure 3.57. You can enter a specific percentage of enlargement or reduction in the Scale and Rotate dialog box. 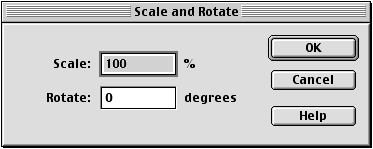 -
To resize the element, do one of the following: -
To make the element smaller, in the Scale field, enter a value less than 100%. -
To make the element larger, in the Scale field, enter a value greater than 100%. -
Click OK. Flash resizes the element relative to its center point.  Tip Tip
You can also resize elements by using the Transform panel. To access the Transform panel: -
If the Transform panel is not open , from the Window menu, choose Transform. The Transform panel appears (Figure 3.58). Figure 3.58. Choose Window >Transform (top) to access the Transform panel, where you can enter values for scaling, rotating, and skewing selected elements (bottom). 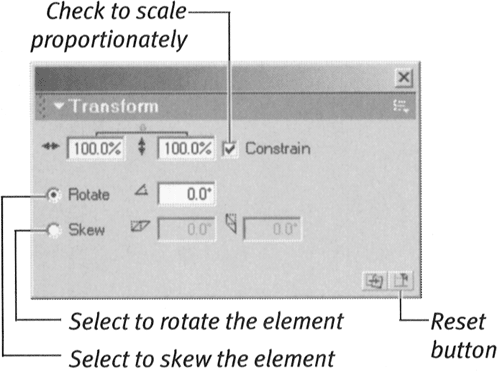 To resize an element proportionately by using the Transform panel: -
With the Transform panel open, on the Stage, select the element you want to resize. A value of 100% appears in the Width and Height fields of the Transform panel. -
Check the Constrain checkbox next to the Width and Height fields. -
Enter a new value in either field. A value less than 100% shrinks the element; a value greater than 100% enlarges the element. As you enter the value in one field, Flash automatically updates the other field. -
Press Enter. Flash resizes the element.  Tip Tip
To resize the width and height of an element separately by percentage: -
With the Transform panel open, on the Stage, select the element you want to resize. -
In the Transform panel, uncheck the Constrain checkbox. -
Enter a new percentage in the Scale Width field. -
Enter a new percentage in the Scale Height field. -
Press Enter. Flash resizes the element.  Tips Tips -
You can scale several elements at the same time. Select all the elements and then use any of the scaling methods described earlier in this section. The bounding box that contains the elements scales relative to its center point, and the entire selection grows or shrinks to fit the new box. -
You can transform a copy of the element by clicking the Copy and Apply Transform button in the Transform panel.
You can also specify precise measurements for a selected element in the Shape Property Inspector or in the Info panel. To specify width and height via the Property Inspector: -
Open the Property Inspector If the Property Inspector panel is not open, choose Window > Property. -
On the Stage, select the element you want to resize. The Shape attributes, including the width and height of the selected element, appear in the Shape Property Inspector (Figure 3.59). Figure 3.59. The Shape Property Inspector displays the width and height of the bounding box of the selected element. Enter new values to resize the element.  -
In the Shape Property Inspector's Width of Instance field, enter a new value for the element's width. -
In the Height of Instance field enter a new value for the element's height. -
Press Enter. Flash resizes the element.  Tip Tip -
You can also enter specific width and height values for a selected element in the Info panel (Figure 3.60). The panel contains no option to constrain the width and height. To preserve the current aspect ratio, you'l have to do the math yourself. But you can determine whether the element changes size relative to the center of the object or the top-left corner of its bounding box. Click the appropriate point on the element model in the Info panel. Figure 3.60. You can enter precise dimensions for an element's width and height in the Info panel. The element model shows whether changes will be relative to the center or to the top-left corner of the element's bounding box. To apply the values you entered in the panel to the selected graphic element, click the Stage or press Enter. 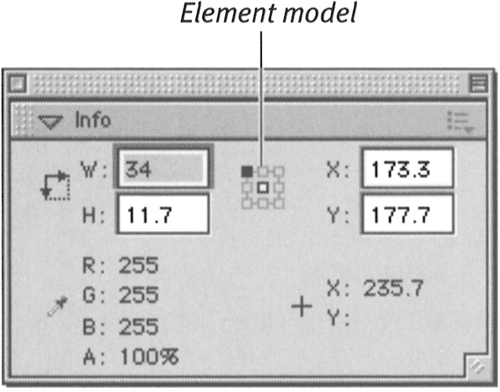
|


