Making Movie Clips Act Like Buttons In the preceding exercise, you created a script for a movie clip in which the location of the pointer during the triggering event (the downward click of the mouse button) did not have to coincide with the movie clip's location. You can use actions to create a script that ties the mouse input directly to the movie clip's physical location, so that the movie clip acts just like a button. To create a movie-clip button: -
Open a new document. -
In Frame 1, place an instance of a movie-clip animation on the Stage. -
Select the movie clip. -
Access the Actions panel. The panel's title bar changes to Actions-Movie Clip. -
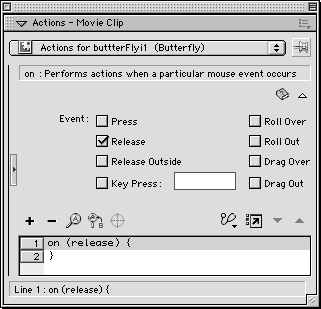
From the Add menu, choose Actions > Movie Control > on . Flash places the default event handler on (release) in Line 1 in the Script pane (Figure 13.42). Figure 13.42. You can add the on event handler to movie clips as well as to buttons. Then this handler responds to mouse clicks only when they are directly over the movie clip itself.  The default event tells Flash to implement the ActionScript as soon as the mouse button is clicked and then released while the pointer is within the image area of the movie clip. As you did for buttons earlier in this chapter, you can change the event parameter of the handler so that other mouse actions or keyboard input will trigger the movie-clip button's script. -
In the Script pane, select Line 1. -
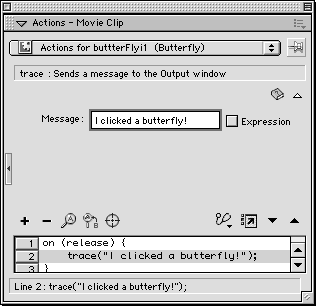
From the Add menu, choose Actions > Miscellaneous > trace . Flash adds trace ("") ; to Line 2 of the script. -
With Line 2 selected, in the parameters area of the Actions-Movie Clip panel, enter text in the Message fieldfor example, I clicked a butterfly (Figure 13.43). Figure 13.43. The trace action lets you post messages to the Output window to track which part of your script is executing. You can also use trace to test small sections of code as you build your script.  -
Choose Control > Test Movie to try out your button movie clip. -
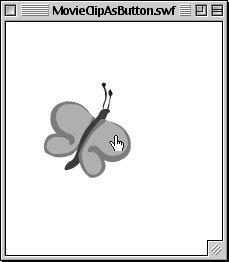
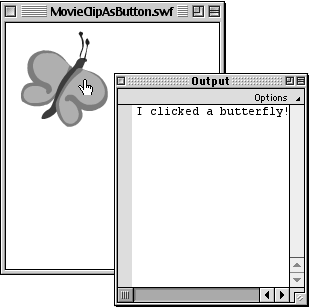
In the Flash Player window, position the pointer over various areas of the Stage. As it moves over the image area of the movie clip, the pointer changes from an arrow to the pointing-finger icon (Figure 13.44). When you click the movie clip, Flash enters the trace message in the Output window (Figure 13.45). Figure 13.44. In Flash Player, the pointer changes to the pointing-finger icon as it passes over a movie clip whose script starts with the event handler on .  Figure 13.45. The Output window displays whatever message you created for a trace action.  Terminology: trace The trace action is very useful both for learning scripting and for finding problems with your script as you start to do more complex things. When you run the movie in test mode during authoring, any time a script contains the trace action, Flash opens a special window named Output and displays whatever message you created in your trace action. By placing trace messages at strategic points in your script, you can narrow down the point in the script where problems are occurring. You can also use trace as a sort of shorthand for "all the rest of the actions," which allows you to script incrementally and test each additional chunk of interactivity without having to create the full script. | Buttons Versus Movie Clips Acting as Buttons Now that you know the basic way to make a movie clip act like a button, why would you? Consider some differences between them. Button symbols come with built-in frames for the Up, Over, Down, and Hit stages of a button. Each frame contains its own form of scripting that detects how the mouse is interacting the button. This built-in functionality makes it easy to create buttons that work as users expect them to. With buttons, you decide what content appears in each phase; you must create the Hit-frame graphic that Flash uses to detect the interaction of the mouse with the button. For movie-clip symbols used as buttons, that detecting capability is built in. You don't have to (and don't get to) define what constitutes the active area of the button; Flash uses whatever graphic image the movie clip is displaying as the hit area. With buttons, you can enhance the feedback to the user about the fact that the button is live by creating content in the Over frame. With movie-clip buttons, you rely on the pointer's changing to the pointing-finger icon when it rolls over the active area of a movie-clip button to indicate that the user has found a live button. But this is Flash, remember? That means there's always more than one way to approach your problem. The movie-clip-as-button procedures that you learn in this chapter are just the beginning of the story. Advanced ActionScripters can override some of this default activity for movie-clip buttons, for example, by assigning button-state properties to frames within a movie clip, thereby creating their own animated Up, Down, and Over frames without nesting movie clips within the button. You can also define your own functions to describe what happens when a viewer interacts with your movie-clip button in certain ways, such as rolling over it. |  |


