| Although you can transform a group as a whole (scale, rotate, and skew it), you can't directly edit the individual shapes within the group the way you can edit an ungrouped shape. To edit the shapes within a group, you must use the Edit Selected command. To edit the contents of a group 1. | In the Tools panel, select the selection tool.
| 2. | On the Stage, select the group you want to edit.
| 3. | Choose Edit > Edit Selected.
Flash enters group-editing mode (Figure 5.16). The Edit Bar just above the Stage Timeline changes to indicate that you're in group-editing mode. The bounding box for the selected group disappears, and Flash dims all the items on the Stage that aren't part of the selected group. These dimmed items aren't editable; they merely provide context for editing the selected group.
Figure 5.16. These eyes and eyebrows are a selected group (top). In group-editing mode (bottom), the other items on the Stage are grayed out to indicate that you can't edit them. 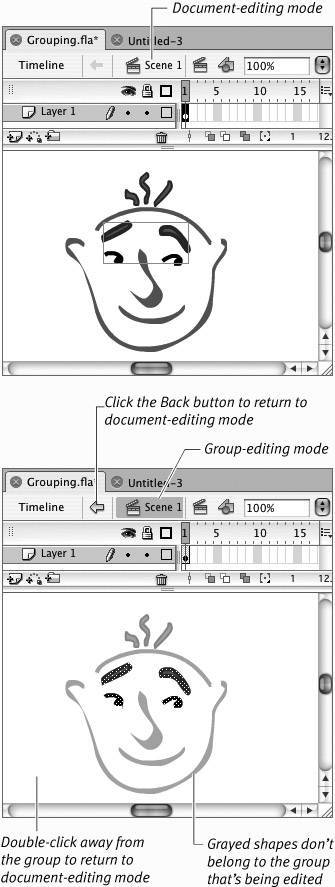
| 4. | Make changes to the contents of the group.
| 5. | To return to document-editing mode, do one of the following:
Choose Edit > Edit All (Figure 5.17). Figure 5.17. You have several ways to return to document-editing mode when you're editing a group. Choose Edit > Edit All or Edit Document. Or, click items in the Edit Bar: The Back button, the scene name, and the Scene pop-up menu (not shown) all let you resume editing the movie. 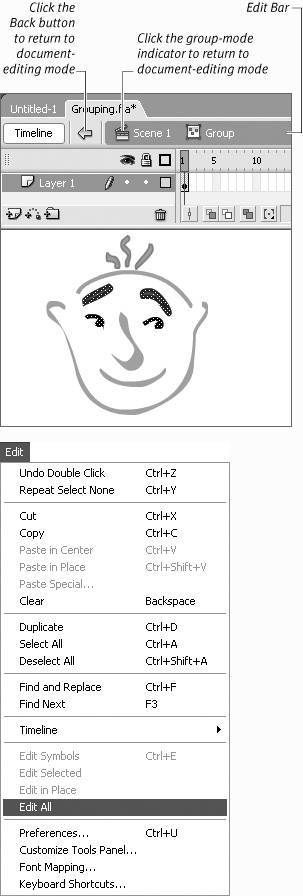 Double-click the Stage or the work area away from the shapes in the group you're editing. Click the current scene name in the Edit Bar. Click the Back button in the Edit Bar.
|
 Tips Tips
To enter group-editing mode quickly, double-click a grouped item on the Stage with the selection tool. When the Properties tab of the Property inspector is open, you can seeand changethe height, width, and x- and y-coordinates of the bounding box of a selected group (Figure 5.18). Figure 5.18. The Property inspector displays the height, width, and x- and y-coordinates for the bounding box of a group you've selected on the Stage. Enter new values to change any of those parameters. 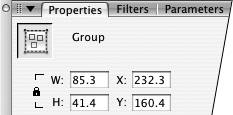 When you're editing a group nested within another group, clicking the Back button moves you up one level in the nesting hierarchy. You can also enter group-editing mode for a selected item by choosing Edit > Edit in Place. When you edit groups, there is no difference between this command and Edit > Edit Selected. There is a difference when you use these commands to edit symbols. You'll learn about symbols in Chapter 7.
Editing the Contents of Drawing-Objects As you learned in Chapter 4, you can modify drawing-objects as they sit on the Stage. But you can also work directly with the merge-shapes inside the drawing-object container. To do so, you must enter drawing-objectediting mode. There is no menu command for entering this edit mode, but double-clicking a drawing-object on the Stage opens that object for editing. In drawing-objectediting modeas in group-editing modeselected shapes appear in full color, and other shapes appear dimmed. In drawing-objectediting mode, you can modify or delete the original merge-shapes or add new merge-shapes. Note that a drawing-object can contain only merge-shapes. If you create a new drawing object while in drawing-objectediting mode, Flash converts your original drawing-object to its constituent merge shapes, adds the new drawing-object(s), selects all these items, and groups them. To return to document-editing mode, use the same techniques discussed in "Editing Groups," earlier in this section. |
|