| As you've learned earlier in this chapter, you can use the line, pencil, pen, and geometric-shape tools to create outline shapes (strokes without fills). Using the brush, pen, and geometric shape tools, you can create fill shapes that have no stroke outline. At any point, you can add the missing element to such shapes. The ink-bottle tool adds strokes that outline plain fill shapes; the paint bucket tool adds fills inside of plain outline shapes. (You can also use these tools to modify strokes and fills; see Chapter 4.) To add strokes to fills 1. | On the Stage, draw a fill that has no stroke, or work with an existing unstroked shape.
For merge-shapes, make sure the fill is deselected; for drawing-objects, the fill can be selected or deselected.
| 2. | In the Tools panel, select the ink-bottle tool or press S (Figure 2.50).
Figure 2.50. The ink-bottle tool applies all the stroke attributes currently set in the (Ink Bottle Tool) Properties tab of the Property inspector. 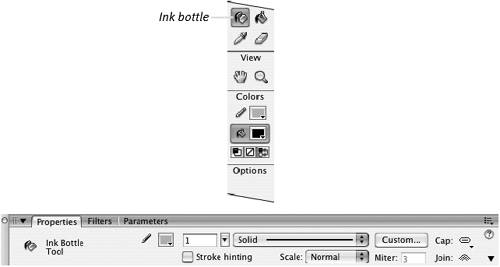
| 3. | In the Ink Bottle Tool Properties tab of the Property inspector, set the desired stroke attributes (see "Setting Stroke Attributes," earlier in this chapter).
| 4. | Position the pointer over a fill shape that has no stroke.
The pointer appears as a little ink bottle, spilling ink.
| 5. | With the ink bottle's hot spot, click a fill shape in one of the following ways:
- To add a stroke around the outside of your shape, click near the outside edge of the shape (Figure 2.51).
Figure 2.51. As you move the ink bottle over a filled shape, the hot spot appears as a white dot at the end of the ink drip that's spilling out of the bottle. To add a stroke around the outside edge of your fill shape, position the hot spot along that edge (top) and then click. Flash adds a stroke with the current attributes set in the (Ink Bottle Tool) Properties tab of the Property inspector (bottom). 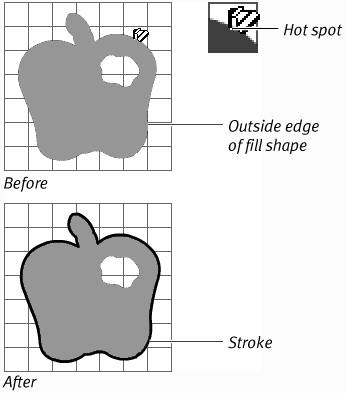
- To add a stroke around the inside of a shape that has a hole cut out of it, click near the inside edge of the shape.
- To outline both the outside of a shape and the hole inside the shape, click in the middle of the shape (Figure 2.52).
Figure 2.52. Position the ink bottle's hot spot in the middle of your fill shape (top), and then click. Flash uses the current stroke attributes to add a stroke around the outside and inside of your shape (bottom). 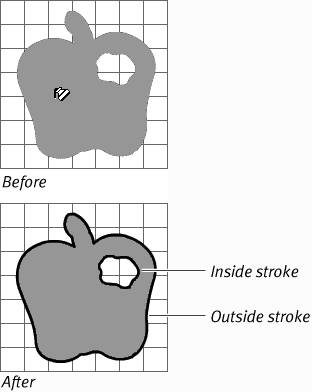
Flash adds strokes to the outside edge, inside edge, or both, using the Properties tab of the Property inspector's current settings for color, thickness, and style.
|
 Tip Tip
In previous versions of Flash, strokes could only be solid colors. In Flash 8, you can use gradients for strokes. In step 3 of the preceding task, in the Properties tab of the Property inspector, choose a linear or radial gradient from the Stroke Color control's pop-up swatch set. Why might you want a gradient stroke? For an oval shape, adding a thick stroke with a radial gradient can help to create the illusion of 3D depth or make the shape appear to glow.
To fill an outline shape with solid color 1. | On the Stage, draw an outline stroke that has no fill, or work with an existing outline shape.
The outline can be selected or deselected.
| 2. | In the Tools panel, select the paint-bucket tool, or press K (Figure 2.53).
Figure 2.53. The paint-bucket tool and its modifiers. 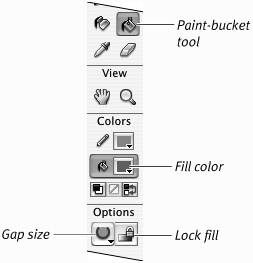
| 3. | From the Gap Size menu in the Options section of the Tools panel, choose the amount of assistance you want (Figure 2.54).
Figure 2.54. The Gap Size menu controls Flash's capability to fill shapes that aren't fully closed. 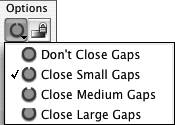
If you draw your shapes precisely, medium or small gap closure serves you best; you don't want Flash to fill areas that aren't meant to be shapes. If your drawings are rougher, choose Close Large Gaps. This setting enables Flash to recognize less-complete shapes.
| 4. | From any Fill Color control, select a solid fill color.
| 5. | Place the paint bucket's hot spot (the tip of the drip of paint) inside the outline shape (Figure 2.55).
Figure 2.55. The hot spot on the paint-bucket tool is the little drip at the end of the spilling paint. The hot spot changes to white when you move the paint bucket over a darker color. 
| 6. | Click.
The shape fills with the currently selected fill color (Figure 2.56).
Figure 2.56. Clicking inside an outline shape with the paint bucket (top) fills the shape with the currently selected fill color (bottom). 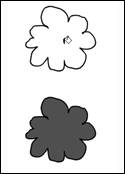
|
Tips You may be unaware that your shape has any gaps. If nothing happens when you click inside a shape with the paint bucket, try changing the Gap Size setting in step 3. Gap-closure settings are relative to the amount of magnification you're using to view the Stage. If the paint bucket's largest gap-closure setting fails at your current magnification, try again after reducing magnification (Figure 2.57). Figure 2.57. The paint bucket can't fill this apple shape with the setting of Close Large Gaps and a magnification of 100 percent (left). But in a 50 percent view, the paint bucket with the same large-gap closure setting recognizes this shape as complete and fills it. 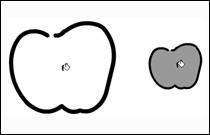
To fill outline shapes with unlocked gradients 1. | In the Tools panel, select the paint-bucket tool.
| 2. | In the Color Mixer panel, define a new gradient (see "Creating Solid Colors and Gradients," earlier in this chapter),
or
From any Fill Color control, select an existing linear or radial gradient (see "Setting Fill Attributes," earlier in this chapter).
| 3. | In the Options section of the Tools panel, make sure that Lock Fill is deselected (Figure 2.58).
Figure 2.58. Deselect the Lock Fill button to fill a shape with an unlocked gradient. 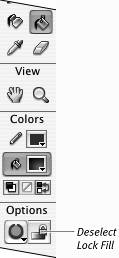
| 4. | Follow steps 5 and 6 in the preceding task.
Each outline shape you click fills with the gradient currently displayed in the Fill Color control. If you chose a linear gradient in step 2, Flash centers the gradient within the outline shape (Figure 2.59). If you chose a radial gradient, the location you click with the paint bucket's hot spot determines where the center of the gradient appears (Figure 2.60).
Figure 2.59. You can use the paint-bucket tool to apply a linear-gradient fill. The gradient is centered within the outline shape's bounding box. 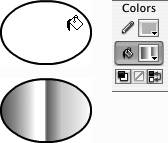
Figure 2.60. The paint-bucket tool can also apply a radial-gradient fill. Click where you want to locate the center of the gradient. 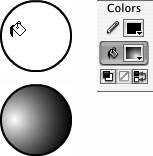
|
To fill outline shapes with locked gradients 1. | Follow steps 1 and 2 in the preceding task.
| 2. | In the Options section of the Tools panel, select Lock Fill.
| 3. | Follow steps 5 and 6 in "To fill an outline shape with solid color," earlier in this section.
Each outline shape you click fills with a portion of the gradient currently set in the Fill Color control (see the sidebar "The Mystery of Gradients and Flash's Drawing Models").
|
Gradients Add Overhead Gradients are lovely, but they increase file sizes and thereby slow the loading of published movies. Each area of gradient fill requires an extra 50 bytes of data that a solid fill doesn't need. In addition, gradients take processor power. If you use too many, you may see slower frame rates, or slower animations, in your finished movie |
|