| Flash offers rulers, grids, and guides as visual aids that help you place graphic elements on the Stage. You turn on these visual aids from the View menu (Figure 1.20). Choose the feature you want to use; a checkmark indicates that the feature is currently on. None of the visual aids appear in your final movie. Figure 1.20. Flash offers three visual drawing aids: rulers, grids, and guides. To show or hide these features during authoring, use the View menu. Here, for example, is the command for showing grids. 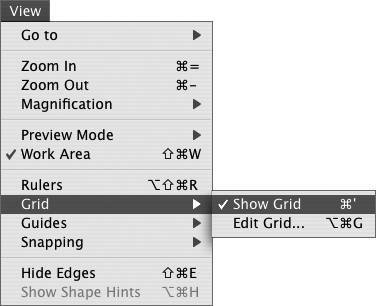
To show/hide grids, guides, and rulers From the View menu, choose any of the following (or use a keyboard shortcut): - Choose Rulers, or press Option-Shift-
 -R (Mac) or Ctrl-Alt-Shift-R (Windows). -R (Mac) or Ctrl-Alt-Shift-R (Windows).
Ruler bars appear on the left side and top of the Stage (Figure 1.21). You can set ruler units in the Preferences dialog.
Figure 1.21. Choosing View > Rulers (left) makes rulers visible on the Stage (right). 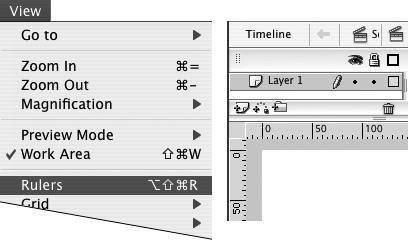
- Choose Grid > Show Grid, or press -apostrophe(') (Mac) or Ctrl-apostrophe (') (Windows).
When Show Grid is active, Flash superimposes crisscrossing vertical and horizontal lines on the Stage (Figure 1.22). The grid acts as a guide for drawing and positioning elements, the way that graph paper functions in the nondigital world. Flash also uses the grid to align elements when you activate the Snap to Grid feature.
Figure 1.22. Visible grid lines help you position elements on the Stage during authoring. 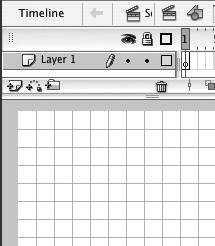
- Choose Guides > Show Guides, or press -semicolon (;) (Mac) or Ctrl-semicolon (;) (Windows).
When Show Guides is active, any guides you've placed become visible. To place guides, see "To work with guides," later in this section.
To set grid parameters 1. | Choose View > Grid > Edit Grid, or press Option--G (Mac) or Ctrl-Alt-G (Windows).
The Grid dialog appears (Figure 1.23).
Figure 1.23. Choosing View > Grid > Edit Grid opens the Grid dialog, where you can change grid parameters. 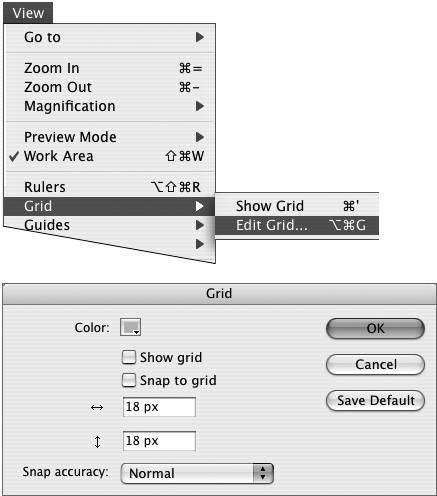
| 2. | To set grid spacing, do the following,
- Type a value in the width field.
- Type a value in the height field (Figure 1.24).
Figure 1.24. Type values in the width and height fields to set grid spacing. 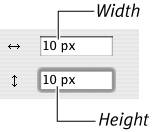
| 3. | To select a grid color, do the following,
- Click the Color control.
The pointer changes to an eyedropper, and a set of swatches appears.
- Click a color in the swatch set, or click an area of color on the Stage (Figure 1.25).
Figure 1.25. To select a new grid color, with the eyedropper pointer, click anywhere in the pop-up set of swatches or on the Stage. The swatch set displays the currently selected color set. 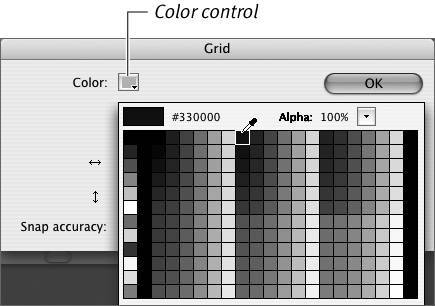
The new color appears in the Color control in the Grid dialog.
| 4. | To control how close an item must get to the grid before Flash snaps the item to the grid, from the Snap Accuracy menu, choose a tolerance setting.
| 5. | Click OK.
|
 Tips Tips
Grids need not consist of perfect squares. You can create new default settings for the grids in all new documents. After entering the desired settings in the Grid dialog, click the Save Default button, and then click OK.
To work with guides 1. | With rulers visible, position the pointer over the vertical or horizontal ruler bar.
If you're using a tool other than the selection tool, the pointer changes to the selection arrow.
| 2. | Click and drag the pointer onto the Stage.
As you click, a small directional arrow appears next to the pointer, indicating which direction to drag (Figure 1.26).
Figure 1.26. As you drag a guideline from the ruler bar, a direction indicator appears next to the selection tool. 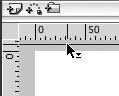
| 3. | Release the mouse button.
Flash places a vertical or horizontal line on the Stage (Figure 1.27).
Figure 1.27. You can position individual vertical and horizontal guides anywhere you want on the Stage. 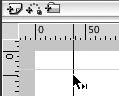
|
Tips To set parameters for guides, open the Guide dialog by choosing Guides > Edit Guides or pressing Option-Shift--G (Mac) or Ctrl-Alt-Shift-G (Windows). To set the guide color, click the Color control, and then use the eyedropper pointer to select a color from the swatch set or from the Stage. Click OK. You can also lock or unlock guides and set their visibility and snapping properties by selecting or deselecting check boxes in the Guides dialog. Click OK to confirm settings and close the dialog. To move a guide, position the selection tool over the guide. A direction arrow appears next to the pointer, indicating that the guide can be dragged. Drag the guide to a new location, and release the mouse button. To remove a guide, drag it completely out of the open document window. To avoid repositioning guides accidentally, choose View > Guides > Lock Guides, or press Option-Shift-semicolon (;) (Mac) or Ctrl-Shift-semicolon (;) (Windows). The directional arrow no longer appears next to the selection tool when you place it over a guideline, and the guides can't be moved. To unlock the guides, choose View > Guides > Lock Guides or press the keyboard shortcut again. If you've placed numerous guides in your document, dragging them from the Stage may get tedious. To remove them all at once, choose View > Guides > Clear All, or access the Guides dialog and click the Clear All button.
|