| The Document Properties dialog lets you define the Stage (its dimensions, the color of the background on which your artwork appears, and the units of measure for rulers and grids) and set a frame rate for playing your movie. Frames are the lifeblood of your animation, and the frame rate is the heart that keeps that blood flowing at a certain speed. Flash's default setting is 12 frames per second (fps)a reasonable setting for animations viewed over the Web. (By comparison, the standard frame rate for film movies is double that speed.). You'll learn more about how frame rates affect animation in Chapter 8. In Flash 8, the Document Properties dialog has a feature for creating metadata for .swf files. Metadata allows search engines to find your creations by title and/or keywords when you publish them to the Web. You can also use the Document Properties tab of the Property inspector to set some document properties. You'll learn more about using the Property inspector later in this chapter. To open the Document Properties dialog Do either of the following: - Choose Modify > Document; or press
 -J (Mac) or Ctrl-J (Windows). -J (Mac) or Ctrl-J (Windows).
- In the Timeline's Status bar, double-click the frame-rate display (Figure 1.12).
Figure 1.12. Double-clicking the frame-rate display in the Status bar is a quick way to access the Document Properties dialog. 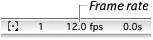
The Document Properties dialog appears (Figure 1.13).
Figure 1.13. The Document Properties dialog is where you set all the parameters for viewing the Stage. Selecting a unit of measure for the rulers resets the unit measurement for all the Stage's parameters. Clicking the color control pops up the current set of colors and lets you choose one for the background. Clicking Make Default sets the parameters for all new documents you create. 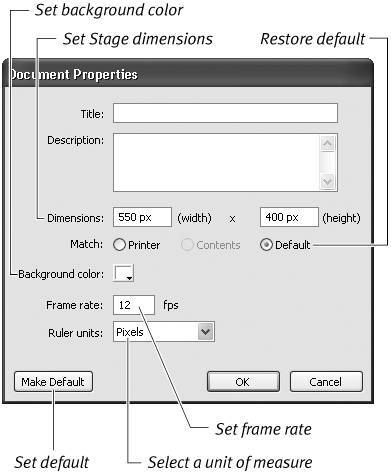
 Tip Tip
To create .swf metadata 1. | Open the Document Properties dialog.
| 2. | In the Title field, enter a title for your document.
| 3. | In the Description field, enter descriptive words (keywords) (Figure 1.14).
Figure 1.14. By entering a title in the Title field and descriptive keywords in the Description field, you add metadata to your published movie (.swf file), making the metadata available to search engines for searching. 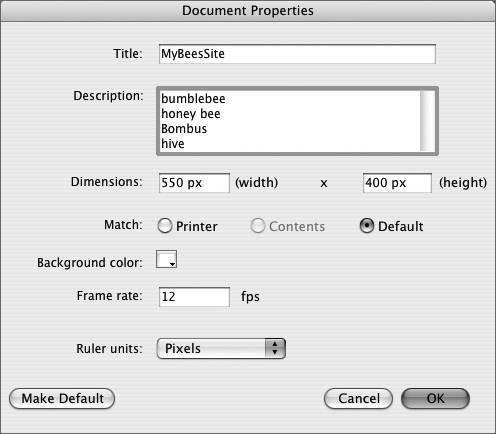
When you publish your movie, the .swf file will contain metadata from the Title and Description fields. To learn about publishing movies, see Chapter 16.
|
The Mystery of .swf Metadata In Flash 8, the Document Properties dialog contains two new fields: Title and Description. When you publish your document (see Chapter 16), the text in these fields gets turned into metadata attached to the .swf file. Search engines can use this metadata to help potential users find your creation. Even though earlier versions of Flash did not create .swf metadata, when you publish from Flash 8 to an earlier version, Flash 8 still creates the metadata for that .swf file. Note that the title and keywords in the Description field don't become part of the metadata of the .html file you publish; you must create metadata for the .html file yourself. |
To set the size of the Stage 1. | Open the Document Properties dialog, and do one of the following:
- To set the Stage's dimensions, type values for width and height in the appropriate fields of the Dimensions section (Figure 1.15). Flash automatically assigns the units of measure currently selected in Ruler Units.
Figure 1.15. To assign new proportions to your Stage, type a width and height in the Dimensions section of the Document Properties dialog. 
- To create a Stage big enough to cover all the elements in your movie, in the Match section of the Document Properties dialog, select the Contents radio button (Figure 1.16). Flash calculates the minimum Stage size required to cover all the elements in the movie and enters those measurements in the width and height fields of the Dimensions section.
Figure 1.16. To make your Stage just big enough to enclose the elements in your movie, select the Contents radio button in the Match section of the Document Properties dialog. 
- To set the Stage size to the maximum print area currently available, in the Match section of the Document Properties dialog, select the Printer radio button. Flash gets the paper size from the Page Setup dialog, subtracts the current margins, and puts the resulting measurements in the width and height fields of the Dimensions section.
| 2. | Click OK.
|
Tips If you've entered new dimensions, either manually or by selecting Printer or Contents for matching, you can return to the default Stage dimensions by clicking the Default radio button. To set the units of measure for your document, in the Document Properties dialog, from the Ruler Units menu, choose the units of measure you prefer. You can work in inches, decimal inches, points, centimeters, millimeters, and pixels. Flash uses these units to calculate all measured items on the Stage: rulers, grid spacing, and dimensions. If you want a banner that's 1 inch tall and 5 inches wide, but you don't know what that size is in pixels (the standard unit of measure used for working on the Web), Document Properties can figure it out for you. First, set Ruler Units to inches. Type 1 in the height field and 5 in the width field. Then, return to Ruler Units and choose pixels. Flash does the math and sets the Stage dimensions. (Note that Flash uses screen pixels in its calculations. This means an inch in your movie may differ from an inch in the real world, depending on the resolution of the monitor on which you view the Flash movie.)
About the Pasteboard In previous versions of Flash, the Pasteboard (formerly called the work area) was a set, limited size. In Flash 8, the Pasteboard grows to accommodate your need for extra space. As you drag items from the Stage to the Pasteboard area, Flash enlarges the Pasteboard to hold them. If you move a large graphic element onto the Pasteboard, and some of it lies outside the area of the open document window, you can see the scroll bar move back toward the center of its range. There is now more Pasteboard area that's hidden from view. Use the scroll bars to view your graphic element and the enlarged Pasteboard. (You'll learn about creating graphic elements in Chapter 2 and repositioning them in Chapter 4.) |
To set the background color 1. | Open the Document Properties dialog.
| 2. | Click the Background Color control.
The pointer changes to an eyedropper, and a set of swatches appears (Figure 1.17).
Figure 1.17. To assign your Stage a new color, choose one from the Background Color control in the Document Properties dialog. 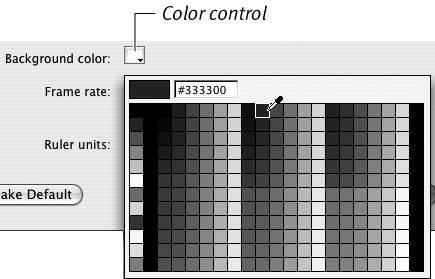
| 3. | To select a background color, do either of the following:
- Click a swatch with the eyedropper pointer.
- Click the hexadecimal-color field (to activate it), type a value, and press Enter.
The selected color appears in the Background Color control.
| 4. | Click OK.
The Stage now appears in the color you selected.
|
Tip
To set the frame rate 1. | Open the Document Properties dialog.
| 2. | In the Frame Rate field, type the number of frames you want Flash to display in 1 second (Figure 1.18).
Figure 1.18. Typing a frame rate for your movie in the Frame Rate field of the Document Properties dialog sets Flash to display that number of frames in 1 second. 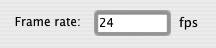
| 3. | Click OK.
The frame-rate setting appears in the Status bar of the current document.
|
To save your settings as the default - In the Document Properties dialog, click the Make Default button.
The current settings in the Document Properties dialog become the defaults for any new documents.
Touring the Edit Bar Another feature of the Flash document window is the Edit Bar. Its default position is above the Timeline, docked to the top edge of the Stage. You can also position the Edit Bar below the top-docked Timeline. When the Timeline is floating, or docked to the bottom or side of the Stage, the Edit Bar remains at the top of the Stage. You can even make the Edit Bar disappear entirely. The Edit Bar lets you know what mode you're working in (editing your document, or editing a drawing-object, group, or symbol within the movie). The Edit Bar's pop-up menus give you the power to switch scenes, to choose a symbol to edit and immediately switch to symbol-editing mode, and to change the magnification for viewing the Stage. When you're editing drawing-objects, groups, or symbols, the Edit Bar identifies the element you're editing (Figure 1.19). To learn about editing drawing-objects and groups, see Chapter 5; for symbols, see Chapter 7; for scenes, see Chapter 11. Figure 1.19. The Edit Bar is located above the Stage. You can use it to access symbols and scenes and to change magnification. When you're editing a drawing-object, group, or symbol, the Edit Bar identifies the item you're editing. Clicking the Back button takes you up the hierarchy of items you are editing, eventually returning you to document-editing mode. 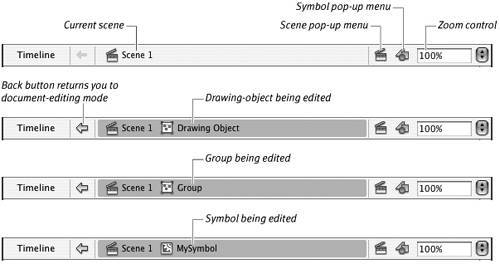
To reposition the Edit Bar, -Shift double-click (Mac) or Alt-Shift double-click (Windows) any blank area within the Edit Bar. If the Edit Bar was initially above the Timeline, double-clicking sends it below the Timeline. If the Edit Bar started out in the low position, double-clicking sends it to the top. To hide the Edit Bar, choose Window > Toolbars > Edit Bar. If you hide the Edit Bar, however, you may find it more difficult to know when you're editing drawing-objects, groups, or symbols within your document and when you're working on the Stage in the main document. |
|