| Up to this point, you have written one page scripts which interface with databases, handle HTML forms, and send cookies. However, as you begin to develop multiple-page Web sites, it quickly becomes impractical to develop every attribute one script at a time. Certain features, such as the HTML design and PHP functions, will be used by every page within the site. You can put this common information into each individual page as you develop your site but when you need to make a change, you'll be required to make the change over and over again. You can save yourself time by creating separate pages for particular elements and then bringing them into the main PHP pages using one of two functions: include() or require(). include ("file.php"); require ("file.php"); Both functions work in the exact same way with only one significant difference. Regardless of where the require() function is within your script, it will always be called, even if it is the result of a conditional that is never true! The include() function, conversely, will only take effect if the function is called. Thus you should use require() if the file must be included and use include() if the file may or may not need to be included, depending upon the circumstances at hand. But what do these two functions do? Both include() and require() will incorporate the file referenced into the main file (for clarity's sake, I'll refer to the file that has the include() or require() line as the parent file). Any code within the included file will be treated as HTML unless it is within the PHP brackets in the included file itself. Any variables existing in the parent document before the include() or require() call will be available to the included file and any variables within the included file will be available to the parent document after the include() or require() call. There are any number of reasons to use included files. You could put your own defined functions into a common file. You might also want to place your database access information into a configuration file. First, however, let's place our HTML design into included files so that it can be used over several pages. To use include() or require(): -
Create a new PHP document in your text editor (Script 13.1). <HTML> <HEAD> <TITLE> -
Although this will be a .php file there is only one section of PHP so you'll code most of the page as you would a standard HTML script to avoid using numerous print() statements. Script 13.1. This is a basic included file which will create the HTML <HEAD> information as well as begin the layout table. Because each page will have a different title, a variable will be assigned to print the particular values. 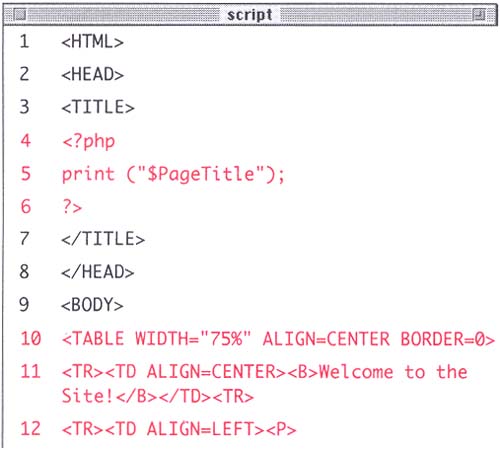 -
Use PHP to print out the title of the page. <?php print ("$PageTitle"); ?> The $PageTitle variable will be assigned in the parent document and then used here to establish the page title which gets displayed at the top of the browser window (Figure 13.1). Figure 13.1. Although this isn't very fancy, it should adequately demonstrate how Web pages can be broken down into several components which are shared over multiple pages (see Figure 13.3).  -
Complete the HTML header information. </TITLE> </HEAD> <BODY> -
Create a table to control the layout of the page. <TABLE WIDTH="75%" ALIGN=CENTER BORDER=0> <TR><TD ALIGN=CENTER><B>Welcome to the Site!</B></TD><TR> <TR><TD ALIGN=LEFT><P> -
The overall design of the site is going to use a table with three rows. The top row includes a welcome message, although it could also have a graphic. The second row will be for the page-specific content and the third row will contain a footer. You'll use the header include to make the top row and begin the second one. -
Save the script as header.php and upload it to your server. Now you'll write the corresponding footer file. -
Create a new PHP document in your text editor (Script 13.2). Script 13.2. This is a basic included file which will complete the layout table and conclude the HTML page. I've also placed a copyright here. 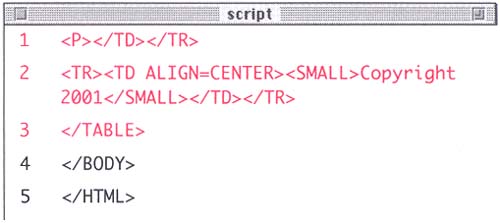 -
Close the second row of the layout table. <P></TD></TR> -
Code for the third and final row that contains the copyright. <TR><TD ALIGN=CENTER><SMALL>Copyright 2001</SMALL></TD></TR> -
Close the table and the HTML page. </TABLE> </BODY> </HTML> -
Save the script as footer.php and upload it to your server. Once the two included files are complete, you can start churning out the parent pages. -
Create a new PHP document in your text editor (Script 13.3). <?php Script 13.3. Once the two included files have been created, the require() function will incorporate them into the parent file to create the entire page on the fly. 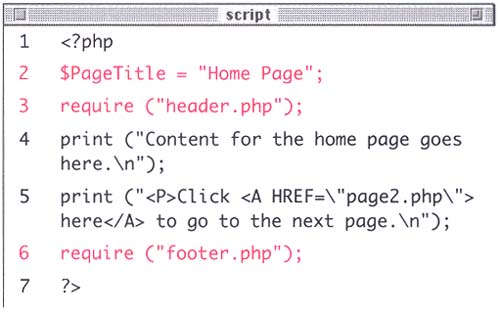 -
Assign the name of the page to the $PageTitle variable. $PageTitle = "Home Page"; The value of $PageTitle will be used to create the title of the page which the browser displays at the top of the window. Because it will be different from parent page to parent page, I make it a variable that is used by the included file. -
Include the header file. require("header.php"); In this case it won't matter if you use include() or require() but you'll use the latter to guarantee the inclusion occurs. This line of programming will bring all of the code from header.php into this page. Be sure to call this line after $PageTitle has been assigned or else the page will have no title. -
Create the page-specific content. print ("Content for the home page goes here.\n"); print ("<P>Click <A HREF=\"page2.php\">here</A> to go to the next page.\n"); For demonstration purposes, I'll only put in a simple message and a link to a second page. Any content you want could go here, though, including content dynamically generated by PHP. -
Include the footer file and close the page. require ("footer.php"); ?> -
Save the script as index.php and upload it to your server. Finally, you'll write a second page that will also make use of the included design files. -
Create a new PHP document in your text editor (Script 13.4). Script 13.4. This is another parent file and, except for line 4, it is exactly the same as Script 13.3. Whether your Web site has 10 pages or 100, they can all use this same basic template. 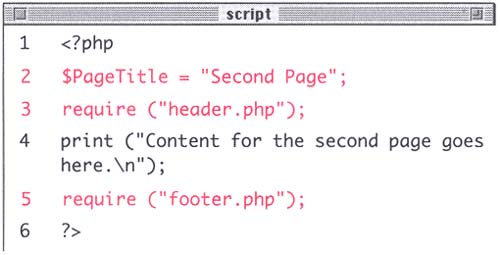 <?php $PageTitle = "Second Page"; require ("header.php"); print ("Content for the second page goes here.\n"); require ("footer.php"); ?> To differentiate this page from index.php, give the $PageTitle variable a different value and then change the print() statement. -
Save the script as page2.php, upload it to your server, and test both it and index.php in your Web browser (Figures 13.1, 13.2, and 13.3). Figure 13.2. Nothing in the source of the page would indicate that this was compiled together on the fly. You can see how the two included files are brought in as if they were a part of the parent file itself.  Figure 13.3. This page uses the same header and footer files as Figure 13.1 but the content and title are different.  Tip I would recommend that you use .php as your file extension and not .inc, which some people use for their included files. While it generally does not matter to the parent PHP file, a sneaky Web user could view the source of a .inc file but not the source of an included .php file (Figures 13.4and 13.5). Figure 13.4. When your included files use a .php extension, users cannot necessarily view them directly because the server will try to execute the PHP, in some cases resulting in this blank page In other cases, the browser may also just reveal the beginning HTML, but, as a security measure you should use the .php extension!  Figure 13.5. In comparison to Figure 13.4 where the file used the .php extension, when the .inc extension is usedwhich is a common enough occurrencea sneaky user could see your source code by directly viewing the page. If passwords and database access information are stored in an included file, this could be a major security risk. 
Table 13.1. The list of formatting possibilities for the date() function is long and not easy to remember. I recommend keeping a copy of this list close at hand while you program. | Format Options with the date() Function | | Character | Format | | a | am or pm | | A | AM or PM | | d | day of the month as 2 digits with leading zeros: 01 to 31 | | D | day of the week as 3 letters : Sun, Mon, etc. | | F | month, long-form : January | | g | hour of the day in 12- hour format without leading zeros: 1 to 12 | | G | hour of the day in 24-hour format without leading zeros: 0 to 23 | | h | hour of the day in 12-hour format: 01 to 12 | | H | hour of the day in 24-hour format: 00 to 23 | | i | minutes: 00 to 59 | | j | day of the month without leading zeros: 1 to 31 | | l (lowercase 'L') | day of the week, long-form: Sunday | | m | month as 2 digits: 01 to 12 | | M | month as 3 letters: Jan | | n | month as digits without leading zeros: 1 to 12 | | s | seconds: 00 to 59 | | S | English ordinal suffix as 2 characters : th, nd, rd, etc. | | t | number of days in the given month: 28 to 31 | | U | seconds since the epoch | | w | day of the week as a single digit: 0 (Sunday) to 6 (Saturday) | | y | year as 2 digits: 01 | | Y | year as 4 digits: 2001 | | z | day of the year: 0 to 365 |  |