The Database Scheme The database being used by this application was first created back in Chapter 4, "Introduction to SQL and MySQL," and has been modified since then. The database currently consists of only one table, users. To create the table as it should be defined for this chapter, use this SQL command: CREATE TABLE users ( user_id INT unsigned NOT NULL  auto_increment, email varchar(40) NOT NULL, pass CHAR(40) NOT NULL, first_name varchar(15) NOT NULL, last_name varchar(30) NOT NULL, active CHAR(32), registration_date datetime NOT NULL, PRIMARY KEY (user_id), UNIQUE KEY (email), KEY (email, pass) ) auto_increment, email varchar(40) NOT NULL, pass CHAR(40) NOT NULL, first_name varchar(15) NOT NULL, last_name varchar(30) NOT NULL, active CHAR(32), registration_date datetime NOT NULL, PRIMARY KEY (user_id), UNIQUE KEY (email), KEY (email, pass) )
Most of the table's structure should be familiar to you by now. One new addition is the active column, which will be used to indicate whether a user has activated their account (by clicking a link in the registration email) or not. It will either store the 32-character-long activation code or have a NULL value. A unique index is placed on the email field, and another index is placed on the combination of the email and pass fields. These two fields will be used together during the login query, so indexing them as one makes sense. |
The registration script was first started in Chapter 7, "Using PHP with MySQL." It has since been improved upon in many ways. This version of register.php will do the following: - Both display and handle the form
- Validate the submitted data using regular expressions
- Redisplay the form with the values remembered if a problem occurs (the form will be sticky)
- Process the submitted data using the escape_data() function from the mysql_connect.php script
- Ensure a unique email address
- Send an email containing an activation link
To write register.php 1. | Create a new document in your text editor (Script 13.6).
<?php # Script 13.6 - register.php
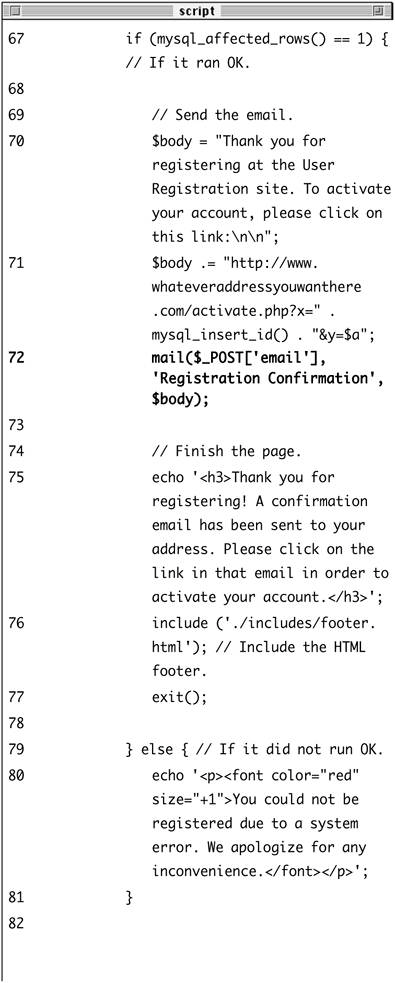
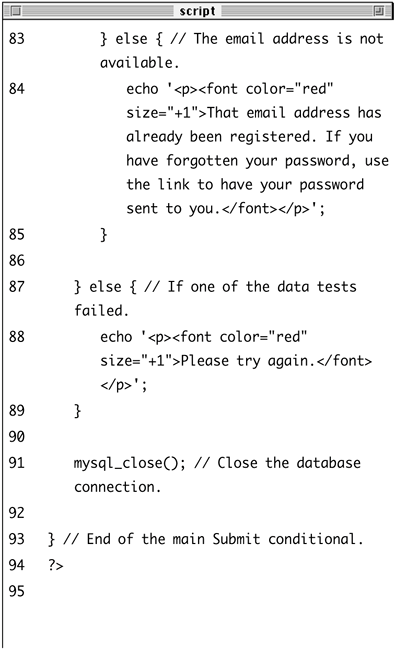
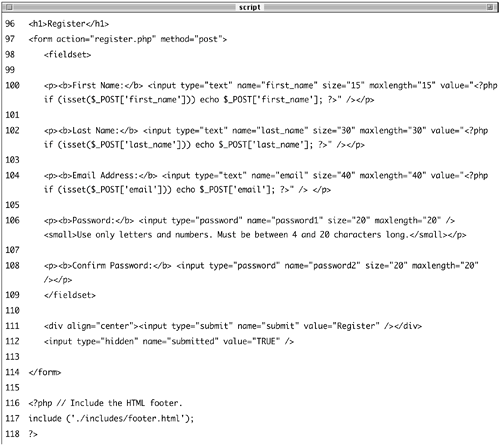
Script 13.6. The registration script uses regular expressions for security and a sticky form for user convenience. It sends an email to the user upon a successful registration. 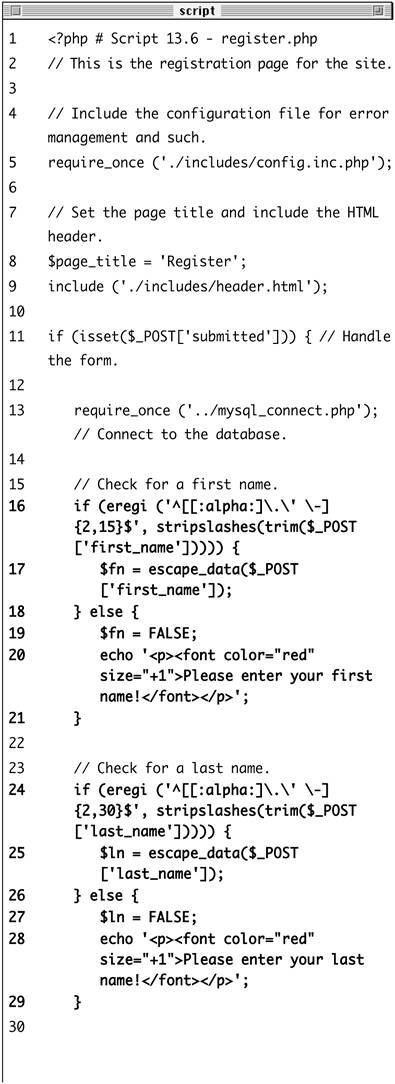
| 2. | Include the configuration file and the HTML header.
require_once ('./includes/config.  inc.php); $page_title = 'Register'; include ('./includes/header.html'); inc.php); $page_title = 'Register'; include ('./includes/header.html');
| 3. | Create the conditional that checks for the form submission and then include the database connection script.
if (isset($_POST['submitted'])) { require_once ('../mysql_connect.  php); php);
Make sure that your mysql_connect.php page defines the escape_data() function and selects the right database (sitename).
| 4. | Validate the first and last names.
if (eregi ('^[[:alpha:]\.\' \-]  {2,15}$', stripslashes(trim($_POST {2,15}$', stripslashes(trim($_POST  ['first_name])))) { $fn = escape_data($_POST ['first_name])))) { $fn = escape_data($_POST  ['first_name]); } else { $fn = FALSE; echo '<p><font color="red" ['first_name]); } else { $fn = FALSE; echo '<p><font color="red"  size="+1>Please enter your size="+1>Please enter your  first name!</font></p>'; } if (eregi ('^[[:alpha:]\.\' \-] first name!</font></p>'; } if (eregi ('^[[:alpha:]\.\' \-]  {2,30}$', stripslashes(trim($_POST {2,30}$', stripslashes(trim($_POST  ['last_name])))) { $ln = escape_data($_POST ['last_name])))) { $ln = escape_data($_POST  ['last_name]); } else { $ln = FALSE; echo '<p><font color="red" ['last_name]); } else { $ln = FALSE; echo '<p><font color="red"  size="+1>Please enter your last size="+1>Please enter your last  name!</font></p>'; } name!</font></p>'; }
The form will be validated using regular expressions, discussed in Chapter 10, "Web Application Security." For the first name value, the assumption is that it will contain only letters, a period (as in an initial), an apostrophe, a space, and the dash. Further, I expect the value to be within the range of 2 to 15 characters long.
If this condition is met, the $fn variable is assigned the value of the escape_data() version of the submitted value; otherwise, $fn will be false and an error message is printed (Figure 13.8).
Figure 13.8. If the first name value does not pass the regular expression test, an error message is printed. 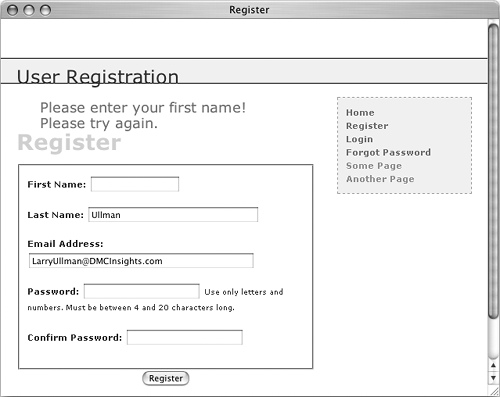
The same process is used to validate the last name, although that regular expression allows for a longer length.
Using regular expressions to validate all of the form data may be overkill, but I wanted to demonstrate more sample regular expression patterns.
| 5. | Validate the email address (Figure 13.9).
if (eregi ('^[[:alnum:]][a-z0-9_\.  \-]*@[a-z0-9\.\-]+\.[a-z] \-]*@[a-z0-9\.\-]+\.[a-z]  {2,4}$', stripslashes(trim($_POST {2,4}$', stripslashes(trim($_POST  ['email])))) { $e = escape_data($_POST['email']); } else { $e = FALSE; echo '<p><font color="red" ['email])))) { $e = escape_data($_POST['email']); } else { $e = FALSE; echo '<p><font color="red"  size="+1>Please enter a valid size="+1>Please enter a valid  email address!</font></p>'; } email address!</font></p>'; }
Figure 13.9. The submitted email address must be of the proper format. 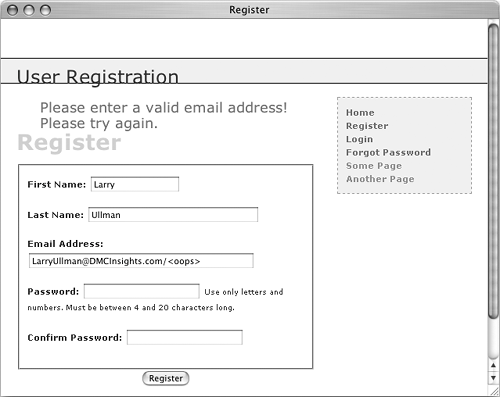
The pattern for the email address was described in Chapter 10 and works rather well in my experience. In all of the validation routines, I make sure to validate a trimmed version of the variable, with the slashes stripped to avoid problems with Magic Quotes.
| 6. | Validate the passwords (Figures 13.10 and 13.11).
if (eregi ('^[[:alnum:]]{4,20}$',  stripslashes(trim($_POST stripslashes(trim($_POST  ['password1])))) { if ($_POST['password1'] == $_POST ['password1])))) { if ($_POST['password1'] == $_POST  ['password2]) { $p = escape_data($_POST ['password2]) { $p = escape_data($_POST  ['password1]); } else { $p = FALSE; echo '<p><font color="red" ['password1]); } else { $p = FALSE; echo '<p><font color="red"  size="+1>Your password did size="+1>Your password did  not match the confirmed not match the confirmed  password!</font></p>'; } } else { $p = FALSE; echo '<p><font color="red" password!</font></p>'; } } else { $p = FALSE; echo '<p><font color="red"  size="+1>Please enter a valid size="+1>Please enter a valid  password!</font></p>'; } password!</font></p>'; }
Figure 13.10. The passwords are checked for the proper format, length, and… 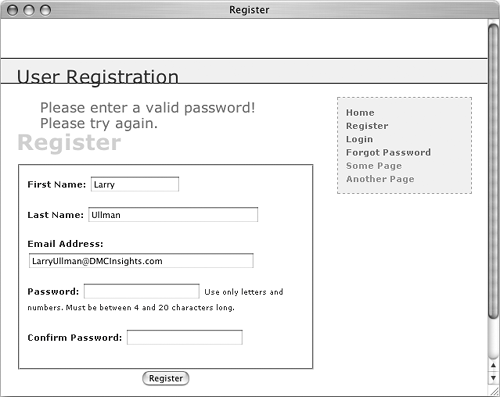
Figure 13.11. …that the password value matches the confirmed password value. 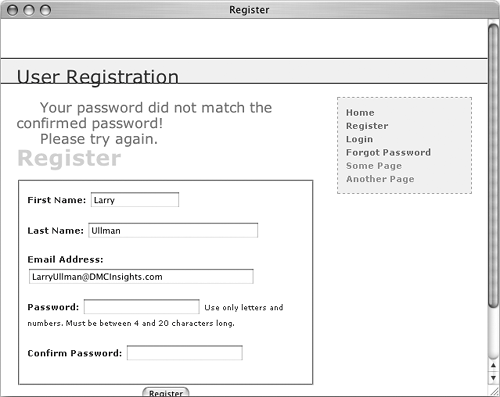
The password must be between 4 and 20 characters long and contain only letters and numbers. Furthermore, the first password (password1) must match the confirmed password (password2).
| 7. | If every test was passed, check for a unique email address.
if ($fn && $ln && $e && $p) { $query = "SELECT user_id FROM  users WHERE email='$e"; $result = mysql_query ($query) or users WHERE email='$e"; $result = mysql_query ($query) or  trigger_error("Query: $query\n trigger_error("Query: $query\n  <br />MySQL Error: " . mysql_ <br />MySQL Error: " . mysql_  error()); error());
If the form passed every test, this conditional will be TRUE. Then I must search the database to see if the submitted email address is currently being used, since that column's value must be unique across each record. As with the MySQL connection script, if a query doesn't run, I'll call the trigger_error() function to invoke my self-defined error reporting function. The specific error message will include both the query being run and the MySQL error (Figure 13.12), so that the problem can easily be debugged.
Figure 13.12. If a MySQL query error occurs, it should be easier to debug thanks to this informative error message. 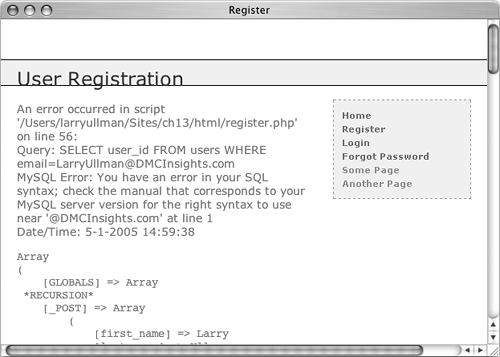
| 8. | If the email address is unused, register the user.
if (mysql_num_rows($result) == 0) { $a = md5(uniqid(rand(), true)); $query = "INSERT INTO users  (email, pass, first_name, (email, pass, first_name,  last_name, active, registration_ last_name, active, registration_  date) VALUES ('$e, SHA('$p'), date) VALUES ('$e, SHA('$p'),  '$fn, '$ln', '$a', NOW() )"; $result = mysql_query ($query) or '$fn, '$ln', '$a', NOW() )"; $result = mysql_query ($query) or  trigger_error("Query: $query\n trigger_error("Query: $query\n  <br />MySQL Error: " . <br />MySQL Error: " .  mysql_error()); mysql_error());
The query itself is rather simple, but it does require the creation of an activation code. To accomplish that, I use the same code as I did in Chapter 10 for generating a unique 32-character string.
The MySQL SHA() function is used to encrypt the password.
| 9. | Send an email or print an error message, reflecting the success of the registration.
if (mysql_affected_rows() == 1) { $body = "Thank you for registering  at the User Registration site. at the User Registration site.  To activate your account, please To activate your account, please  click on this link:\n\n; $body .= "http://www. click on this link:\n\n; $body .= "http://www.  whateveraddressyouwanthere.com/ whateveraddressyouwanthere.com/  activate.php?x=" . mysql_insert_ activate.php?x=" . mysql_insert_  id() . "&y=$a; mail($_POST['email'], id() . "&y=$a; mail($_POST['email'],  'Registration Confirmation, 'Registration Confirmation,  $body); echo '<h3>Thank you for $body); echo '<h3>Thank you for  registering! A confirmation registering! A confirmation  email has been sent to your email has been sent to your  address. Please click on the address. Please click on the  link in that email in order to link in that email in order to  activate your account.</h3>'; include ('./includes/footer.html'); exit(); } else { echo '<p><font color="red" activate your account.</h3>'; include ('./includes/footer.html'); exit(); } else { echo '<p><font color="red"  size="+1>You could not be size="+1>You could not be  registered due to a system registered due to a system  error. We apologize for any error. We apologize for any  inconvenience.</font></p>'; } inconvenience.</font></p>'; }
With this registration process, the important thing is that the confirmation mail gets sent to the user, because they will not be able to log in until after they've activated their account. This email should contain a link to the activation page, activate.php (you'll need to change the domain name so that it's accurate). The link also passes two values along in the URL. The first, generically called x, will be the user's ID from the database. The second, y, is the activation code. The URL, then, will be something like http://www.domainname.com/activate.php?x=22&y=901e09ef25bf6e3ef95c93088450b008.
A thank-you message is printed out upon successful registration, along with the activation instructions (Figure 13.13).
Figure 13.13. The resulting page after a user has been successfully registered. 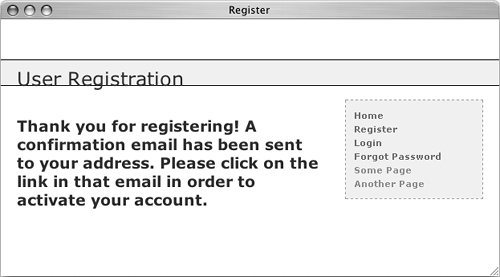
If the query failed for some reason, an error message is printed to the browser (although the live version of the site should never have a problem at this juncture).
| 10. | Complete the conditionals and the PHP code.
} else { echo '<p><font color="red"  size="+1>That email size="+1>That email  address has already been address has already been  registered. If you have registered. If you have  forgotten your password, forgotten your password,  use the link to have your use the link to have your  password sent to you. password sent to you.  </font></p>'; } } else { echo '<p><font color="red" </font></p>'; } } else { echo '<p><font color="red"  size="+1>Please try again. size="+1>Please try again.  </font></p>'; } mysql_close(); } ?> </font></p>'; } mysql_close(); } ?>
The first else is executed if a person attempts to register with an email address that has already been used (Figure 13.14). The second else applies when the submitted data fails one of the validation routines (see Figures 13.9 through 13.11).
Figure 13.14. If an email address has already been registered, the user is told as much. 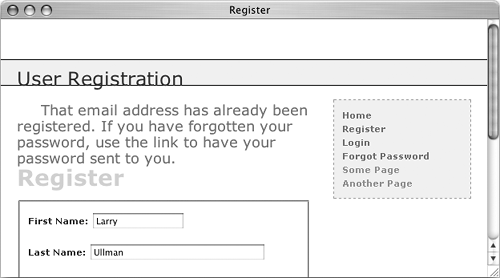
| 11. | Display the HTML form (Figure 13.15).
<h1>Register</h1> <form action="register.php"  method="post> <fieldset> <p><b>First Name:</b> <input method="post> <fieldset> <p><b>First Name:</b> <input  type="text name="first_name" type="text name="first_name"  size="15 maxlength="15" value= size="15 maxlength="15" value=  "<?php if (isset($_POST['first_ "<?php if (isset($_POST['first_  name])) echo $_POST['first_ name])) echo $_POST['first_  name]; ?>" /></p> <p><b>Last Name:</b> <input name]; ?>" /></p> <p><b>Last Name:</b> <input  type="text name="last_name" type="text name="last_name"  size="30 maxlength="30" value= size="30 maxlength="30" value=  "<?php if (isset($_POST['last_ "<?php if (isset($_POST['last_  name])) echo $_POST['last_ name])) echo $_POST['last_  name]; ?>" /></p> <p><b>Email Address:</b> <input name]; ?>" /></p> <p><b>Email Address:</b> <input  type="text name="email" type="text name="email"  size="40 maxlength="40" value= size="40 maxlength="40" value=  "<?php if (isset($_POST "<?php if (isset($_POST  ['email])) echo $_POST ['email])) echo $_POST  ['email]; ?>" /> </p> <p><b>Password:</b> <input ['email]; ?>" /> </p> <p><b>Password:</b> <input  type="password name="password1" type="password name="password1"  size="20 maxlength="20" /> size="20 maxlength="20" />  <small>Use only letters and <small>Use only letters and  numbers. Must be between 4 and numbers. Must be between 4 and  20 characters long.</small></p> <p><b>Confirm Password:</b> 20 characters long.</small></p> <p><b>Confirm Password:</b>  <input type="password <input type="password  name="password2 size="20" name="password2 size="20"  maxlength="20 /></p> </fieldset> <div align="center"><input type= maxlength="20 /></p> </fieldset> <div align="center"><input type=  "submit name="submit" value= "submit name="submit" value=  "Register /></div> <input type="hidden" name= "Register /></div> <input type="hidden" name=  "submitted value="TRUE" /> </form> "submitted value="TRUE" /> </form>
Figure 13.15. The registration form as it appears when the user first arrives. 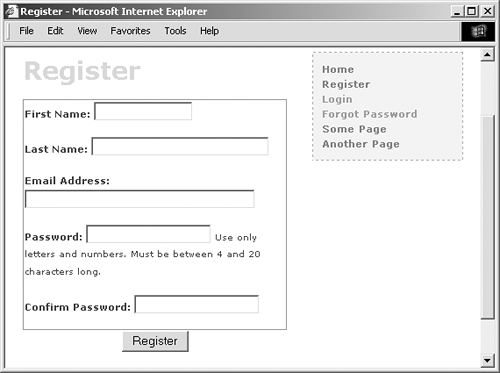
| 12. | Include the HTML footer.
<?php include ('./includes/footer.html'); ?>
| 13. | Save the file as register.php, upload to your Web server, and test in your Web browser.
|
 Tips Tips
Because every column in the users table cannot be NULL (except for active), I require that each input be correctly filled out. If a table had an optional field, you should still confirm that it is of the right type if submitted, but not require it. Except for encrypted fields (such as the password), the maximum length of the form inputs and regular expressions should correspond to the maximum length of the column in the database. If Magic Quotes GPC (GET, POST, COOKIE) is turned on, the sticky part of the form should strip the slashes from the values before printing them. For example: <?php if (isset($_POST['first_name'])) echo stripslashes($_POST['first_name']); ?>
|