A Quick Look at JDBC and MySQL
| I l @ ve RuBoard |
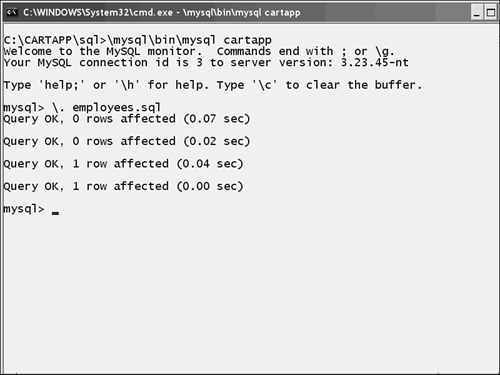
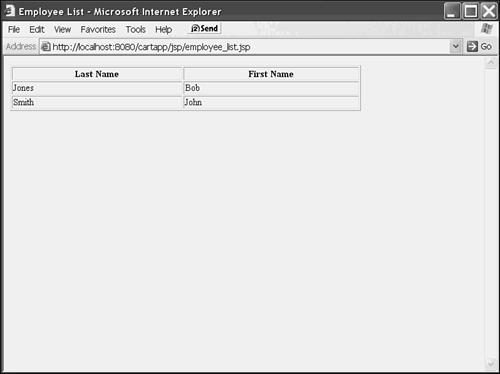
| After completing the setup instructions in Appendix B,"Getting and Installing MySQL and JDBC," you should have a working MySQL and JDBC installation in place. Now let's create a small table in MySQL and try getting to it from JSP. Rather than create the table directly by typing to the command line, you'll put the commands in a file and run it so that you can fix things more easily if you make a typo. You'll put all of your SQL scripts in their own directory under CARTAPP to keep them organized. (See Listing 1.8.) Listing 1.8 employees .sql drop table IF EXISTS employees; create table employees ( lname_txt char(50), fname_txt char(50), employee_num integer primary key, address1_txt char(120), address2_txt char(120), city char(50), state char(2), zip char(10), phone char(14)); insert into employees values ('Jones', 'Bob', 1, '27 Mockingbird Lane', NULL, 'Springfield', 'MA', '11223-4321', '1-617-555-1212'); insert into employees values ('Smith', 'John', 2, '55 Boring Street Name', 'Apt 1', 'Roswell', 'NM', '65444-4556', '1-800-AMA-LIEN'); Now you can bring up the mysql interface and use the \. syntax to run commands from a file (see Figure 1.6). Be sure not to terminate a \. command with a ; like a normal SQL command; it confuses the mysql parser. Figure 1.6. Creating a sample table. To write a JSP page that talks to the database, you need to do several things. Listing 1.9 is a small sample program that walks through the bare minimum. Listing 1.9 employee_list.jsp <HTML> <HEAD><TITLE>Employee List</TITLE></HEAD> <BODY> <%@ page import="java.sql.*" %> <TABLE BORDER=1 width="75%"> <TR><TH>Last Name</TH><TH>First Name</TH></TR> <% Connection conn = null; Statement st = null; ResultSet rs = null; try { Class.forName("org.gjt.mm.mysql.Driver").newInstance(); conn = DriverManager.getConnection("jdbc:mysql://localhost/cartapp"); st = conn.createStatement(); rs = st.executeQuery("select * from employees"); while(rs.next()) { %> <TR><TD><%= rs.getString("lname_txt") %></TD> <TD><%= rs.getString("fname_txt") %></TD></TR> <% } %> </TABLE> <% } catch (Exception ex) { ex.printStackTrace(); %> </TABLE> Ooops, something bad happened: <% } finally { if (rs != null) rs.close(); if (st != null) st.close(); if (conn != null) conn.close(); } %> </BODY> </HTML> The first thing you have to do is to make the java.sql.* classes available for use in this file. In normal Java, you could just say import java.sql.*; and it would happen. In a JSP page, however, imports have to be done with a special syntax, hence the <%@ page import line. We'll look at this and similar tags in more detail in the next chapter. In JDBC, you deal primarily with three things: connections, statements, and result sets. Mainly to facilitate the finally clause that you see at the bottom of the page, you need to declare the variables to hold them and set them to null before you begin. Any time you're dealing with SQL in Java, you need to expect and handle java.sql.SQLException, which can occur because of database errors. So, wrap all of your database code inside a try so that you can attempt to handle failures correctly. The next line, instantiating an instance of the mm.mysql.Driver class, is required to register the DriverManager. An instance of your JDBC driver needs to be registered with the DriverManager before your call to getConnection() can make the proper connection. Most JDBC drivers have a static initializer in the class, so as soon as the class is loaded, a new instance will be registered with the DriverManager. (Others force you to create a new instance, which is another line of code.) Two other ways of doing this are to directly import your driver class (this limits your ability to use other drivers) or to specify the driver name in a system property so that Java automatically loads it. The createStatement call does the work of actually making a connection to the MySQL database. The argument is a URL-style string, with the first two sections ( jdbc and mysql ) always the same. The third section ( localhost ) could also be the hostname of another machine, allowing you to run your server on one box and your database on another. The final portion ( cartapp ) is the name of the database to connect to. You could also specify a username and password for a database that required it. When you have a connection, you can create a statement. Two types of statements exist: the plain type that you're using here and a PreparedStatement . You can then call executeQuery with the SQL code as the argument, which returns a ResultSet object. When you have a ResultSet , you can iterate over it using rs.next() , which will return true until the rows of data that match the query are exhausted. Inside the while loop, you break back out to HTML to put in the tags for the TR and TD of the table you're building. Rather than go back into JSP and use out.write to send the actual contents of each row to the browser, you can use a handy shortcut. The <%= tag causes whatever is the Java expression between the <%= and %> tags to be sent to the browser. Notice that you don't end the expression with a ; because it's a value and not a true statement. If an error occurs during the connection to or query of the database, execution gets thrown to the catch clause. If this occurs, first print a backtrace to the log and then close the table and print a user -friendly error message. Assuming that there's no error, once all the rows have printed, you can close the table. Then, because it appears in a finally clause, you can attempt to close all the open database objects, regardless of whether an error occurred. Because an error might have occurred at any stage (trying to connect, to allocate a statement, and so on), you must make sure that there is an object to close before you try closing it. This is why you must check to make sure that the connection object is not null; it might have thrown an error during initial assignment. At last, you can close up the last few open tags and you're finished. Figure 1.7 shows the resulting view from a browser. Figure 1.7. Creating a sample table. |
| I l @ ve RuBoard |
EAN: 2147483647
Pages: 203

