Managing Fact Tables
You've learned that when maintaining data for fact tables and dimension tables, the order is important because you don't want to load fact data that has dimension relationships (foreign to primary key) that might not already exist in the dimension tables. So the order (or control flow) of your data warehouse SSIS packages is important. As a rule, dimension data processing should be performed before fact table data.
Aggregating Data in Fact Tables
Data is generally aggregated to store the summarized information over a period of time of the fact measures such as the number of units of a product sold in a given month. The source for these aggregations is the detailed granular fact, which collects transactional information from the source at regular intervals of time. In some data warehouses, the aggregation is performed directly by the ETL process to move it into an aggregated fact table, where the detailed transactional records do not have any value for the report users. For example, executives might not need to see the number of units sold at the sixth hour of a day.
When fact tables contain transactions for dimension members that have not yet been loaded and without a default member (zero key dimension), the SSIS Load process will usually fail. The failure is triggered by the database, which is forcing referential integrity between the fact transactions and the dimensions. SSIS allows you to configure error handling during package execution. A common practice is to route error records in the SSIS Data Pipeline to error files or tables for further investigation. In the following demonstration, you will learn how to use this helpful capability in SSIS.
Loading Fact Tables
In the next procedure, you will perform a series of steps to create a new SSIS package that loads a fact table. Sometimes fact table sources can contain information that might violate the referential integrity of the DW mode (for example, if the fact table has rows for dimension members that do not exist in the dimensions). The following procedure will show you how to detect and manage loading fact tables that demonstrate this condition.
Add a New Package for Fact Table Load Processing
-
Right-click the SSIS Packages Folder in the Chap13 project and select New SSIS Package.
-
Right-click and rename the Package
 IntSalesFactLoad.dtsx.
 -
Add an Execute SQL task to the Control Flow tab; then right-click the new task and rename it Clear Staging Table.
-
Right-click in the white space in the Connection Managers pane at the bottom of the window and select New OLE DB Connection.
-
Select localhost.SSIS DW for the database, and then click OK.
-
Double-click Clear Staging Table and choose localhost.SSIS DW from the Connection drop-down list.
-
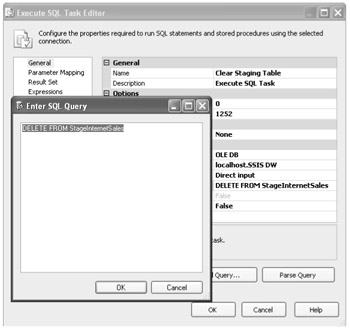
In the SQLStatement property field, click the ellipses button and type the following SQL Statement:
Delete from StageInternetSales
Your screen should look like this:
-
Click OK twice.
-
From the Toolbox, drag a Data Flow task to the Control Flow designer.
-
Right-click the new task, rename it Stage New Internet Sales, and then connect it to the Execute SQL task by dragging the green arrow from the SQL task to the new task.
-
Double-click Stage New Internet Sales to open the Data Flow tab.
-
Add a Flat File source to Data Flow.
-
Double-click the new source and select New to create a new Flat File connection manager.
-
Type Internet Sales Extract File as the connection manager name.
-
Browse to C:\Documents and Settings\<username>\My Documents\Microsoft Press\is2005sbs\Chap13\Data\NewInternetSalesExtract.csv.
-
Select the Column Names In The First Data Row check box and verify that the format is set to Delimited.
-
Click the Columns tab to set the mappings, and then click OK.
-
Right-click the Flat File source and rename it Internet Sales Extract File.
Add a Multicast Task and an Aggregate Task
-
Drag a Multicast task from the Toolbox to the Data Flow and connect the Internet Sales Extract File source to the Multicast task.
-
From the Toolbox, add an Aggregate task to the data flow and connect the Multicast task to it.
-
Double-click the Aggregate task.
-
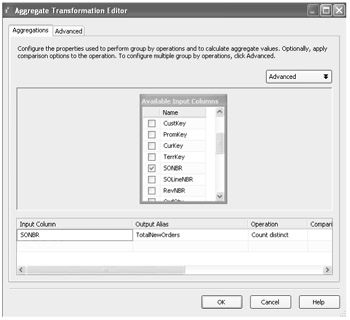
Click the SONBR (sales order number) column in Available Input Columns to configure the Aggregate task to count the number of distinct new Internet sales orders.
-
Set the output alias to TotalNewOrders.
-
Set the operation to Count Distinct.
Your screen should look like this:
-
Click OK.
Note You might often want to capture counts and check sums to compare and validate fact tables loading. To accomplish this, you can use the Derived Column task to add aggregate values to the data flow for storing downstream validation.
Add a Derived Column Task
-
Drag a Derived Column task to the Data Flow and connect the Aggregate task to it.
-
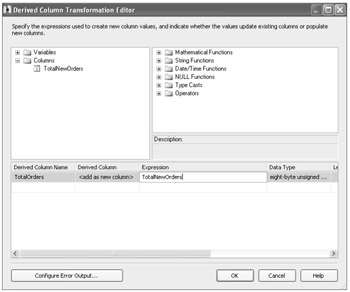
Double-click the Derived Column task to derive a new column named TotalOrders in the Derived Column Transformation Editor.
-
Click the column's plus sign (+) to expand the available columns.
-
Drag the TotalNewOrders to the expressions position.
Your screen should look like this:
-
Click OK.
-
Add a Flat File destination from the Toolbox and connect it to the Derived Column task.
-
Double-click the new Flat File destination and select New.
-
Accept Delimited as the format and click OK.
-
Name the new connection manager Total New Orders Check Count.
-
Browse to C:\Documents and Settings\<username>\My Documents\Microsoft Press\is2005sbs\Chap13\Data\TotalNewIntOrders.txt.
-
Click OK.
-
Click Mappings in the left pane, and then click OK.
Add a Data Conversion Task
-
Add a Data Conversion task from the Toolbox and connect it to the Multicast task by dragging the green arrow from the Multicast to the Data Conversion task.
-
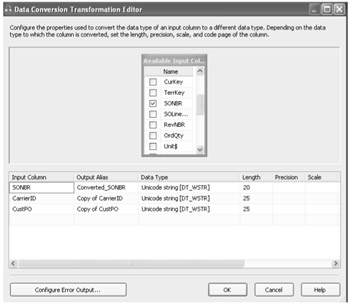
Double-click Data Conversion and select the SONBR, CarrierID, and CustPO columns from the Available Input Columns for conversion.
-
Change Data Type to Unicode string[DT_WSTR] for each.
-
Change the length for SONBR to 20 and to 25 for the other two columns.
Your screen should look like this:
-
Click OK.
-
Add an OLE DB destination and connect the Data Conversion task to the new destination.
-
Double-click Destination, configure the destination to use the existing localhost.SSIS DW, and select the [dbo].[StageInternetSales] table from the Name Of The Table Or The View drop-down list.
-
Click Mapping in the left pane.
-
Expand the page for the available input and output columns to view all the columns.
-
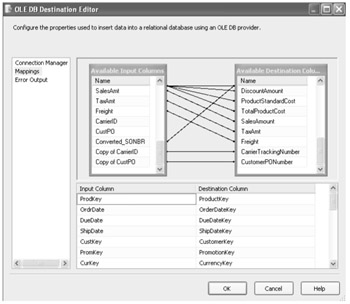
Line up the columns from the top down and map columns 1 to 1, 2 to 2, 3 to 3, and so on except for SONBR, CarrierID, and CustPO. (Mapping columns is done by clicking the item in Available Input Columns and dragging it over to the corresponding item in Available Destination Columns.)
-
Map Copy of SOBR, Copy of CarrierID, and Copy of CustPO to SalesOrderNumber, CarrierTrackingNumber, and CustomerPONumber, respectively.
Your screen should look like this:
-
Click OK.
Note The data flow to load the staging table with the new extract file for Internet sales is complete. Now you need another data flow to load the fact table from the staging table.
Add a New Data Flow to Load the Fact Table from the Staging Table
-
Click the Control Flow tab and add a new Data Flow task.
-
Right-click the new task and rename it Load New Internet Sales Facts. Connect the Stage New Internet Sales data flow task to it.
-
Double-click the new data flow to go to the design window.
-
Add an OLE DB data source from the Toolbox for Load New Internet Sales.
-
Double-click the data source and configure it to use localhost.SSIS DW.
-
Select the [dbo].[StageInternetSales] table from the Name Of The Table Or The View drop-down list, and then click OK.
Add a Variable and a Row Count Task
-
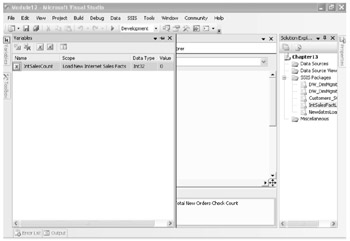
Right-click the designer surface and select Variables to display the Variables tab and add a new variable.
-
Name it IntSalesCount and leave all other default values.
Your screen should look like this:
-
Drag a Row Count task from the Toolbox to the Data Flow designer and connect the data source to it.
-
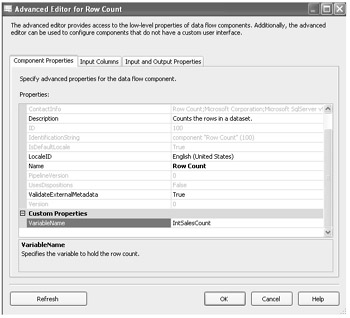
Double-click the new Row Count and configure it to use the IntSalesCount variable by typing IntSalesCount in the VariableName field.
Your screen should look like this:
-
Click OK.
Add an OLE DB Destination and Configure Error Output
-
Drag an OLE DB Destination from the Toolbox to the Data Flow task and connect the Row Count task to it.
-
Right-click the new destination and rename it Internet Sales Fact Table.
-
Double-click the new Destination and configure it to use the localhost.SSIS DW.
-
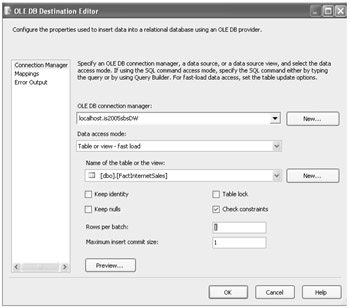
Select the [dbo].[FactInternetSales] table from the Name Of The Table or The View dropdown list.
-
Change the Rows Per Batch to 1.
-
Change the Maximum Insert Commit Size to 1.
Your screen should look like this:
-
Click Mappings.
-
Click Error Output.
-
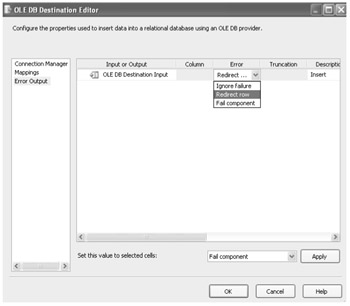
Set Error for OLE DB Destination Input to Redirect Row.
Your screen should look like this:
-
Click OK.
-
Add a Flat File destination and connect it to the red arrow from the Internet Sales Fact Table destination.
-
Click OK in the Configure Error Output dialog box.
-
Right-click the new destination and rename it Load Errors File.
-
Double-click the new destination and select New to create a new Flat File connection manager.
-
Accept Delimited as the Flat File format and click OK.
-
Name the new connection manager Load Errors File.
-
Browse to C:\Documents and Settings\<username>\My Documents\Microsoft Press\is2005sbs\Chap13\Data\ErrorInternetSalesRows.csv.
-
Select Column Names In The First Data Row, and then click OK.
-
Click Mappings in the left pane, and then click OK.
-
Click Save All on the toolbar.
-
Right-click
 IntSalesFactLoad.dtsx and select Execute Package.
Your screen should look like this:
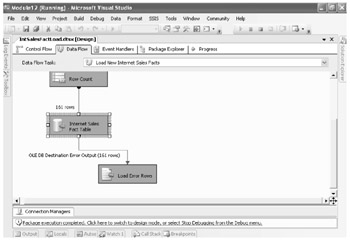
Note The package fails to load all the rows. The error rows are written to the error file. Upon inspection, the fact sales are for new dates that have not been added yet to the DimTime dimension. The referential integrity of the database prevents these sales facts from being loaded into the DW. The DimTime table needs to be updated first with additional members for the new time frames, and the fact table will need to be reloaded.
-
Click Stop Debugging from the Debug menu.
-
Right-click SSIS Packages in Solution Explorer and select New SSIS Package.
-
Right-click and rename this package
 NewDatesLoad.dtsx.
 -
From the Control Flow Items group in the Toolbox, add an Execute SQL task to the Control Flow grid, and then right-click and rename the task Clear Dates.
-
Double-click the Clear Dates task and type the following property for the connection: localhost.SSIS DW.
-
In the SQLStatement property field, click the ellipses button and enter the following SQL Statement:
Delete from dbo.DimTime where FullDateAlternateKey > = '9/1/2004'
-
Click OK.
-
From the Toolbox, drag a new Data Flow task onto the Control Flow designer. Connect it to the Clear Dates task, and then right-click and rename it Insert New Additional Dates.
-
Double-click the new task to open the Data Flow tab.
-
Drag a new Flat File source from the Toolbox onto the Data Flow designer, and then right-click and rename the source NewDates.
-
Double-click NewDates and select New to create a new connection manager.
-
Type NewDates in the name field.
-
Click Browse and navigate to C:\Documents and Settings\<username>\My Documents\Microsoft Press\is2005sbs\Chap13\Data\NewDates.csv.
-
Select Column Names In The First Data Row, click Columns in the left pane, and then click OK twice.
-
Drag Data Conversion Transformation from the Toolbox to the Data Flow designer and connect the NewDates Flat File source to it with the green arrow.
-
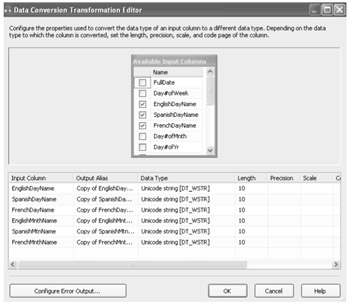
Double-click Data Conversion, select the following from the Input Column Names, and type their properties:
-
EnglishDayName - Unicode String, length = 10
-
SpanishDayName - Unicode String, length = 10
-
FrenchDayName - Unicode String, length = 10
-
EnglishMnthName - Unicode String, length = 10
-
SpanishMnthName - Unicode String, length = 10
-
FrenchMnthName - Unicode String, length = 10
Your screen should look like this:
-
-
Click OK.
-
Drag an OLE DB destination from the Toolbox to the Data Flow designer and connect Data Conversion to it.
-
Double-click the new OLE DB destination.
-
Select Table Or View from the Data Access Mode drop-down list.
-
Select [dbo].[DimTime] from the Name Of The Table Or The View drop-down list.
-
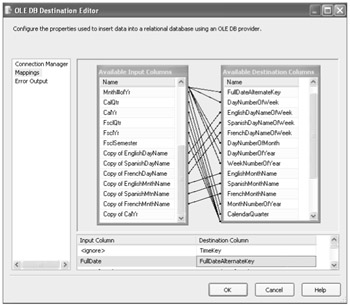
Click the Mappings tab in the left pane, and then map the appropriate columns by selecting the item in the Input Column that corresponds to the OutputColumn.
Your screen should look like this:
-
Click OK.
-
Execute the
 NewDatesLoad.dtsx package by right-clicking it and selecting Execute Package.
 -
The package adds 668 new dates to the DimTime dimension.
-
Click Stop Debugging from the Debug menu, and then right-click the
 IntSalesFactLoad.dtsx package and select Execute Package.
Note In this demonstration, all the records for the new Internet sales facts were rejected. Therefore, you can rerun the
 IntSalesFactLoad.dtsx package from the beginning. Otherwise, you would have had to modify the connection manager for the extract file to point to the load errors file and only rerun the load for the rejected record.
The fact load should have processed 161 rows that represented 62 new distinct orders as counted and stored in C:\Documents and Settings\<username>\My Documents\Microsoft Press\is2005sbs\Chap13\Data\TotalNewIntOrders.txt.
-
Open SSMS and connect to Database Engine.
-
Click New Query.
-
In the Available Databases drop-down list, select SSIS DW.
-
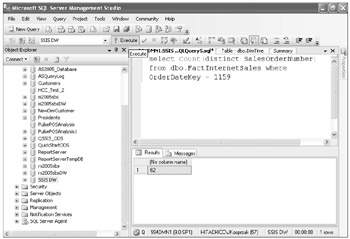
Type the following query:
Select count(distinct SalesOrderNumber) from factinternetsales where orderdatekey = 1159
-
Click Execute.
Note The value returned should equal 62 and match the check value from the staging process.
Your screen should look like this:
-
Go back to BIDS and save and close the project.
EAN: 2147483647
Pages: 152