Hack 24 Restore the Active Directory Icon in Windows XP
| < Day Day Up > |
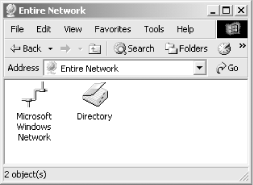
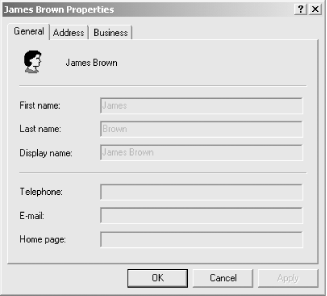
Hack 24 Restore the Active Directory Icon in Windows XP A useful feature in Windows 2000 that enables users to browse Active Directory is missing in Windows XP; here's how to get it back . In Windows 2000, when Active Directory is deployed, a user can easily browse Active Directory by double-clicking on My Network Places and then double-clicking on Entire Network. This displays the Directory icon (Figure 2-9), which represents Active Directory for the network. Figure 2-9. The Directory icon in Windows 2000 Successive double-clicking on this icon can then display information about which users, groups, printers, and other objects are listed for each domain. For each object selected, only a limited amount of information is displayed, but this can sometimes be handy for users who need to browse the directory for information. For example, a User object has a properties sheet with only three tabs on it: General, Address, and Business (see Figure 2-10), which is much less than the dozen or so tabs displayed when the properties sheet for the object is opened in Active Directory Users and Computers. Note that the user information is grayed out in the Figure 2-10; this is because the currently logged on user (James Brown) is an ordinary user and therefore can view selected information about other users but cannot change this information. Figure 2-10. Browsing the Directory icon for information about a user Unfortunately, in Windows XP the directory icon is now gone, but if you want your users to have access to it, you can use this hack to add it back. If you have Windows 2000 computers running on your network (hopefully, with the latest service pack), the steps are simple. If not, you'll need the full instructions. The Easy WayIf you have a Windows 2000 computer handy, simply navigate to the C:\Windows\system32 directory of the Windows 2000 computer and find the dsfolder.dll file. Copy that file to the system32 directory of your Windows XP computer. Now click Start, and then click Run. In the Open box, type regsvr32 dsfolder.dll and then click OK. When you receive the message "DllRegisterServer in dsfolder.dll succeeded," click OK. The Hard WayIf you don't have a Windows 2000 computer handy, do the following:
The next time you view Network Neighborhood, you should have an Active Directory icon available. John Gormly |
| < Day Day Up > |