Integrated Windows Authentication
|
|
Integrated Windows Authentication is the normal method for authenticating users when they try to log on to a Windows Server 2003 computer or network. Integrated Windows Authentication is an evolution of the original NTLM authentication scheme developed by Microsoft for its early LAN Manager server product. It was renamed Windows NT Challenge/Response authentication for Windows NT, and then renamed again as Integrated Windows Authentication for Windows 2000. On the Windows 2000 and Windows 2003 platforms, Integrated Windows Authentication represents two separate authentication methods:
-
NTLMv2 The direct successor to the challenge/response NTLM authentication method. This method is used when IIS machines are part of a workgroup or on Windows Server 2003 networks that still have some legacy Windows NT domain controllers present.
-
Kerberos An industry-standard, ticket-based authentication method. This method is used when IIS machines are part of a domain and there are no legacy Windows NT domain controllers present.
Integrated Windows Authentication is the most secure way to authenticate users attempting to connect to IIS. Users’ passwords are not transmitted in any way, shape, or form across the network connection, so if intruders are trying to sniff passwords using a packet sniffer, they’re out of luck. If you want to provide users with secure access to your IIS websites, for example to provide remote users access to your company intranet, this is often the best way to go. There are two caveats to observe, however:
-
Integrated Windows Authentication requires Internet Explorer 3.01 or later, so legacy Windows clients may be out of luck.
-
Integrated Windows Authentication sometimes doesn’t work through firewalls or proxy servers, so your intranet web server may need to be located somewhere on your perimeter network instead of completely behind the company firewall. More specifically, NTLM has problems with proxy servers and Kerberos has difficulties with firewalls. A workaround for this problem can be achieved by having clients access your web server using a tunneled connection, for example using Point-to-Point Tunneling Protocol (PPTP). This works because tunnels can be proxied and firewall ports can also be opened to let them through. This kind of approach is often used by companies to allow remote clients to securely access a company intranet.
Integrated Windows Authentication in a Workgroup Scenario
It’s easy to test Integrated Windows Authentication in a workgroup scenario where you have a stand-alone IIS machine. Start by opening Computer Management on your IIS machine and use Local Users And Groups to create a test user like John Smith, as just discussed (you might use userid=jsmith and password=password). Then go to a separate machine, log on as Administrator, and try to open the URL for the Default Web Site on your IIS machine. The result is a Connect To dialog box requesting the credentials of a valid user account on the IIS machine (Figure 10-7). Enter the credentials for John Smith in this dialog box and click OK, and you can access the home page of the site.
A couple of things to note concerning Integrated Windows Authentication:
You can explicitly specify a local user account on the IIS machine in the Connect To dialog box by typing it in the form computername\ userid, where computername is the NetBIOS or DNS name or IP address of the IIS machine, and userid is the username of the user account you are trying to authenticate.
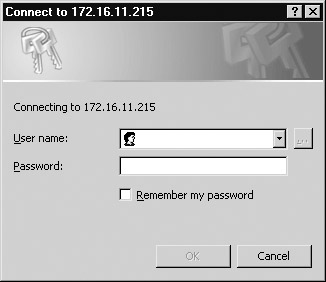
Figure 10-7: Logging on to a site using Integrated Windows Authentication
-
If you make a mistake entering your credentials, you get two more tries before your authentication attempt is rejected.
-
If your credentials are finally rejected, the error message returned is “HTTP Error 401.1—Unauthorized: Access is denied due to invalid credentials.”
Integrated Windows Authentication in a Domain Scenario
Integrated Windows Authentication is more often used in a domain scenario, where Active Directory controls access to network resources and to a corporate intranet site running on IIS. To test this, you’ll need two machines, a domain controller and a standalone machine belonging to a workgroup. Let’s say your domain name is mtit.local and you’ve created a test user called Mary Jones using Active Directory Users And Computers. Mary Jones will therefore be a member of the Users group in this domain and will typically have a logon name like mjones@mtit.local. Now install IIS on your domain controller (not really a good idea from a security standpoint, but this is only a test), and configure the Default Web Site to use Integrated Windows Authentication only by disabling anonymous access. Go to the stand-alone machine and try to open a URL for the domain controller running IIS. The Connect To dialog box should appear, so enter Mary’s credentials (her userid mjones@mtit.local and her password, whatever it is), and you should be authenticated using Integrated Windows Authentication.
Now join the second machine to the domain by opening the System utility in Control Panel, selecting the Computer Name tab, clicking Change, selecting Domain, and typing mtit.local (or your own domain name if your have a different test network).
Make sure your second machine points to the domain controller as its primary DNS server, and click OK to join the domain. Enter the credentials of a domain administrator account to complete the process and reboot your machine, and your second machine is part of the domain.
When the machine restarts, this time log on as domain user Mary Jones by typing mjones@mtit.local in the User Name box. Open Internet Explorer and try to open the URL for the Default Web Site on your domain controller running IIS. This time you shouldn’t have to specify your credentials, since when Integrated Windows Authentication is being used, the browser first tries to automatically use the credentials of the currently logged-on user (Mary Jones) and pass these to IIS for authentication.
If you get a dialog box in the preceding example, it’s probably because you used your IIS machine’s IP address or DNS name in the URL you opened. If this is the case, IIS assumes that the client is connecting over an Internet connection and for extra security generates the logon box. In an intranet scenario however, where Integrated Windows Authentication is usually used, you can use the server name in the URL (For example, http://snoopy) and you should not see the logon box because the credentials of the currently logged on user will be passed silently to IIS for authentication. An alternative to this is to change the security zone settings for Internet Explorer to allow logon information to be passed silently to IIS, which lets you use an IP address or DNS name in the URL, so you won’t see a logon box.
Digest Authentication
Digest Authentication is similar to Basic Authentication (which I will discuss soon) but is more secure because it employs a challenge/response mechanism and transmits user credentials across a network using an encrypted MD5 hash. However, Digest Authentication has some requirements you need to meet if you plan to use it:
-
Client computers must be using Internet Explorer version 5 or higher as their web browser.
-
Both your users and your IIS machine must be members of (or trusted by) the same domain.
-
You must be using Active Directory with either Windows 2000 or Windows 2003 domain controllers and have domain user accounts for your users.
-
If your IIS machine is running in worker process isolation mode, it must be using the LocalSystem account as its identity.
If your domain controllers are running Windows 2000 while your IIS machine is running Windows Server 2003, you must enable subauthentication by installing and configuring a component called iissuba.dll on your IIS 6 machine (see IIS online help for information on how to do this).
IIS 6 also supports a variant of Digest Authentication called Advanced Digest Authentication that is more secure because it securely stores user passwords on domain controllers as MD5 hashes instead of using plaintext. To use Advanced Digest Authentication, both your domain controllers and IIS machines must be running Windows Server 2003, and the UseDigestSSP metabase property must be True. Some IIS docs say that to use Digest Authentication, your users must also have the Store Password Using Reversible Encryption setting enabled on the Accounts tab of their properties sheet. Actually; this setting is enabled by default in Active Directory on Windows Server 2003, so when you enable Digest Authentication on IIS 6, you are really enabling Advanced Digest Authentication.
Testing Digest Authentication
You can test Digest Authentication using the setup from the preceding example if you have your network configured similarly. Open the Authentication Methods dialog box on the domain controller running IIS, select Digest Authentication, and deselect any other authentication methods that you had previously selected. Click the Realm button, and you’ll see a list of domains you can choose to authenticate from. Select your own domain from the list.
Now go to another machine belonging to the domain, log on as a domain user account—you did with Mary Jones in the preceding example, and try to open the Default Web Site on the IIS machine. This time you should get an Enter Network Password dialog box (Figure 10-8). Type your credentials and you should be able to access the site.
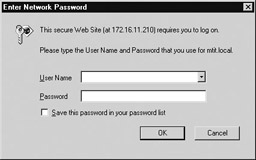
Figure 10-8: Logging on to a site using Digest Authentication
Basic Authentication
Basic Authentication is the weakest form of authentication available on IIS and should only be used when all other forms of authentication fail. The main advantage of Basic Authentication is that it is an Internet standard that works with any browser client. Another advantage of Basic Authentication is that it can work through a proxy server, while Integrated Windows Authentication cannot.
The main disadvantage of Basic Authentication is that it transmits your credentials across the network connection in plaintext (actually, your credentials are Base64 encoded, but this is trivial to decode into plaintext). As a result, any intruder sniffing your network can read your userid and password when you use Basic Authentication. Another disadvantage is that Basic Authentication caches user tokens for 15 minutes, and an attacker who cracks your system during this time interval will be able to read your credentials. However, you can disable such caching in the Registry—see the IIS help files for information.
Basic Authentication is generally not a good idea for authenticating users to your IIS websites, though it’s the only authentication method that works with every browser client (because Basic Authentication is part of the HTTP 1.0 standard). We’ll look at it briefly, particularly because it is the only authenticated access method for FTP sites. However, if you do use this authentication method, never use administrator credentials when accessing your website. If these credentials are stolen, your network is toast. If you do have to use Basic Authentication for your website and you are concerned about users submitting their credentials insecurely, then use SSL to encrypt the authentication session.
| Note | In previous versions of IIS, Basic Authentication required that you grant users the Log On Locally right on your IIS machine for this authentication method to work, which constituted an additional security hazard. In IIS 6, however, this right is no longer required. |
Enabling Basic Authentication for Web Sites
To enable Basic Authentication, select the check box for this option on the Authentication Methods dialog box. Then click the Select button beside the Default Domain text box, and choose a domain to which users will be authenticated (if you’re running IIS on a stand-alone machine belonging to a workgroup, this step is not necessary). Note that if you leave Default Domain blank, IIS uses its own domain as the Default Domain for authenticating users, it doesn’t use the domain of the users’ machines. Don’t bother specifying a realm, as this feature doesn’t really do anything for Basic Authentication— it displays the configured realm in the logon box on the client.
To test this setup, go to another machine and try to open the site using Internet Explorer. You’ll be presented with a Connect To dialog box similar to that for Integrated Windows Authentication. Enter the credentials of a local user on the IIS machine (for a workgroup scenario) or a domain user in Active Directory (in a domain scenario), and you should be able to access the site. If necessary, configure the local security policy on your IIS machine to allow the users you want to access your site the right to log on locally. Like Integrated Windows Authentication, Basic Authentication gives you three authentication tries before generating an error.
Enabling Basic Authentication for FTP Sites
Basic Authentication is already enabled by default for FTP sites. If you want to disable it, select the Allow Only Anonymous Connections on the Security Accounts tab of your FTP site’s properties sheet. This will leave anonymous access the only method for accessing your site. If you want to configure your FTP site to use only Basic Authentication, clear the Allow Anonymous Connections check box. This makes it look like there are no authentication methods configured for the site, but in fact Basic Authentication will be used even though there is nothing in the GUI to indicate this.
You can test Basic Authentication for FTP sites using the command-line FTP client of Windows Server 2003 or Windows XP.
.NET Passport Authentication
Another method IIS can use for authenticating users is.NET Passport, a single sign-on (SSO) web services technology developed by Microsoft. With this type of authentication, each user’s credentials must be associated with a unique Passport account stored on central Passport servers managed by Microsoft and connected to the Internet. This association is made using the e-mail address of the user, so in a way a user’s e-mail address is their Passport. Then when a user tries to access an IIS website that has been configured to use Passport Authentication, IIS forwards the user’s Passport information to the Passport servers that authenticate the user on behalf of IIS.
Associating a User Account with a Passport
To test Passport Authentication on IIS, you first need to associate your user account with Passport. For simplicity, this example will test Passport Authentication on a standalone IIS machine belonging to a workgroup and will not use SSL (for information about using SSL, see the later section “Using SSL to Secure IIS”).
Start by using Local Users And Groups in Computer Management to create a local user account jsmith for ordinary user John Smith. To use Passport, you need an e-mail account, so open Internet Explorer and create a free e-mail account using a service like Yahoo! (www.yahoo.com) for user John Smith. You could also use a Passport-enabled e-mail service like MSN or Hotmail, but I want to keep this example as general as possible, so use some other service instead.
Now log on to your IIS machine using account jsmith, and open the URL www.passport.com to go to Microsoft’s .NET Passport site. Click the image or link that says Register For Your Free .NET Passport Today to open the Member Services Registration page. Type the e-mail address for John Smith, specify a password to protect your new Passport account, read the NDA, and click I Agree to continue. Once your registration is complete, click Continue to return to the main Passport page. You’ve now created a Passport account for John Smith.
You still have to verify who you say you are to the Passport servers, so, still logged on as jsmith, open your mailbox for your free mail service and check your mail. There should be a message waiting for you from Passport. Read it and click the link asking you to verify that you really want to register with Passport. This will open a new browser window and take you to a page on the Passport site that asks you to verify your e-mail address. Click Continue, and the .NET Passport Wizard appears (Figure 10-9).
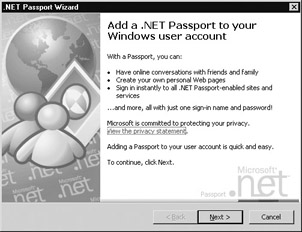
Figure 10-9: The .NET Passport Wizard
This wizard guides you through the process of associating your newly created Passport account with the currently logged-on user account (jsmith). Follow the steps of the wizard by specifying your e-mail address again and entering your Passport password, making sure that the Save My .NET Passport Information in the My Windows User Account check box is selected (Figure 10-10). When you reach the You’re Done! page, a message should state that your user account has been associated with your Passport e-mail address. Click Finish, close your browser window, and log off as John Smith.
Configuring Passport on the Server
Now configure your IIS machine to require Passport Authentication from users. Log on as Administrator and configure the Default Web Site to use Passport Authentication as follows:
-
Open IIS Manager, right-click the Default Web Site, and select Properties.
-
Select the Directory Security tab, and click the Edit button under Authentication and Access Control.
-
Select the .NET Passport check box and clear all other check boxes; then close the Authentication Methods sheet.
-
Click OK to close the Default Web Site properties sheet and apply the changes.
This enables Passport Authentication on your IIS machine, but, by default, Passport is configured to require an SSL server certificate. You can change this by editing the Registry. Open the Registry Editor (regedt32.exe) and find the following Registry key:
HKLM\Software\Microsoft\Passport\SecureLevel
By default, this REG_DWORD key has the hexadecimal value A, or decimal value 10, which means that an SSL server certificate is required on the server. Change this value to zero and close Registry Editor. This will cause your IIS machine to use its default encryption key for Passport Authentication instead of a server certificate that you would obtain and install in a normal production environment.
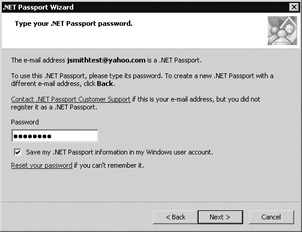
Figure 10-10: Associating a Passport password with a user account
Testing Passport Authentication
Now log off as Administrator and log on again as John Smith. To display the home page of the Default Web Site, open the URL http://localhost in Internet Explorer. A Passport Authentication dialog box will appear, displaying the e-mail address for the Passport account associated with your local user account (Figure 10-11). Type your Passport password, click OK, and your browser will open the home page of your Default Web Site.
Developing Passport-Authenticated Websites
I’ve only scratched the surface of using Passport to authenticate users against IIS. In a real-world environment there will be at least two other stages in the development of your sites, the preproduction (PREP) and final production stages. For these stages you will have to do things such as:
-
Use the Passport Manager Administration Utility (msppcnfg.exe) on your IIS machine to configure a site ID and other Passport settings.
-
Obtain a server certificate for your website to establish its identity when communicating with Microsoft’s Passport servers.
-
Register your website with Microsoft’s Passport site by completing the necessary forms and agreements.
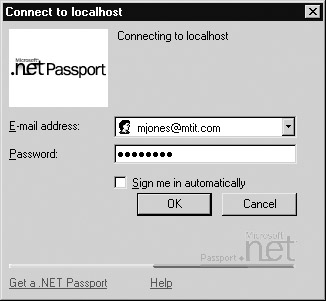
Figure 10-11: Accessing a Passport-protected site
For more information on these and related procedures regarding implementing Passport on your sites, see IIS online help, the MSDN site (msdn.microsoft.com), and the Passport site (www.passport.com).
Summary of Authentication Methods
The authentication methods are summarized in Table 10-2 for easy comparison. This will be helpful in deciding which authentication methods to enable when creating IIS websites for various purposes.
| Feature | Anonymous Access | Integrated Windows Authentication | Digest Authentication | Basic Authentication | .NET Passport Authentication |
|---|---|---|---|---|---|
| Level of security | None | High | Medium | Low | High |
| Password transmission | None | Kerberos ticket or NTLM hash | MD5 hash | Base64 | SSL |
| Supported Clients | All | IE 2 or higher | IE 5 or higher | All | All |
| Through proxy server | Yes | No | Yes | Yes | Yes |
Combining Authentication and Permissions
I’ve covered two aspects of IIS security: authentication and permissions. Which is applied first? The answer is simple: users must be authenticated to a site before permissions can be applied to control their access to the site. Putting it all together, here’s how IIS authenticates clients:
-
The user is first authenticated and granted an access token. If anonymous access is enabled, this is used. Otherwise, other methods are used, starting from the most secure and working downward. If .NET Passport Authentication is configured, however, only this method is used.
-
The web permissions configured for the site are then applied to determine what level of access the user has to the page requested. Web permissions are applied equally to all users, regardless of their group membership.
-
If web permissions allow the user access to the page, the user’s access token is then compared to the NTFS permissions configured for the page, and these NTFS permissions ultimately determine whether the user can access the page or not; they also determine the level of access granted. NTFS permissions take the user’s group membership when determining access into account as well.
There’s one more level of security that IIS can use: IP address and domain name restrictions.
|
|