| Now you are ready to begin drawing the logo. The logo is an image of a mint candy with a design in the middle and the company name: Sweet Creations. In the next steps, you will create the candy, add an effect to make it appear three-dimensional, and add the company name to the logo. It might be useful to have a mint candy (a round white candy with red stripes around the edge) in front of you as you complete these steps. Try not to pop it into your mouth until you're finished with the logo! 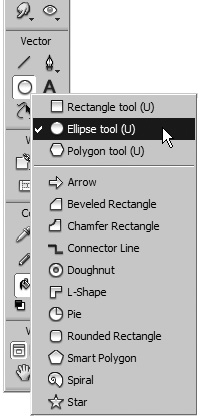 1. | Select the Ellipse tool on the Tools panel.
The Rectangle tool, Ellipse tool, and Polygon tool are in the same tool group as well as other tools referred to as Auto Shapes. You will examine some of the Auto Shape tools in Lesson 3. Hold down the mouse to access the tool pop-up menu and select the Ellipse tool. You'll use the Ellipse tool to draw the basic shape of the mint.
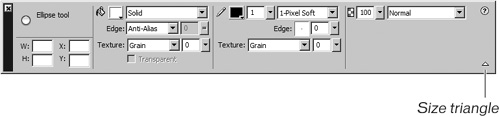
The ellipse you will draw needs to be stroked and filled with white. Strokes (the lines around an object) and fills (the color or pattern within the object) are controlled in the Property inspector. If you don't see the Property inspector at the bottom of the screen (the default location), choose Window > Properties. Because so many settings are located in this panel, you'll want to keep it open as you create and edit your documents. If you have a small monitor, you can reduce or enlarge the size of the panel by clicking the size triangle located at the bottom right of the panel.
 | 2. | In the Property inspector, choose Solid from the Fill category pop-up menu. Click the Fill color box and choose white from the pop-up color palette.
When the color pop-up window opens, the pointer changes to an eyedropper. Move the eyedropper over the color in the window to pick the color you want. When you are over a color, the top row of the window displays the color, plus the Hexadecimal value of the color. Click to choose the color.
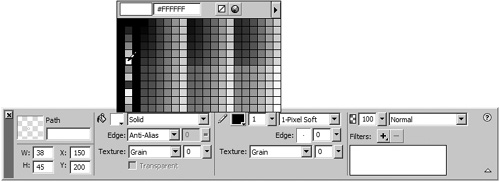 Tip You can move the eyedropper over a color on the canvas to pick a color from an existing image or graphic. This is very handy when you want several objects to have the same color. You can also pick a color from outside the Fireworks environment. In Windows, hold down the mouse button and drag the eyedropper to the color, and then release to pick the color. On the Macintosh, you can just pick any color on the screen. | 3. | In the Property inspector, click the Stroke color box and choose a red color from the color pop-up window. For this exercise, choose the red color with the value #CC0000. From the Stroke category pop-up box, choose Pencil > 1-Pixel Soft and enter 1 in the Tip Size text box.
 Note To remove a stroke or fill, choose None from its category pop-up menu in the Property inspector. | 4. | Position the cursor where the guides cross. Hold down Alt (PC) or Option (Mac) to draw a circle from the center; then, as you are dragging, add Shift to constrain the shape to a circle. As you drag, look at the values in the Property inspector. Release the mouse button when you see 150 for the width and height.
The width and height of the circle along with its position on the page are displayed on the left side of the panel. You can enter new values or just view the information. Verify that the width value and the height value are the same to ensure that you have a circle.
Tip Release the mouse button before you release the modifier keys; otherwise, you'll get an ellipse instead of a circle. Note When you move over a guide, the Ellipse tool pointer turns magenta. The magenta color does not appear on the Macintosh. Macintosh users: Try setting your preferences to use precise cursors to change the pointer to red when you are over a guide. Choose Preferences from the Fireworks application menu, and then choose Editing from the Category pop-up menu and select Precise Cursors. |
|