| The Button Editor steps you through the process of creating all states of a button and adding the links and HTML to make everything work. Most of the time, you'll want to use this editor, but you can still create buttons manually if you prefer. When you use the Button Editor, the button is added to the library. This makes adding other buttons of the same type a snap you just drag the new button from the library onto the canvas. Most often, you'll create simple rollovers for your buttons. A simple rollover switches to a new image when the user rolls the pointer over the button and then switches back as the user rolls the pointer off the image. A simple rollover requires only two graphics, making downloading fast. The next exercise shows you how to create a three-state button using the Button Editor. 1. | Create a new document 600 by 300 pixels with a white canvas. Save your file in the Projects folder and name it buttons.png. Choose Edit > Insert > New Button to access the Button Editor.
The Button Editor is a separate window where you design your button. All of the tools and panels are available just as they are in the standard document window. If your Fireworks document window is maximized in Windows, the Button Editor will open as a maximized window as well.
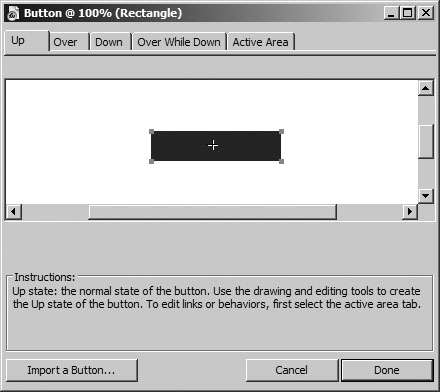
| 2. | Draw a rectangle in the Button Editor window. Make the width of the rectangle 130 pixels and the height 30 pixels. Change the Fill color to black and change the Stroke to None.
Notice the five tabs at the top of the Editor. The Up tab is where you create the normal state of your button. The normal state is the look of the button as it initially appears on the page.
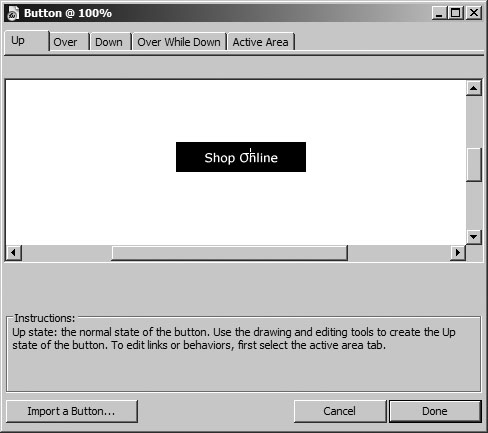
 | 3. | Use the Text tool to add the label Shop Online to the button.
Place the text block in the center of the rectangle. Change the text color to white and set the alignment to centered. Choose a font and size of your liking (for example Verdana, 12 points), leaving some room on either side of the text. Align the text block so that it is centered between the left and right edges of the rectangle. Move the text block closer to the bottom edge.
 Note For the other buttons on the page, you will copy the completed button and then change the text label. The other buttons are labeled Facts & Recipes, Request a Catalog, and About Us. If your text block is centered in the rectangle and the text alignment set to Centered, then when you change the text labels on the other buttons, the text block expands or contracts based on the text, but remains centered in the rectangle. If you are not pleased with your button, adjust it now. The other states of the button are based on this state. Although you can adjust the button later, it is much easier if you make your adjustments now. You know: Get it right the first time!
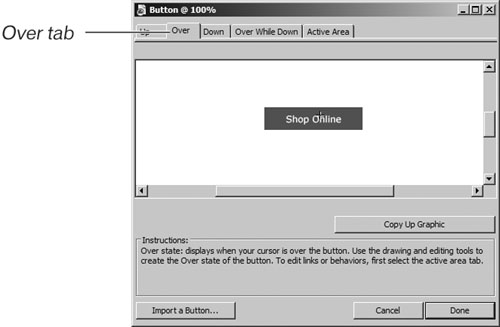
| 4. | Select the Over tab to create the rollover image. Click Copy Up Graphic to make a copy of the original button (the rectangle and the text) you just created. Select the rectangle and change the color to gray.
The button you created in the Up window is copied and pasted in the exact location in the Over window. Normally, the rollover image is based on the original image, with perhaps just the color of the text or shade of the button changed.
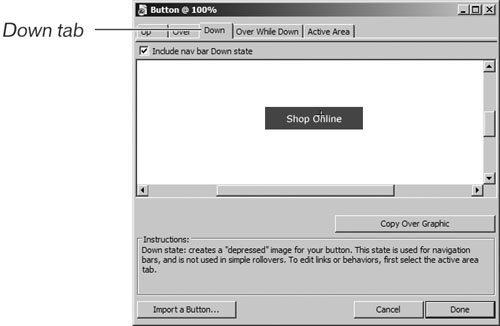
 | 5. | Select the Down tab to create the image that is displayed when the user clicks the button. Click Copy Over Graphic to make a copy of the previous state of the button. Select the rectangle and change the color to the same red color you added to the top rectangle on your home_page.png file.
If you don't remember the same red color you used, you can open the basic_colors.png file in the Lesson03 folder and pick the color from the first color chip. Or open your home_page.png file and pick the color from the top rectangle. You can open either of these files while the Button Editor is open.
 | 6. | Click Done to exit the Button Editor.
When you exit the Button Editor, you are returned to the document window. The button is placed in the center of the canvas, but you can move it wherever you want. For this exercise, move the button to the left of the canvas. Your button is visible, and you see a green translucent overlay (called a slice) and the red slice guide lines.
Up to this point, you've created static images on the page. The button you just created includes some JavaScript that instructs the browser to change the image from the Up state to the Over state when the user moves over the button and to change to the Down state when the user clicks the button. Fireworks did all that work for you and stored the code in the slice. The slice is placed on the Web Layer and is always on top.
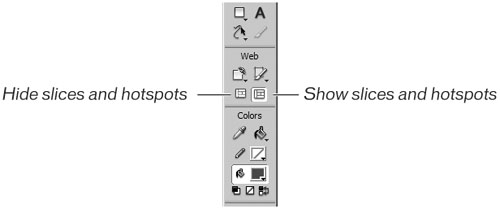
| 7. | If the slice guides are not visible, choose View > Slice Guides to display them. If the slice is not visible, click Show Slices and Hotspots on the Tools panel to show it.
 The slices and slice guides are very helpful for placing other buttons on the page relative to this first one, but they can be distracting. You will find yourself showing them and then hiding them as you design your page. Hide them for the next task. The slices and slice guides are very helpful for placing other buttons on the page relative to this first one, but they can be distracting. You will find yourself showing them and then hiding them as you design your page. Hide them for the next task.
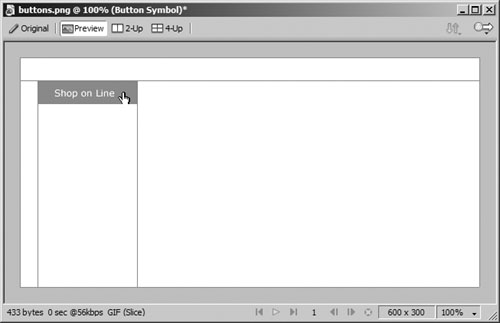
Tip Clicking Show or Hide Slices on the Tools panel is the same as hiding or showing the Web Layer on the Layers panel. Press the 2 key to quickly show or hide the slices.  | 8. | Click the Preview button in the document window to view your button.
Move the pointer over the button to see the rollover image. The button changes to the Over state and then returns to the Up state when you move off the button. Click the button to see the Down state of the button.
 Note At this point, you have only one button. Once you click the button, it remains in the Down state. If you have two or more buttons, then the clicked button returns to the Up state when you click another button. This type of button interaction is referred to as a Nav Bar as opposed to a simple rollover. | 9. | Click the Original button to return to the document window.
Tip You cannot edit the button while you are in the Preview window. You must return to the original document window to make your changes. |
|