Creating Parameter Fields to Select a Date
|
You'll find that one of the most common purposes of parameter fields is to select records based on a date (or some date range). In other words, the report will use the report user's defined value to select the desired records.
To perform this type of functionality, you'll need to:
-
Create the parameter field
-
Incorporate that parameter field into a selection statement
Continue working with the EmplOrders.rpt file.
-
In the Field Explorer, right-click on the Parameter Fields node.
An options menu displays. Select New. The Create Parameter Field dialog box displays.
-
In the Name field, type Order Date.
-
In the Prompting text field, type Please Enter Order Date:.
-
In the Value type drop-down field, select DateTime.
Your screen should look like Figure 11-5.
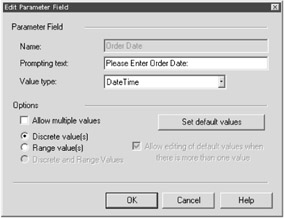
Figure 11-5: Defining a date parameter field -
Leave the Discrete value(s) option selected.
This means that the parameter value is to include only one value. If you wish to create a date range (which you learn later in this chapter), you would select the Range value(s) option.
-
Press the OK button to close the Create Parameter Field dialog box.
You're returned to the Report Design area.
You're halfway there. You've created the date parameter field. Now try adding it to your report (below the title in the Report Header). You'll notice that the report date you define displays. However, none of the records in the report change, as shown in Figure 11-6. The reason there was no change in the report's data is because you have not defined the date parameter field within a selection statement.
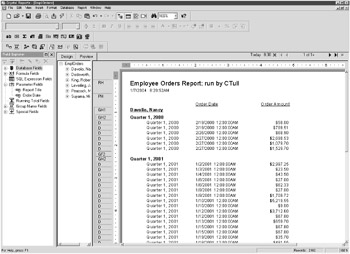
Figure 11-6: The date parameter field will not filter records until it is part of a selection formula.
Let's look now at the process of defining a parameter in a selection statement. Perform the following steps:
-
From the menu bar, select Report, Select Expert.
The Choose Field dialog box displays.
-
In the Choose Field dialog box, select the Orders.Order Date field from the Report Fields node.
Once you've done this, press OK. The Select Expert displays.
-
In the Comparison Operator drop-down field, select Is Equal To.
-
In the Comparison Value drop-down field, select ?Order Date.
In Crystal Reports, all parameter fields are listed with a question mark (?) for identification purposes. Your screen should look like Figure 11-7.
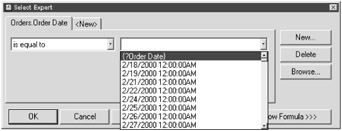
Figure 11-7: Defining a parameter value within a selection statement
| Note | You don't have to create selection statements in the Select Expert; you can also create them in the Formula Editor. Also, if you're in the Select Expert and curious about what your selection statement code looks like, press the Show Formula button. Your selection statement code displays. Once you press the Show Formula button, you'll also notice that a Formula Editor button displays, which takes you straight to the Formula Editor. To hide this formula code, simply press the Hide Formula button on the Select Expert. |
Once you've done these steps, press the OK button on the Select Expert. Refresh your data.
Your report shouldn't return any data, as shown in Figure 11-8. This is actually good. It shows that the selection statement is working.
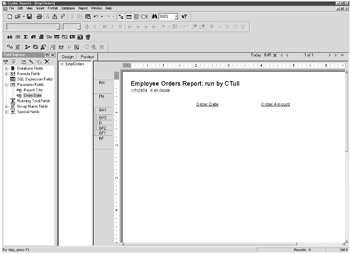
Figure 11-8: No records found for your parameter
The date that appears is the date parameter you entered earlier in this chapter. If you do not see any records display, it's because there are no records associated with the date you've entered.
Let's try again. Refresh your report by pressing the Refresh icon on the Standard toolbar. A Refresh Report Data dialog box displays, asking if you wish to use your current parameters or new parameter values. This dialog box displays every time a report with parameters is refreshed. Select the Prompt for New Parameter Values option box and press OK.
An Enter Parameter Values dialog box displays, prompting you for the values for all report parameters:
-
For the Report Title parameter, enter: Employee Orders Report; run by [your name here].
Once you've done this, select with your cursor the Order Date parameter (within the list box at the top of the dialog box). If you press Enter or the OK button, Crystal assumes you wish to use the default for the second parameter.
-
For the Order Date parameter, enter: 01/10/2001 12:00:00 A.M.
Once you've entered these values, press the OK button on the Enter Parameter Values dialog box. Your report refreshes with only orders that occurred on 01/10/2001, as shown in Figure 11-9.
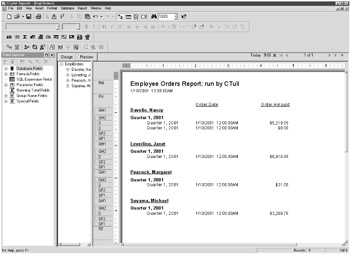
Figure 11-9: Record selection using a parameter field
Editing Parameter Fields
In the report in this chapter, you may have noticed that all the Order Date fields display in a format of DateTime. This is a default of the database. The time information isn't very helpful — it's simply defaulted to 12:00:00 A.M. with each record. Let's change this format to only display the date and then edit the parameter field to match this change. First, you'll need to change the format within the report. You learned about changing DateTime information in Chapter 5.
Right-click on the order date information within the Details section. Then, select Format Field from the options menu. The Format Editor dialog box displays. From the Format Editor, select the Date and Time tab. Then, from the Style list box, select the format that reads: 03/01/1999.
Once you've done this, press the OK button. You should now notice the Order Date information within your report change to a mm/dd/yyyy format.
You're now ready to edit your parameter field. Go to the Field Explorer. Then, expand the Parameter Fields node and right-click on the Order Date parameter. Select Edit from the options menu. The Edit Parameter Field dialog box displays.
Once you're at this dialog box, change the Value type to Date, as shown in Figure 11-10. You need to match the Value type to the newly changed Order Date format.
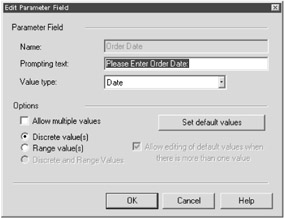
Figure 11-10: The Edit Parameter Field dialog box
Once you've made that change, press the OK button. Try refreshing your report. Notice at the Order Date parameter that you're only asked for Date information now. Type in 01/10/2001 as your date, and press OK. Your report should now look like Figure 11-11.
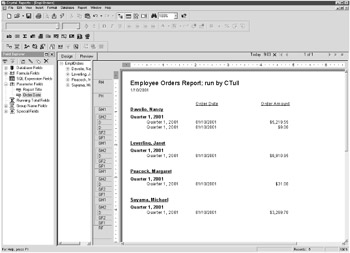
Figure 11-11: The results of editing a parameter field
|
EAN: 2147483647
Pages: 177