Working with the Format Editor
|
To access the Format Editor, right-click on the object you wish to format (for example, try right-clicking on the Notes field within your Details b section). An options menu displays. From this options menu, select Format Field. The Format Editor dialog box displays, as shown in Figure 5-7.
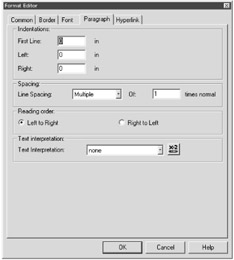
Figure 5-7: The Format Editor
| Tip | If you're selecting a text object, the options menu will read Format Text instead of Format Field. |
The Format Editor dialog box always contains a series of tabs, with some reporting objects containing more tabs than others. The tabs may differ slightly, depending on the reporting object you're formatting.
With database field objects (such as the Notes field), you'll notice a total of five tabs. These tabs are as follows:
-
Common: This tab contains options that set properties such as suppressing an object or setting the horizontal alignment.
-
Border: This tab contains options that control the formatting of borders, background, and drop shadows for an object. This is good to use when you want to highlight an object of importance in your report.
-
Font: This tab contains options that control the look of an object's font, font size, or font style.
-
Paragraph: This tab controls the formatting options for paragraphs in a text object.
-
Hyperlink: This tab creates a link to another file, be it a web site, a data value, an e-mail address, or even another Crystal Reports file.
Let's jump into some of these tabs and see how their functionality can help you in formatting your reports.
Resize an Object (Using the Format Editor)
The Common tab is one of the most useful areas of the Format Editor, allowing you to perform a number of common formatting tasks. Figure 5-8 displays the Common tab, while Table 5-1 summarizes the fields available within the Common tab.
| Functionality | Description |
|---|---|
| Object Name | Defines a name for the report object you're formatting. A default name is created for each field within a report. |
| CSS Class Name | Defines a class name for the report object you're formatting. Class names are useful if you're using a Cascading Style Sheet (CSS) to indicate a unique style for the selected report object. |
| Read-only | Defines the report object as read-only so that the object cannot be formatted. If this option is selected, all other options within the Format Editor become inactive (as well as the formatting options available from the toolbars and shortcut menus). |
| Lock Position and Size | Defines the position of the report object so that the object cannot be moved. If this option is selected, the report object cannot be moved or resized. |
| Suppress | Defines whether a report object should be suppressed (in other words, the report object will not display within the Preview tab or when the report is printed). |
| Horizontal Alignment | Defines the horizontal alignment of a report object (for example: left, center, or right). |
| Keep Object Together | Defines that all report objects (within a given section) remain together on the same page. If there is not enough room to print these report objects on one page, Crystal Reports will move all report objects within that section to the next page. If the report objects within that given section are larger than a page, this property will not work. |
| Close Border on Page Break | If you define a report object to contain a border (available within the Border tab of the Format Editor), this option closes the border after each page, even if the report object is split over two pages. |
| Can Grow | Allows report objects to expand as necessary whenever the text within an object is larger than the object's frame. |
| Max Number of Lines | If the Can Grow check box is selected, this option allows you to define the maximum number of lines that Crystal Reports will expand an object frame. If you do not want a limit, enter a 0 (zero) in this field. |
| Tool Tip Text | This option is useful for reports that are viewed via a computer rather than printed. This option allows you to add text associated with a report object. This text displays when users leave their cursor over the report object for a few seconds. Tool Tip Text only displays within the Preview tab. In order for Tool Tip Text to display, go to File, Options. An Options dialog box displays. Make sure the Tool Tip check box is checked. |
| Text Rotation | Defines rotation options for the report object (for example, vertically aligning text). |
| Suppress If Duplicated | Defines the suppression of duplicate values on a report. |
| Display String | An advanced feature that allows you to define a formula to customize the formatting of a value. For example, if you wanted thousands to display as K, you could define that information in this area. |
| Sample | Displays a sample of the formatted object (if you add borders or boldfacing to the object, you will see these formatting actions represented in the Sample area). |
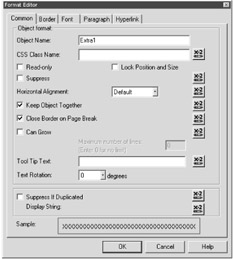
Figure 5-8: The Common tab of the Format Editor
| Note | You may notice after certain fields the conditional formatting icon: Conditional formatting is formatting that applies only under certain conditions. We explore conditional formatting in Chapter 10. |
To try your hand with the Common tab, let's use it to expand your report object frame. Perform the following steps. Make sure that you've accessed the Format Editor for the Notes field.
-
Select the Common tab, and check the Can Grow check box.
This enables an object to expand so that all the information displays.
-
Press OK on the Format Editor.
-
Resize the field by dragging the right resizing box to the 7.5" mark.
Select the Preview tab (if you're not already there). In Figure 5-9, you'll see that the Details b section now expands to fit the Notes field.

Figure 5-9: Using the Can Grow option to resize objects
Formatting Date Information
Take a look at the birth date information within this report. Notice that the birth date displays within a date/time format. You may need to resize the Birth Date field to see this.
Date information is often an area you'll need to clean up within your reports. Date information is often stored in a date/time format within databases. However, most reports usually only require the date. The Format Editor allows you to change the date/time format so that only the date displays.
In the report you've been working on in this chapter, try the following:
-
Right-click on the Birth Date field (located within the Details a section.
An options menu displays.
-
Select the Format Field option.
The Format Editor displays.
-
Select the Date and Time tab (if this tab is not already selected).
The Date and Time tab contains two options. You can select a date/time format from a predefined list, available from the Style list box, or you can customize your own date/time format with the Customize button.
-
Press the Customize button.
A Custom Style Date/Time dialog box displays. Select the Date and Time tab within this Custom Style dialog box, as shown in Figure 5-10.
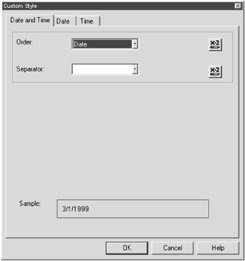
Figure 5-10: The Date and Time tab within the Custom Style dialog box -
In the Order drop-down field, select Date.
Notice the sample format at the bottom of this dialog box. This shows that only the date information will display within your report.
-
Select the Date tab.
This tab allows you to modify the format of the date information, if necessary. Feel free to experiment with this tab if you wish.
-
Press the OK button on the Custom Style dialog box.
The Custom Style dialog box closes.
-
Press the OK button on the Format Editor dialog box.
The Format Editor dialog box closes.
Preview your report. For some extra practice, try resizing and moving the Phone Number and Ext fields so that they display all information as necessary without overlap. Figure 5-11 displays what your report might look like.
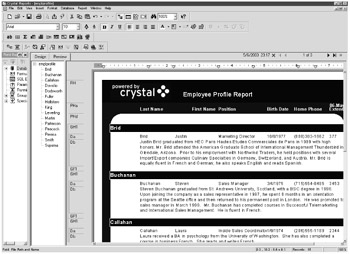
Figure 5-11: Formatting date information with the Format Editor
|
EAN: 2147483647
Pages: 177