| Test Objective Covered: 4. Implement the Delimited Text driver for DirXML. To pass your CLE exam, you need to know how to configure the DirXML Delimited Text driver. This is an interesting driver in that instead of synchronizing eDirectory data with a database, it simply writes the synchronized data out to a comma-delimited text file ( *.CSV ) in the local file system. This driver can be used to synchronize with older databases that don't have a DirXML driver written and aren't LDAP compliant. If you can import and export data to a comma-delimited text file, you can use this driver to synchronize data. Granted, it requires more administrative intervention than other drivers (mostly to export and import the CSV files), but considerably less administrative overhead than keeping data synchronized manually. Implementing the Delimited Text Driver This is a very useful driver for training students on DirXML (hence why Novell includes the driver in its list of objectives for the CLE). If you make a mistake, nothing blows up. Note DirXML is an extremely powerful product. It can do things that network administrators previously could only dream about. With that power, however, comes the risk of potential problems. Simply put, you could really mess up your eDirectory tree and your synchronized databases if you implement DirXML incorrectly. Some of the very first DirXML implementations back in 2000 did just that. A couple very large companies (I'm not at liberty to name them) adopted DirXML in its earliest release. They configured their drivers incorrectly and turned synchronization on. When they did, it totally wiped out their systems. It took quite some time to restore everything from backup. As you probably know, downtime in a corporate network is a very bad thing. The key mistake they made was that they implemented DirXML on a live system without testing it first. Because of this, the DirXML engineers were hesitant about including DirXML in the CLE certification. They were concerned that students would feel they knew everything they needed to know after a basic introduction to the product. In this regard, there are two things you need to keep in mind. First, understand that you should pursue advanced DirXML training before undertaking a large-scale deployment. DirXML is so complex, you could create a full certification program around this one NNLS component alone. The CLE certification only requires that you understand some very basic DirXML skills and concepts. Second, when working with DirXML you should model your production network in an isolated lab environment and test DirXML in it first. Chances are, you'll make many mistakes that will need to be fixed. It's much better to learn from these mistakes in this environment than on your organization's network. If you destroy a production system, it's very unlikely that you will be given the opportunity to learn from your mistake.
As with other drivers, the Delimited Text driver uses a publisher channel and a subscriber channel. The publisher channel is configured to read data from comma-separated (CSV) text files located in a directory that you configure in the local file system. When read, data from the text file is processed by the DirXML engine using the publisher channel rules. Data that meets the criteria specified in the rules is added to your eDirectory tree. The publisher channel continually scans the directory every 10 seconds (by default) and reads any CSV files that it finds. After a file is processed, the publisher channel changes its extension to .bak to prevent it from being read again. The Delimited Text driver's subscriber channel monitors your eDirectory tree for DirXML events (such as Add, Modify, Delete, and Rename). When an event is detected , the event is processed through the subscriber channel's rule set. The resulting output is written to a CSV file in the output directory in the file system. Tip The Delimited Text driver requires that the input and output directories be separate directories in the file system.
By default, the first output file opened by the subscriber channel is given a name consisting of a random number with a .csv extension. When the number of entries in the file reaches 200, it is closed and a new output file is opened. If your system is relatively static, the subscriber channel will still close the output file, even though it doesn't contain 200 entries. By default, the subscriber channel is configured to keep the output file open for only 30 seconds. After that time, it is closed and the next output file is opened and written to. As with other drivers, the Delimited Text driver uses rules on the publisher and subscriber channels. When you implement the driver, it comes preconfigured with some basic rules, which you can modify to suit your needs. The default configuration of the driver is shown in Table 7.2. Table 7.2. DirXML Delimited Text Driver Defaults | PARAMETER | DESCRIPTION | | Publisher Channel matching rule | Matches entries in the text file with objects inthe eDirectory tree using the Internet Email Address attribute. | | Publisher channel create rule | The Given Name and Internet Email Address attributes of a user account must be populated for a corresponding user object to be created in eDirectory. | | Publisher channel placement rule | Places new user objects in a container in the eDirectory tree specified when you installed the driver. | | Subscriber channel event transformation stylesheet | Because the delimited text driver cycles through multiple CSV files, it can't process Modify, Rename, and Delete events. It converts events as other drivers do with databases such as PeopleSoft. | | | Instead, these types of events are written as a simple record in the output CSV file. The subscriber channel event transformation stylesheet takes care of this process. | | Schema-mapping rule | Maps eDirectory attributes to the configured attributes in the CSV file. The default mappings are as follows : Surname = LastName
Given Name = FirstName
Internet Email Address = Email
Telephone Number = WorkPhone
Facsimile Telephone Number = Fax
Mobile = WirelessPhone
eDirectory attributes are listed on the left; CSV file attributes are on the right. | | Input transformation stylesheet | Transforms each entry in the scanned CSV file in the input directory to an Add event in an XML file to be processed by the DirXML engine in the eDirectory tree. The username for the new user object in the tree is created by merging the FirstName and LastName attributes for the entry from the text file. For example, a user named Kimberly Tracy in the text file will have a user object named KimberlyTracy created in the tree. | | Output transformation stylesheet | Defines the text-delimiting character and the file format for output files. The default values are the comma character and the CSV file format. |
The Delimited Text driver is automatically installed on your system when DirXML is installed as a part of NNLS. Let's discuss how to configure this driver. Configuring the Delimited Text Driver To configure the Delimited Text driver on a server, you would need to complete the following steps: Warning This is intended to be a generic set of steps. Wait until the upcoming lab exercise to implement DirXML on your server.
-
Run a web browser and open iManager by navigating to https :// your_server_ip_address /nps/iManager.html.
-
Authenticate as your admin user.
-
Under the DirXML Management role, select the Create Driver task. The screen shown in Figure 7.7 appears. Figure 7.7. DirXML Create Driver Wizard. 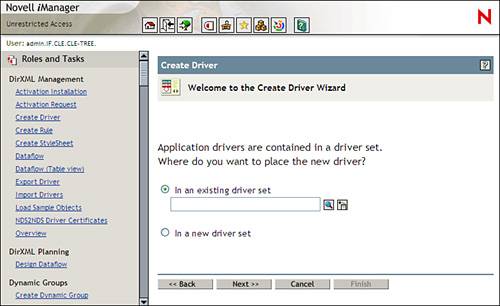 -
In the Create Driver Welcome screen, select the In a new driver set option and then click Next . When you do, the screen shown in Figure 7.8 appears. Figure 7.8. Defining DirXML driver set properties. 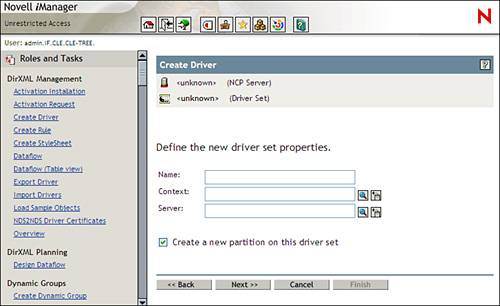 -
In the Name field, enter a name for your Driver Set object in the eDirectory tree.
-
In the Context field, browse to and select the container in your tree where you want your Driver Set object created.
-
In the Server field, browse to and select the server you want to associate with the Driver Set object.
-
Check Create a new partition on this driver set . Warning By default, the Create Driver Wizard creates a new partition in the eDirectory tree on the DirXML Driver Set object. This is done so that the Master replica of the Driver Set object partition remains on the server where DirXML is installed. If you deselect this option, DirXML will still function correctly. However, if you were to move all replicas of the partition where the Driver Set object resides to a different server, DirXML will stop working. In a multiserver environment, you should replicate this partition among several servers to increase fault tolerance. -
Click Next . The screen shown in Figure 7.9 appears. Figure 7.9. Selecting the DirXML driver.  -
Mark Import a pre-configured driver from the server (.XML file) .
-
From the drop-down list, select the DelimitedTextCSVSample.XML driver.
-
Click Next . The screen shown in Figure 7.10 appears. Figure 7.10. Configuring the DirXML Delimited Text driver. 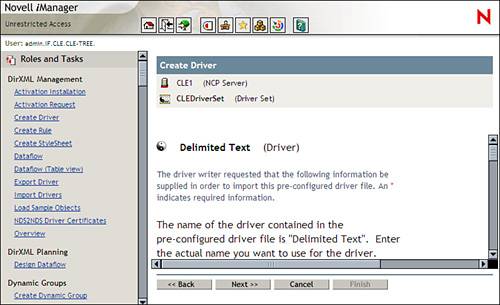 -
In the Driver Name field, enter a name for your Delimited Text driver.
-
In the Output Directory field, enter the directory path in the local file system where the output files from the driver will be created and stored. If this directory doesn't exist, you must create it before starting the driver.
-
In the Input Directory field, enter the directory path in the local file system where the input files will be stored. If this directory doesn't exist, you must create it before starting the driver.
-
In the User Container field, enter the container in your tree where you want users created by the driver stored in the tree. If this container doesn't exist, you must create it before starting the driver. Warning The User Container field requires that you enter the value using a very different format than you have learned in this book. Instead of eDirectory format or LDAP format, this field requires that you enter the container using a slash format, much like a directory path in a file system. For example, if you wanted to place users in the IF.CLE container, you would enter CLE\IF in this field. Notice that you use slashes instead of periods or commas. Also, notice that the direction changes. Instead of starting with the object lowest in the tree and working up to the tree root, you start at the topmost container and work down to the container where the users will reside. -
Click Next . The screen shown in Figure 7.11 is displayed. Figure 7.11. Configuring security equivalences and exclusions. 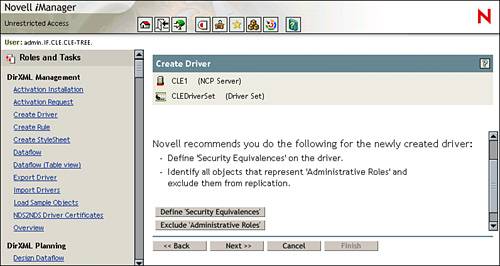 -
Assign rights to the driver object in the tree by completing the following steps: -
Select Define Security Equivalences .
-
Click Add .
-
Browse to and select a user object in the tree that has either the Supervisor right or the Browse, Create, Delete, and Rename rights to the container in the tree where the user objects will be created as well as to the Driver Set object. The driver object you're creating will receive the eDirectory rights assigned to this user object.
-
Click OK .
-
Keep your admin user object from being synchronized by completing the following steps: Warning Because admin doesn't represent an actual employee, you shouldn't replicate it to the other databases in the DirXML system. For example, you wouldn't want admin showing up in a PeopleSoft database or in a PBX system. As well, depending on how your rules and filters are configured, you could potentially have changes from the other databases synchronized to your admin user object, potentially making it unusable in your tree. -
Select Exclude Administrative Roles . -
-
Browse to and select your admin user object. -
-
Click Next . The summary screen shown in Figure 7.12 is displayed. Figure 7.12. The DirXML Create Driver Summary screen. 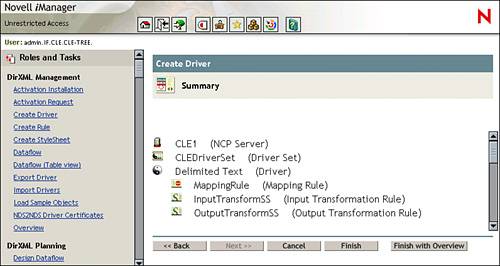 -
Click Finish with Overview . The DirXML Overview screen is displayed, as shown in Figure 7.13. Figure 7.13. DirXML Overview with a stopped driver. 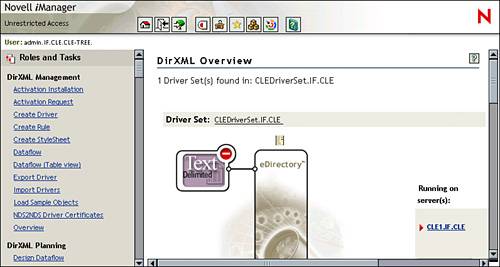 -
Start the driver by selecting the red circle with the minus sign icon; then select Start Driver .
-
Wait while the driver starts.
-
When the driver has started, the red circle changes to a yin-yang icon, as shown in Figure 7.14. Figure 7.14. DirXML Overview with the driver started. 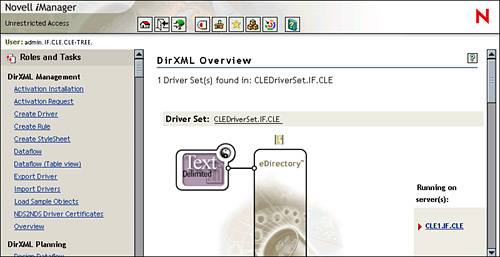 Remember that the Delimited Text driver is an evaluation driver. If you don't activate it within 90 days, the driver will shut down. To activate the driver, select the Activation Required link displayed in the top-right corner of the DirXML Overview page, as shown in Figure 7.15. You will be taken to a Novell website where you can register. Follow the prompts displayed in the web page to complete the activation. Figure 7.15. Activating the driver. 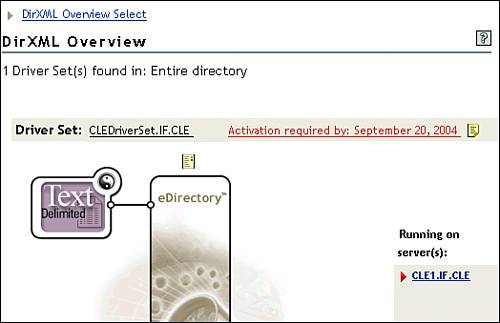
Let's practice implementing DirXML using the Delimited Text driver on your server in Lab Exercise 7.1. |