Managing Search Settings in SharePoint Portal Server
| < Day Day Up > |
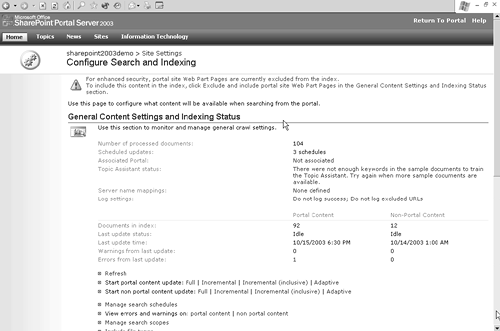
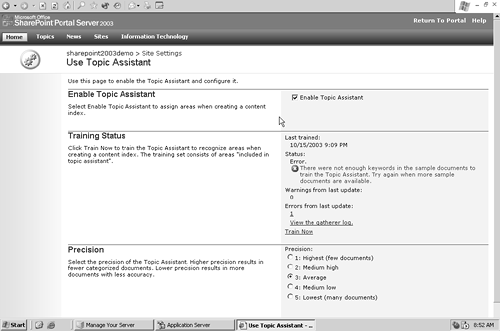
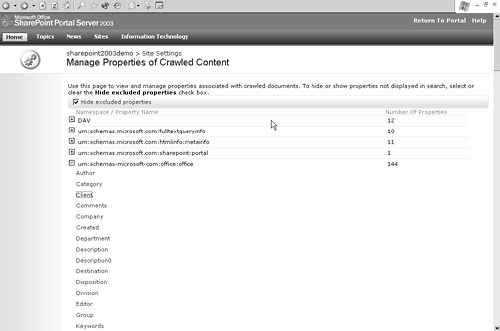
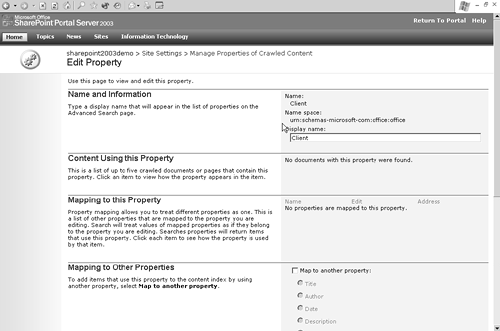
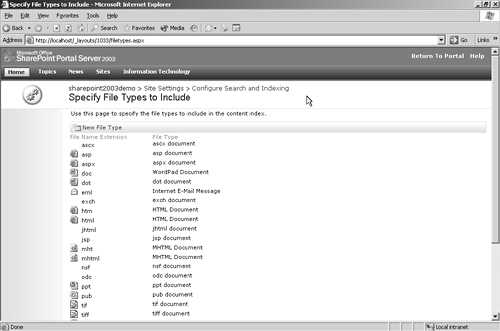
| When you install SharePoint Portal Server version 2, it includes search capability for content in your portal (the pages you create as well as documents in document libraries). This capability is also present in Windows SharePoint Services web sites. With SharePoint Portal Server, you can extend the data sources that you search. Search settings are established in several places in SharePoint. As content is created, for instance, you can choose whether items are included or excluded from search results. Similarly, sites themselves can be included in search results. The central location for most search administration, however, is in the Manage Search Settings and Indexed Content section of site settings. You access these by clicking Site Settings in the top navigation of the portal home page. On these pages, you define most settings relating to searches. You can view a general status of indexing on the Configure Search and Indexing page (Figure 13.3). To open this page, click the Configure search and indexing link on the Site Settings page. Figure 13.3. Configure Search and Indexing Page The Configure Search and Indexing page gives you access to many of the configuration settings that relate to search. From this page you can initiate crawls, manage search schedules, review error messages generated by the search engine, change search configuration such as which files are included and excluded, and see a high-level summary of the documents that have been crawled by the search engine. Using the Topic AssistantThe Topic Assistant is a SharePoint feature that automates the process of content categorization. It is based on the areas to which content may be mapped. We have referred to this as your site taxonomy. For instance, you may have areas that are divided geographically , by functional areas, or by areas for each department in your organization. These taxonomy terms are stored as keywords in SharePoint. The quality of results from the Topic Assistant depends on the keywords you have created. The more keywords, and the more granular they are, the more accurate the Topic Assistant will be. To use the Topic Assistant, you must first train it by providing sample content that relates to a specified area. Microsoft recommends that you create at least two areas with 10 documents each before you initiate the training process. The sample content should contain a reasonable number of your keywords in order to produce results. See Chapter 10 for more information on creating areas. The Topic Assistant is activated from the Use Topic Assistant page (Figure 13.4). Choose Use Topic Assistant from the Portal Content section of the Site Settings Page. Figure 13.4. Use Topic Assistant Page You can choose the level of precision with which the Topic Assistant is trained by raising or lowering the bar in terms of the relevance of search results. Higher precision means that a closer match will be required before the Topic Assistant suggests a content item belongs to an area. After the Topic Assistant is trained, it suggests areas for new content that are then created. The Topic Assistant suggests areas to which content should be assigned, but these do not take effect until they are approved by an area manager. Editing Properties of Crawled ContentFull-text searches can search not only the words within a web page or document but also the metadata, or properties of pages and documents. In HTML, metatags are vital for capturing indexing information and targeting search engines. Similarly, document properties are quite helpful for enterprise portals. Users often need to determine the author, date, and other document properties. SharePoint lets you determine which properties of crawled content are used for a search. You can change the names of properties to make them easier for users to understand and map properties to one another. For instance, two document types might use properties with different names to store the same data. These settings are controlled on the Manage Properties of Crawled Content page (Figure 13.5). Figure 13.5. Manage Properties of Crawled Content Page Different types of documents have different properties. For instance, while some file types have only a few properties, Microsoft Office documents have over 100 properties. Figure 13.5 shows some of these properties that have been selected to include in the search. You can edit an individual property by clicking its name in the list (Figure 13.6). Figure 13.6. Edit Property Page From this page you can see documents that include this property so you can view it in content. You can map this property to another property so the search engine treats the two as a single property. You can change the properties used in a search to help users search more productively. This step may be especially helpful if your users or programs are consistently entering data in these properties. Managing File TypesYou can configure SharePoint to include or exclude certain file types when building the index (Figure 13.7). You may elect, for instance, to exclude all documents with an extension of "txt" even though the search engine is capable of indexing such documents, because you know that they do not contain relevant information. Figure 13.7. Exclude or Include File Types You may want to install third-party IFilters if your repository contains a large number of documents that cannot be indexed with the standard SharePoint filters. For instance, legal offices often have a large number of legacy files written in WordPerfect. Table 13.1 lists IFilters for popular file formats, including those that ship with SharePoint. Table 13.1. IFilters for Common File Formats
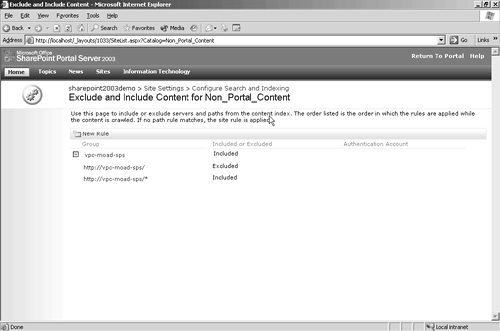
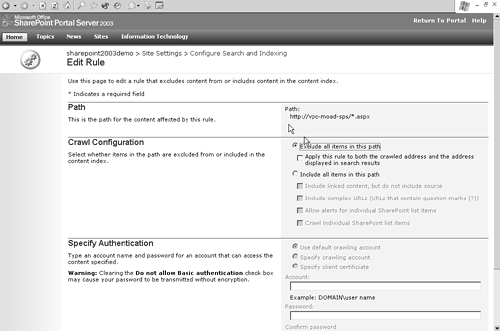
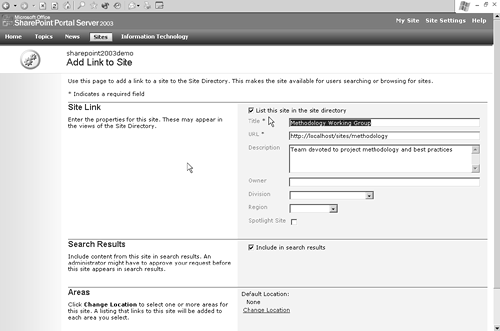
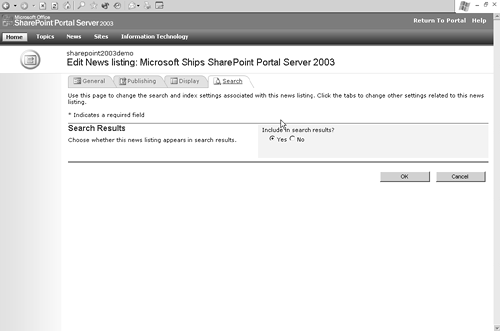
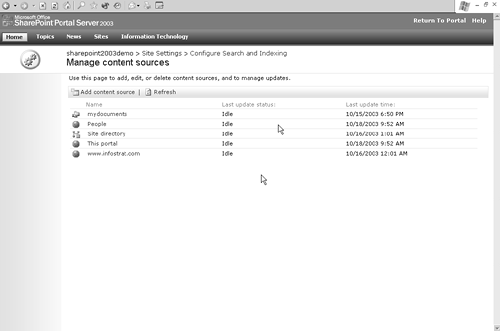
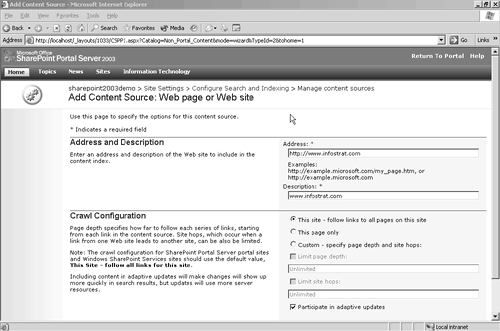
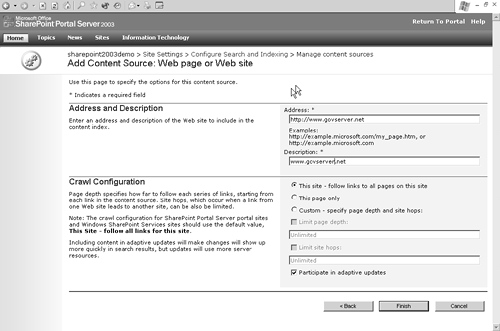
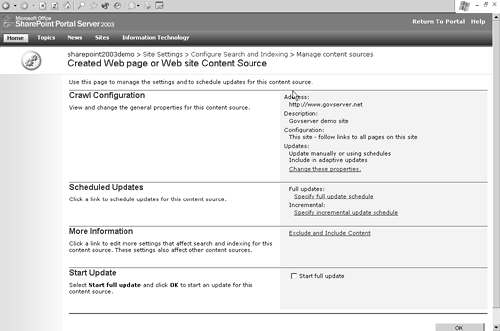
The IFilters are installed on the server and help the search engine crawl all documents of that type in all the data sources that are crawled. Users must have the proper software registered on their workstation in order to open files found in a search. Managing Rules That Include or Exclude ContentAs if all the flexibility in indexing already discussed is not enough, SharePoint provides a feature that lets you create business rules that include or exclude content from searches. These rules are defined on the Exclude and Include Content page (Figure 13.8) accessed from the Configure Search and Indexing page of Site Settings. Figure 13.8. Exclude and Include Content Page Click Add Rule to define a new rule. On the Add Rule page (Figure 13.9), enter a path for content, and then specify whether content here is to be included or excluded. The rules are processed in the order in which they are displayed. You can move them up or down the hierarchy after you create them. Figure 13.9. Edit Rule Page If the URL to be crawled requires authentication, you enter the credentials here. You can use multiple accounts to crawl various content sources. Managing Content SourcesA content source is a location where indexed content is stored such as a web site, Exchange Server, file share, or the portal itself. SharePoint allows the administrator to define a number of content sources and individually configure indexes and other search options for each one. For instance, you might want to crawl certain external web sites every week rather than every day if they change infrequently or to avoid overtaking your indexing processing power and bandwidth. I have found from experience that it is not difficult to overwhelm a modest Internet connection by unleashing a server to crawl and index a massive web site. Each SharePoint portal contains a built-in content source called "this portal" that cannot be deleted. This source represents content stored in SharePoint itself, such as news items, staff directories, and document libraries. When you create a new subsite , you can add it as a content source to be indexed as well. The Add Link to Site page includes an Include in Search Results option that controls whether you would like to include the site in the search results, as shown in Figure 13.10. Figure 13.10. Add Link to Site Page You can also control indexing behavior at the level of the individual item. For instance, Figure 13.11 shows a news item. By choosing whether to include it in the content index, you determine whether users can find the item through the search engine. Figure 13.11. Including Individual Items in Search Results The default setting for inclusion in content index is "yes." Even if you were to choose to include a subsite in the search results, it would only be displayed for users who have permissions to view that subsite. Adding Content SourcesThe most powerful tool for adding content sources is the Manage Content Sources page (Figure 13.12). This is only available to administrators, however, which is one of the reasons that other users have the ability to add content to the search or suggest that content be indexed. This is the only way to perform advanced functions such as crawling Lotus Notes databases and Exchange Server. Figure 13.12. Managing Content Sources Page This page shows all the content sources that have been created in the portal. Some, such as This Portal and People, are automatically created. Others are added by the search administrator. To add a content source:
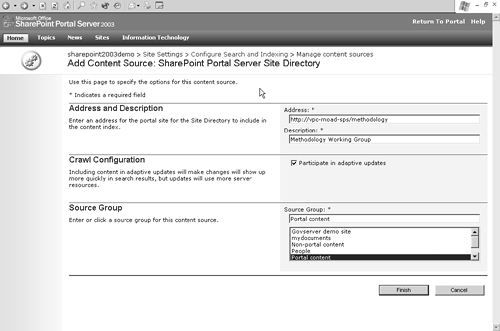
Another way to add new content to your indexes is to add a site to the site directory and include it in the search results. From Site Settings, click Approve and manage sites in the Sites Directory for searching in the Manage Search Settings and Indexed Content section. The Add Content Source page opens (Figure 13.16). Figure 13.16. Add Content Source: SharePoint Portal Server Site Directory Page You can add sites created by users to the site directory so they appear in search results. For instance, you may want to include meeting sites, team sites, or departmental sites. |
| < Day Day Up > |
EAN: 2147483647
Pages: 164