| One of the key benefits of SharePoint over competitive portal products is the capability of users to create new ad hoc web sites without programming. These team sites are the focus of much collaborative activity. For most organizations, the smaller the organizational entity is, the greater the degree of collaboration. Most of the underlying features of these sites, such as the document library and discussions, have already been discussed in this chapter. To create a team site: - On the Sites Directory page, click Create Site in the Select Action section to the left to open the Add Link to Site page (Figure 12.20).
Figure 12.20. Add Link to Site Page 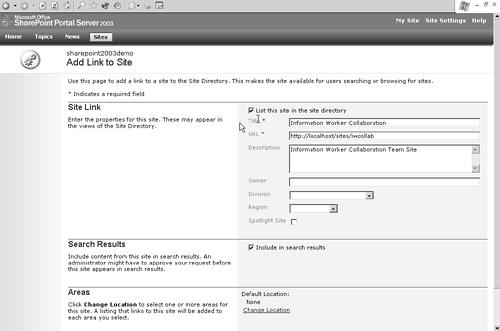
- Fill in the title, description, URL, and contact email address for the site. Click Create to open the Add Link to Site page (Figure 12.21).
Figure 12.21. Add Link to Site Page 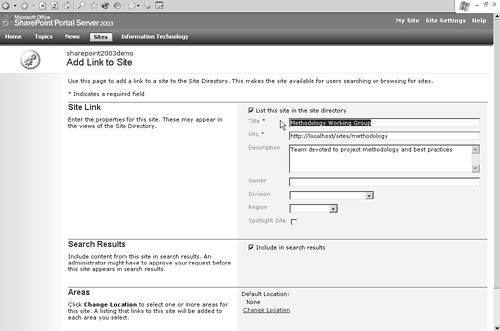
- Choose whether the site will appear in search results, and associate the site with one or more appropriate categories.
- Choose the site template to determine which pages are included on the new site (Figure 12.22).
Figure 12.22. Template Selection Page 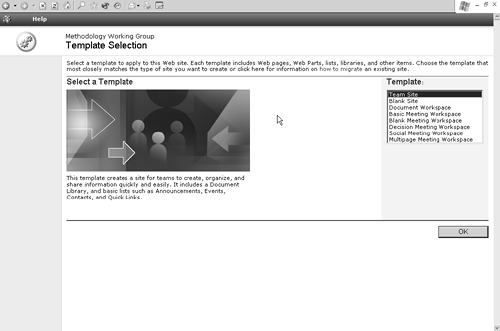
After the site is created, you can add other pages that are not included in the template. You can also create your own templates or modify the existing site templates. Types of SharePoint Sites SharePoint Portal Server provides a number of site types for inclusion in your portal. They are designed to match the most common office collaboration scenarios. You can also customize the site by adding additional web parts to make it suit your requirements. Table 12.3 summarizes the site types and their characteristics, while Table 12.4 outlines team site features. Table 12.3. SharePoint Site Types | Site Type | Description | Features | | Team Site | A group of popular web parts for many scenarios. Contains places to "push" news to portal users as well as support for document collaboration. | Document Library Announcements Events Contacts Quick Links | | Blank Site | Tabula rasa for adding your own web parts. | Blank Home Page | | Document Workspace | Documents and related functions for creating documents. | Document Library Task List Quick Links Members Announcements | | Basic Meeting Workspace | Content relating to a generic meeting. | Objectives Attendees Agenda | | Blank Meeting Workspace | An empty site to which you can add new pages. | Blank Home Page | | Decision Meeting Workspace | Includes basic meeting functions and also documents, tasks , and decisions. | Objectives Attendees Agenda Document Library Tasks and Decisions | | Social Meeting Workspace | This is the template you might use for a company picnic. | Attendees Directions Weather Image/Logo Things to Bring Discussions Picture Library | | Multipage Meeting Workspace | Includes two additional pages in addition to basic meeting workspace. | Objectives Attendees Agenda Two Blank Pages | | My Site | Personalized site. You can add additional pages to your personal site. | |
Table 12.4. SharePoint Team Site Features | Feature | Description | | Agenda | Place to list meeting agenda items. | | Announcements | Post news to members of your group. | | Attendees | Contact information for people. | | Contacts | Contact information for people; may be dragged and dropped from Outlook. | | Directions | Driving or other directions to a meeting location. | | Document Library | Place to store shared documents. Includes check-in and check-out functions. | | Events | Calendar of events. | | Image/Logo | Placeholder for image file displayed on home page of site. | | Members | Contact information for people. | | Objectives | Meeting goals. | | Picture Library | Place to upload and view photographs or other images. | | Quick Links | Easy facility to share links to web pages. | | Survey | Submit questions to users and tally results. | | Task List | To Do list. | | Things to Bring | Items to bring to social event. | | Weather | Weather forecast or report for social event. |
Most of the SharePoint team site features are self-explanatory, though the surveys feature bears more explanation. SharePoint lets you quickly generate opinion surveys and deliver them to your users. The surveys may be long or short, simple or complex. To create a survey on your team site: - Click Create New in the Actions menu to open the Create Page page (Figure 12.23).
Figure 12.23. Create Page 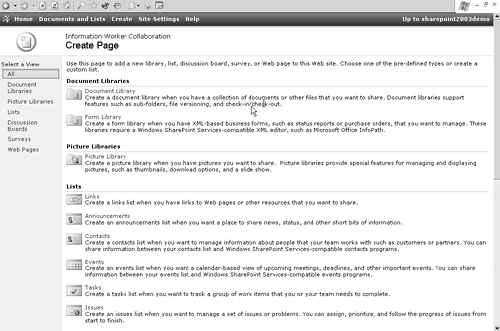
- Click Surveys in the left-hand navigation to open the New Survey page (Figure 12.24).
Figure 12.24. New Survey Page 
- Name and describe the survey, and choose whether respondent names will be shown and whether people may respond more than once to the survey. Click Next .
- Complete the series of pages for defining the questions in the survey (Figure 12.25). You can enter as many questions as you like. You can enter as many questions as you like. For each question, you specify the respond type along with the default value for the response. Validation for the field is provided depending on the data type for the response. For instance, you can set upper and lower limits for numeric values in responses.
Figure 12.25. Add Question Page 
- Click Finish to open the Customize Survey page (Figure 12.26), on which you can review the survey or change settings. You can rearrange the order of the questions here, for instance.
Figure 12.26. Customize Survey Page 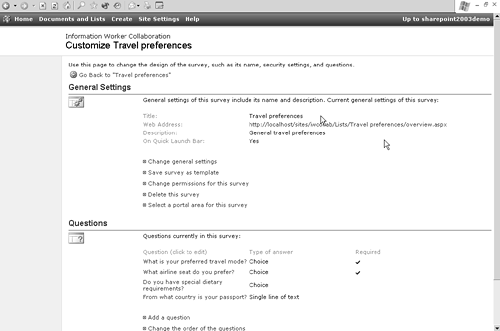
The survey is saved and is ready for responses. Click Home to return to the homepage of the team site. The new survey appears in the left navigation under Surveys. Click the survey and then click Respond to this Survey on the survey page to respond to it, as shown in Figure 12.27. Figure 12.27. Responding to a Survey 
When a user goes to a survey URL, he is prompted to respond to the questions in the survey. You may want to provide a link to the survey on your home page to encourage users to respond to it. By default, users are not allowed to respond more than once to a survey. |