Installing, Configuring, and Troubleshooting Network Adapters and Drivers
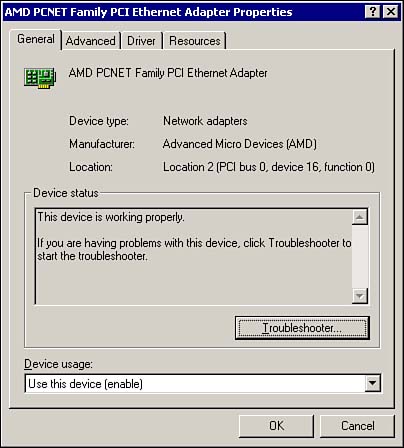
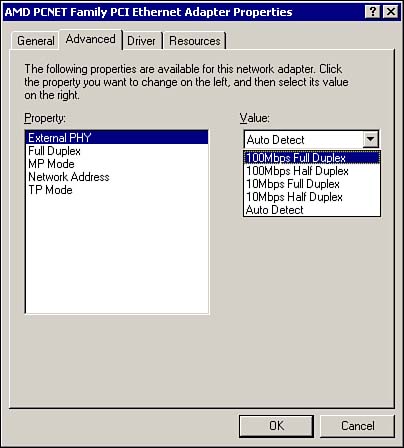
| Installing a network adapter into your Windows 2000 computer should be one of the easiest tasks you ever have to perform. Chapter 4, "Configuring and Troubleshooting Hardware Devices and Drivers," covered hardware installation and configuration in some detail, so if you need a refresher on installing your network adapter, see Chapter 4. After you have the network adapter and drivers properly installed, you need to configure the network adapter driver. Each network adapter allows different levels of configuration options; some network adapters allow more configurable options than others. Figure 7.1 displays the network adapter properties shown in the Device Manager for a typical AMD network adapter. Figure 7.1. The network adapter properties page. It's important to note that not all network adapters have the same properties nor the same properties tabs. In the following sections, we examine each tab of the network adapter properties page shown in Figure 7.1 and discuss the typical network adapter configuration options available to you. General Network Adapter PropertiesFrom the General tab, seen in Figure 7.1, you can gather some basic information about the network adapter, such as the type of network adapter you have, the manufacturer, and the physical location within your computer. You can also determine whether the device is functioning properly. If the device is functioning improperly, you can opt to start the Hardware Troubleshooter by clicking the Troubleshooter button. Lastly, you can manually disable and enable the network adapter by using the Device usage drop-down. Advanced Network Adapter PropertiesOn the Advanced tab, shown in Figure 7.2, you can configure some of the deeper options that your network adapter may support. Figure 7.2. Configuring the network adapter's advanced options. Bear in mind that each network adapter will have different options listed on the Advanced tab. Therefore, if you don't see what's listed in Figure 7.2, it's not necessarily a problem as long as your drivers are up to date and properly installed. By selecting a value from the list on the left side, you can configure its options in the right side of the page. The most common item you may want to consider configuring manually is that for speed (Link Speed/Duplex Mode in our example). You should configure the adapter to the maximum speed supported by the network adapter and your network infrastructure. In most cases this should be configured to 100MBps full duplex, but your network conditions may vary. Driver PropertiesOn the Driver tab, you can get more detailed information on the currently installed driver. The following is some of the information that is available to you:
Each item in this list can be used to help discover or prevent driver- related problems with the hardware installed on your network. Refer to Chapter 4 if you need to refresh on the importance of digital signatures. By clicking the Driver Details button, you can gain very detailed information on each file that makes up the driver file set. Clicking the Uninstall button allows you to actually uninstall the network adapter itself, which is a useful first step to try when you begin experiencing hardware problems. Clicking the Update Driver button allows you to update the installed driver file set as discussed previously in Chapter 4. Resources PropertiesThe Resources tab contains a listing of the computer resources that the network adapter is currently using. You may or may not be able to manually configure these resources; however, in most cases, you should leave them alone and let Windows 2000 do the resource management work for you. Chapter 4 covered hardware resources in great detail. Power Management PropertiesThe Power Management tab may or may not be present on your particular network adapter. If it is, you typically have two options for configuring power management behavior for the network adapter. The Allow This Device to Bring the Computer out of Standby option can be selected to allow the network adapter to bring the computer out of standby ”a popular function with Wake-ON LAN (WOL) capable network devices. The WOL cable must be connected to the network adapter and the WOL plug must be connected to the computer's mainboard for this function to work properly. This is not recommended for use on portable computers, because this process periodically wakes up a computer in standby to check the network connection, which can have an adverse impact on battery life. You can select the Allow Computer to Turn Off This Device to Save Power option to allow Windows to manage the network adapter's state to save power. This option should be selected on portable computers to maximize battery lifetime. Troubleshooting Network AdaptersMore often than not, network adapters work fine for many years . When they do act up, however, it is a critical situation that you want to correct as soon as possible. Without a functioning network adapter, the network does not serve much purpose. Table 7.1 outlines some of the more common issues that plague network adapters and serves as a starting point for your troubleshooting efforts. Table 7.1. Common Network Adapter Problems
|
EAN: 2147483647
Pages: 155